antijam
Senior Member
- Joined
- Jul 20, 2008
- Messages
- 1,628
- Reaction score
- 94
- Location
- Gloucestershire
- Your Mercedes
- 2003 SLK320
Water in the headlamps on these cars is a problem that seems to be cropping up quite frequently these days. The standard Dealer solution is to replace the (expensive) headlamp unit. Several owners have avoided this by simply replacing an internal seal, described as follows.
Perhaps the Mods might add this to the DIY section?
SLK headlamp unit removal and internal seal replacement
Moisture in R170 SLK headlamps is a common problem. If the unit is unbroken the solution is to replace the seal between the lens and reflector.
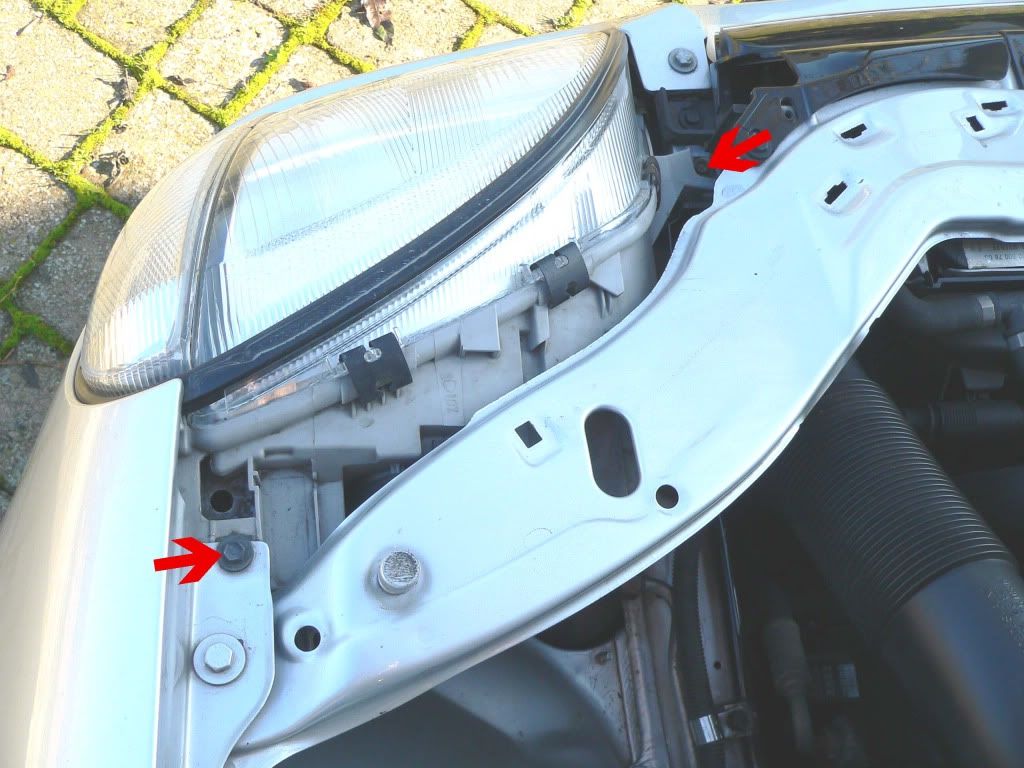
There are three bolts securing the headlamp unit. Picture shows the LH light unit and the two upper bolts arrowed. Remove these.
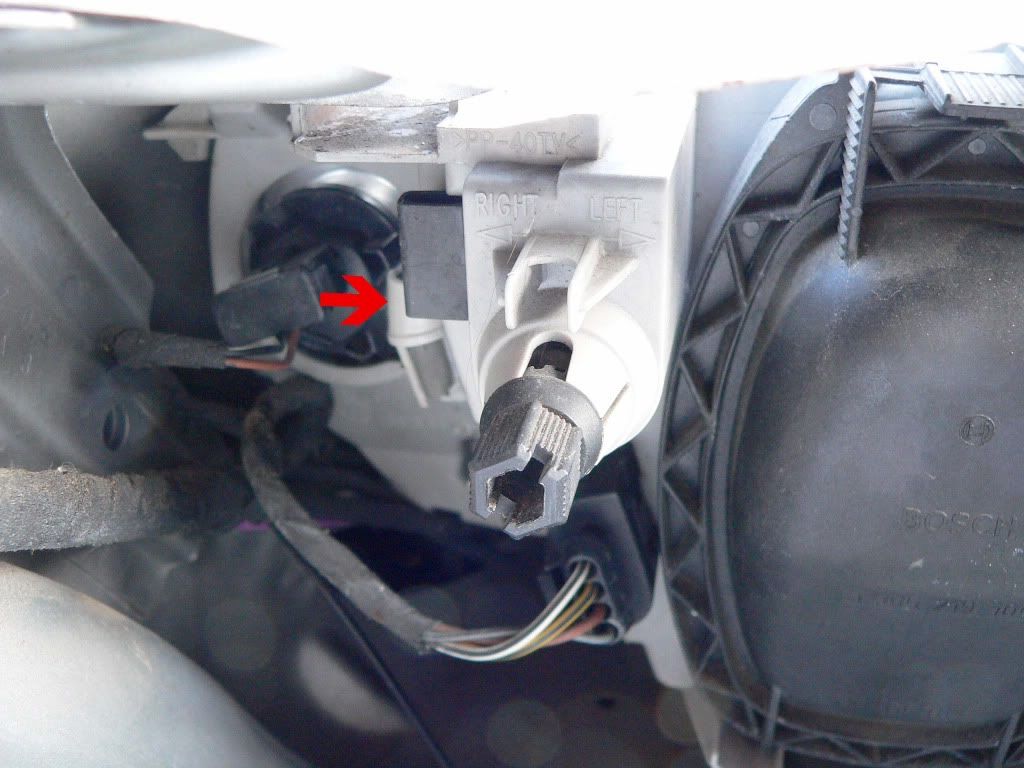
To access the lower bolt it is necessary to remove the indicator lamp unit. Feel down behind the light units and find the plastic arm surmounted by a small cylindrical boss – shown arrowed. Flex the arm outboard, i.e. in the opposite direction to the arrow, and the unit may be slid forward and away from the bodywork.
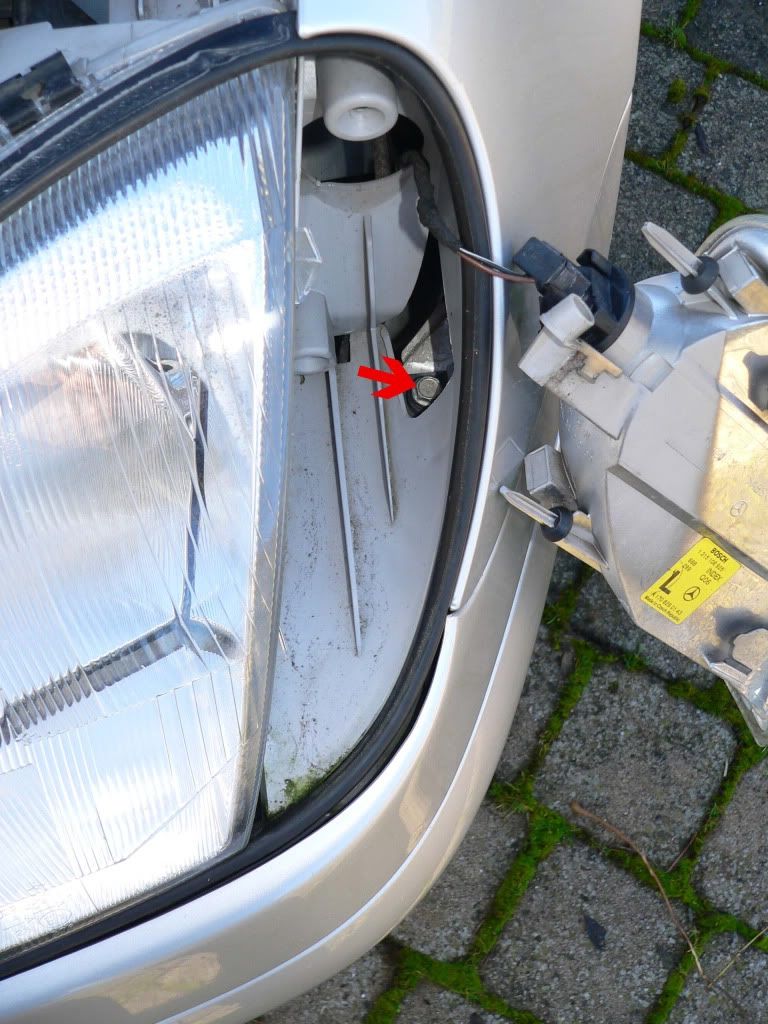
The lower headlamp securing bolt is now exposed. Remove this and the complete headlamp unit can be jiggled out of the car
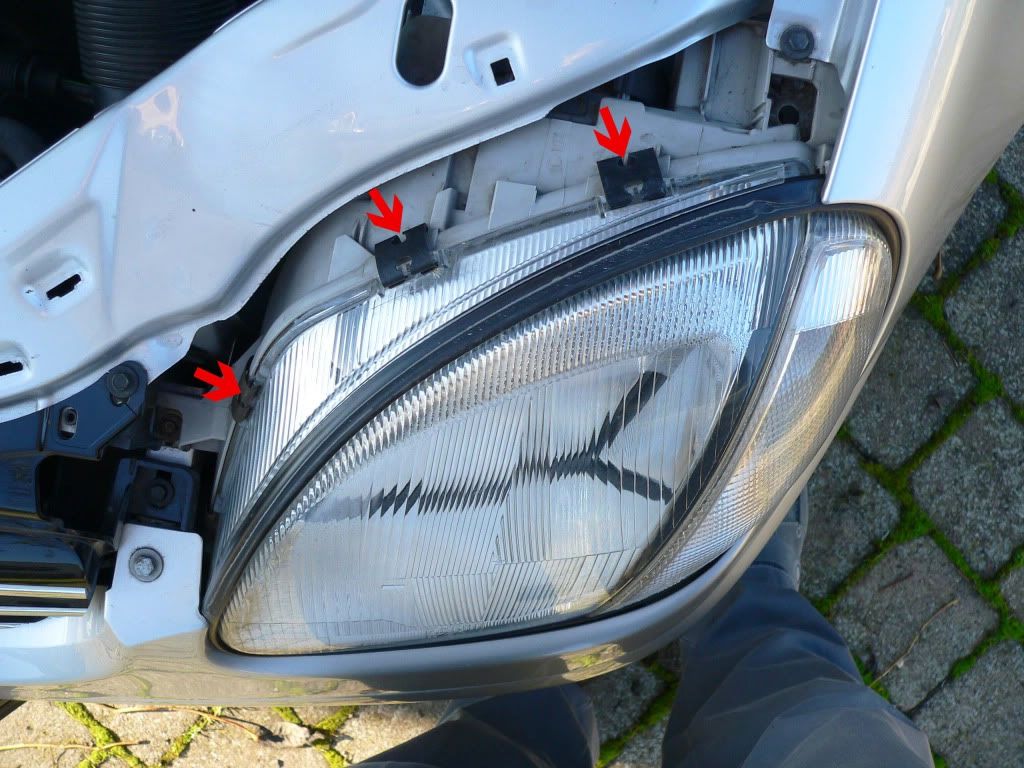
With the unit removed, carefully lever off all the spring clips, three of which are shown arrowed.
Remove the headlamp glass and carefully remove the seal (item 11 below)
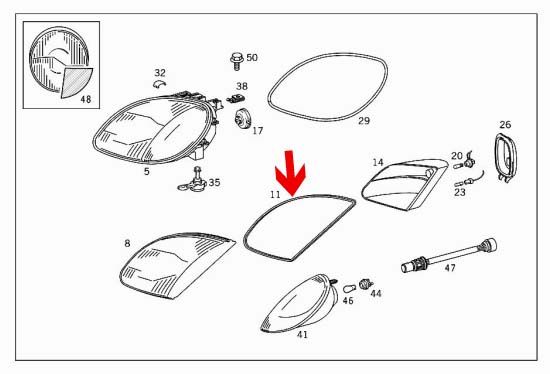
If the seal is unbroken and the surface not badly perished you may be able to reuse it by coating it with silicone grease If in doubt, replace with a new one. The Part Number of the seal is A1708260280. It is not handed and will fit either side.
Dry the glass and reflector carefully and reassemble.
Note that following this procedure, the headlamps should not need the alignment adjusted.
Antijam 2011
Perhaps the Mods might add this to the DIY section?
SLK headlamp unit removal and internal seal replacement
Moisture in R170 SLK headlamps is a common problem. If the unit is unbroken the solution is to replace the seal between the lens and reflector.
There are three bolts securing the headlamp unit. Picture shows the LH light unit and the two upper bolts arrowed. Remove these.
To access the lower bolt it is necessary to remove the indicator lamp unit. Feel down behind the light units and find the plastic arm surmounted by a small cylindrical boss – shown arrowed. Flex the arm outboard, i.e. in the opposite direction to the arrow, and the unit may be slid forward and away from the bodywork.
The lower headlamp securing bolt is now exposed. Remove this and the complete headlamp unit can be jiggled out of the car
With the unit removed, carefully lever off all the spring clips, three of which are shown arrowed.
Remove the headlamp glass and carefully remove the seal (item 11 below)
If the seal is unbroken and the surface not badly perished you may be able to reuse it by coating it with silicone grease If in doubt, replace with a new one. The Part Number of the seal is A1708260280. It is not handed and will fit either side.
Dry the glass and reflector carefully and reassemble.
Note that following this procedure, the headlamps should not need the alignment adjusted.
Antijam 2011
