- Joined
- Mar 25, 2010
- Messages
- 15,133
- Reaction score
- 6,288
- Location
- Tonbridge
- Your Mercedes
- W221 S65 AMG - W204 C63 AMG + Various other MB's
- Moderator
- #1
As requested, I have posted the contents in a post:
Here is a guide on how to change the brake pads and discs on a W211 E class Mercedes.
Pre-facelift W211's built before the June 2006 facelift*have Mercedes's very odd SBC braking system (please note, Post-facelift cars have a "normal" braking system that does not need to be disabled. SBC uses a sensor in the brake pedal to tell an electronic valves to push fluid down hydraulic braking pipes to then actuate the brake calipers individually. This uses a very high pressure brake fluid resevoir that gets charged when one of the following happens:
Some other methods to disable SBC include:
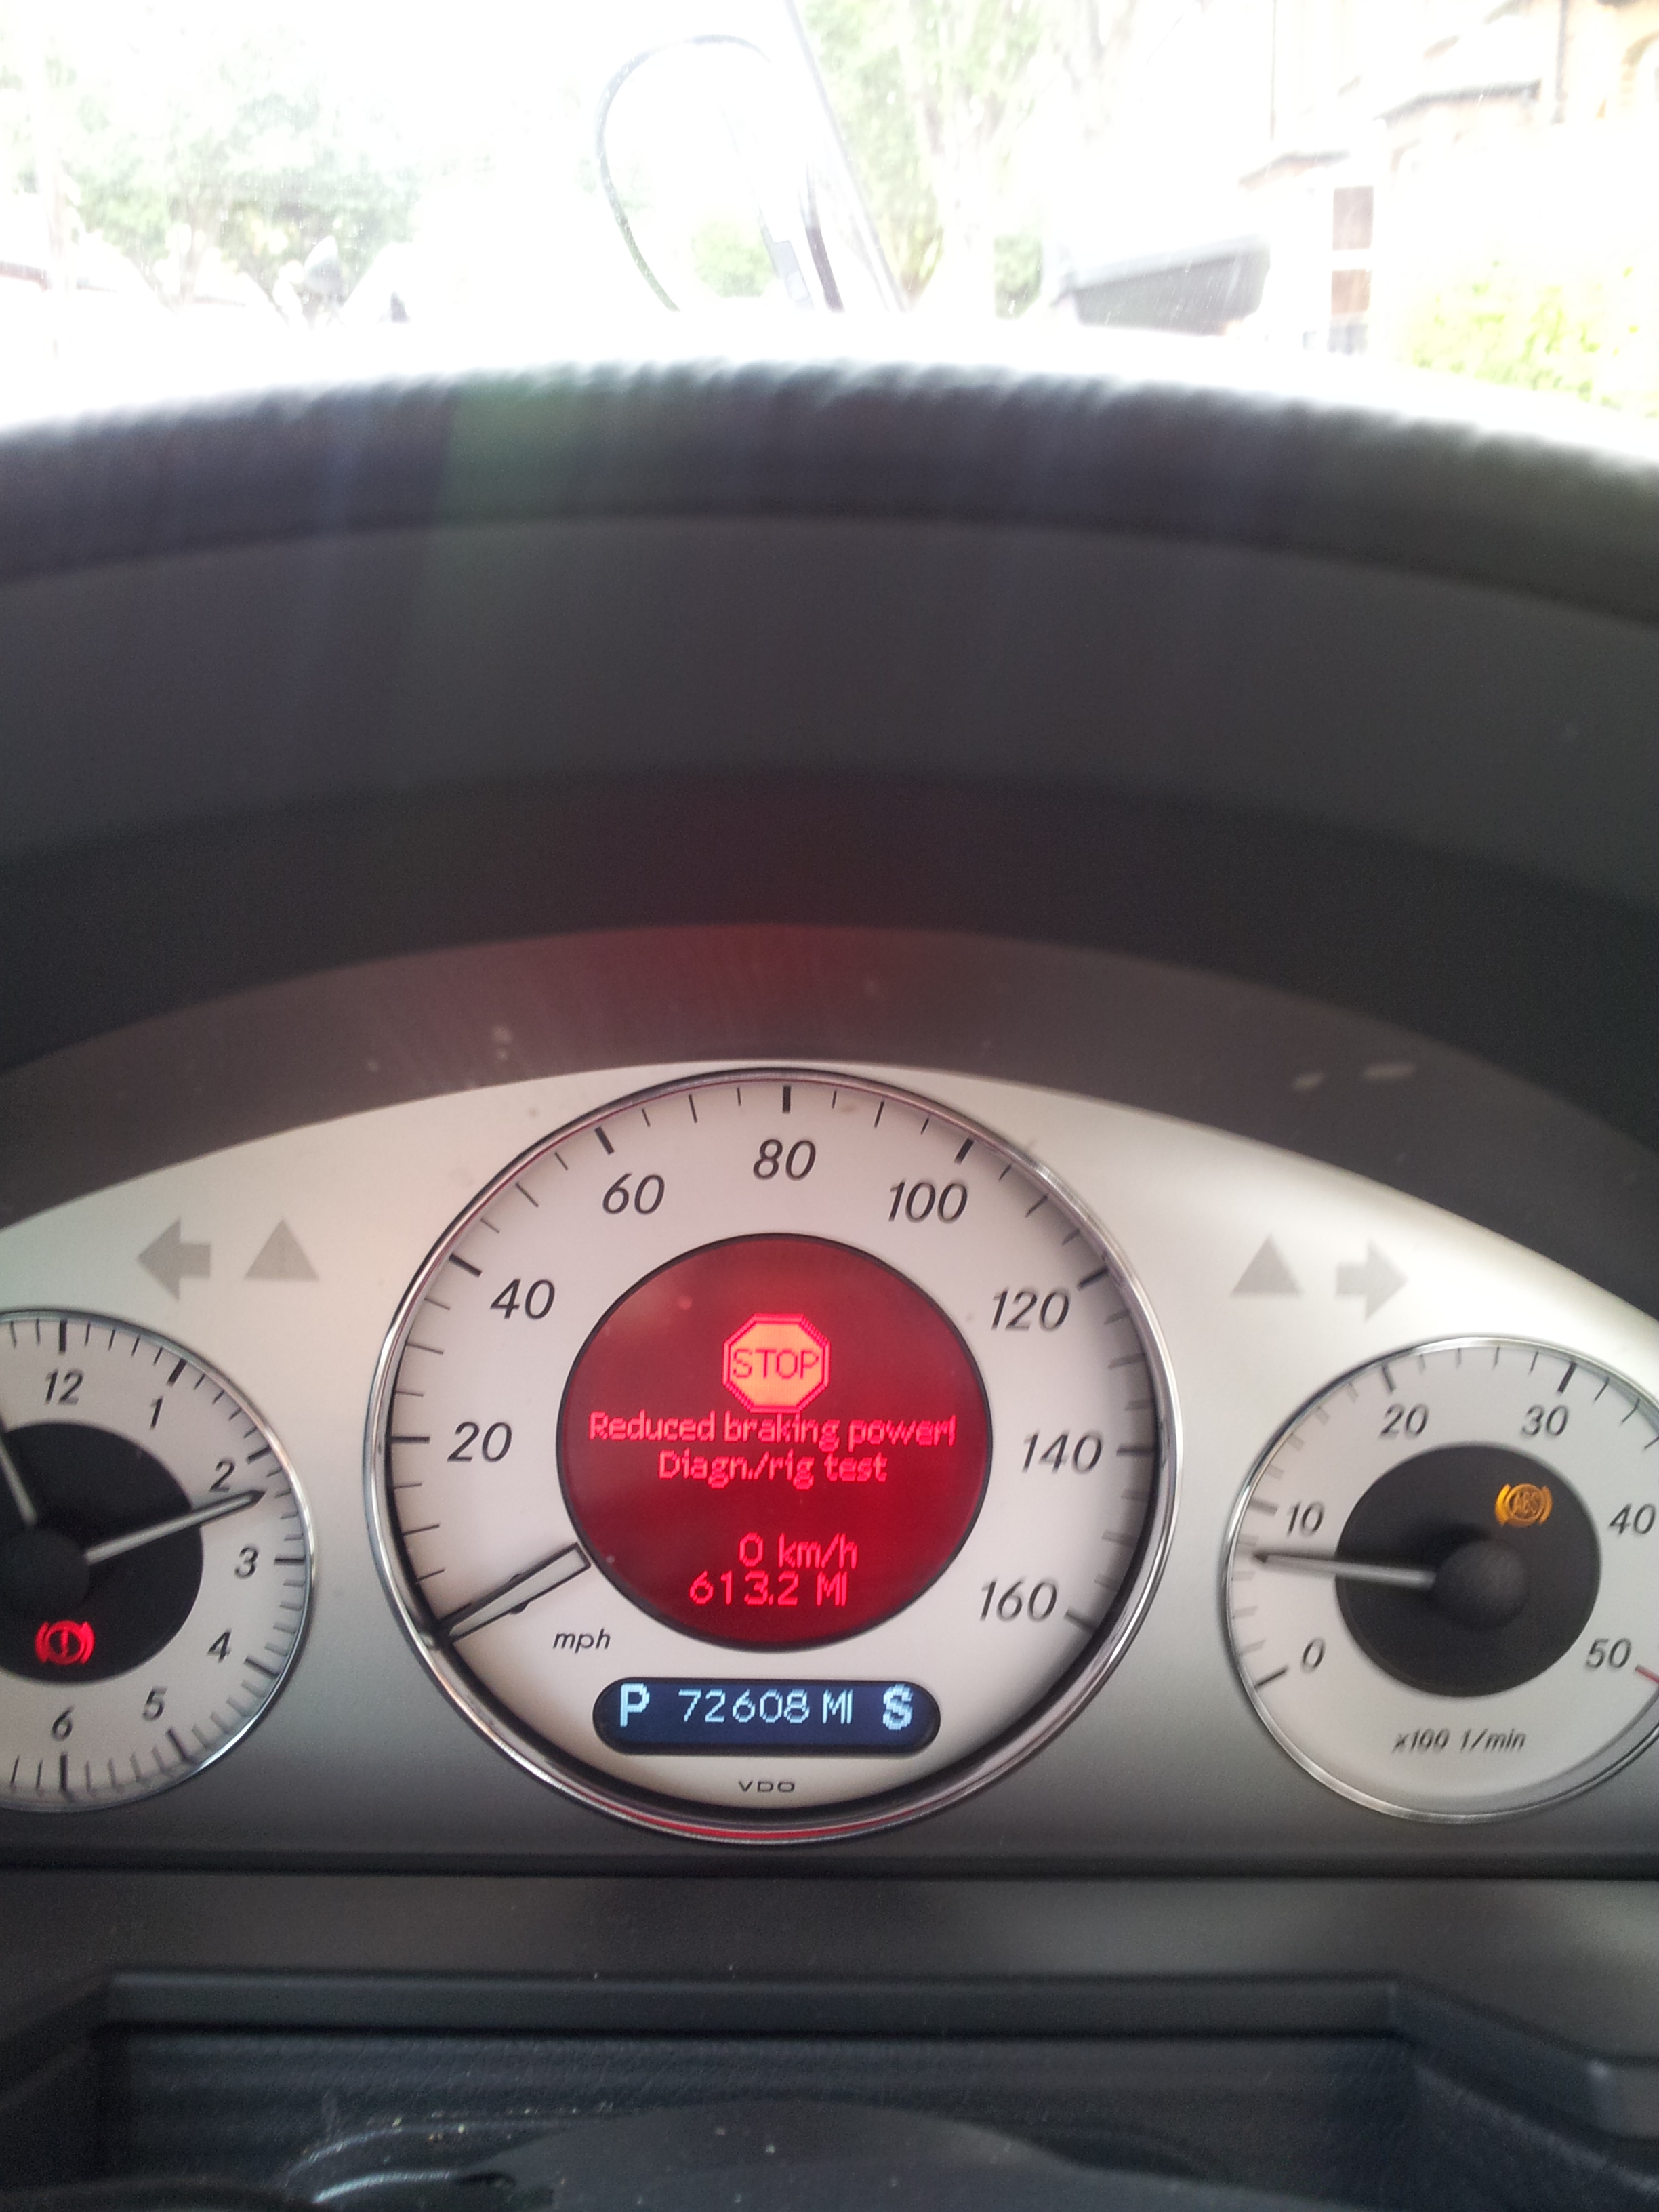
1. Starting on STAR, disable SBC (Control modules - > Chasis -> SBC - > Deactivate SBC. After carrying this out, the dashboard will display the following:

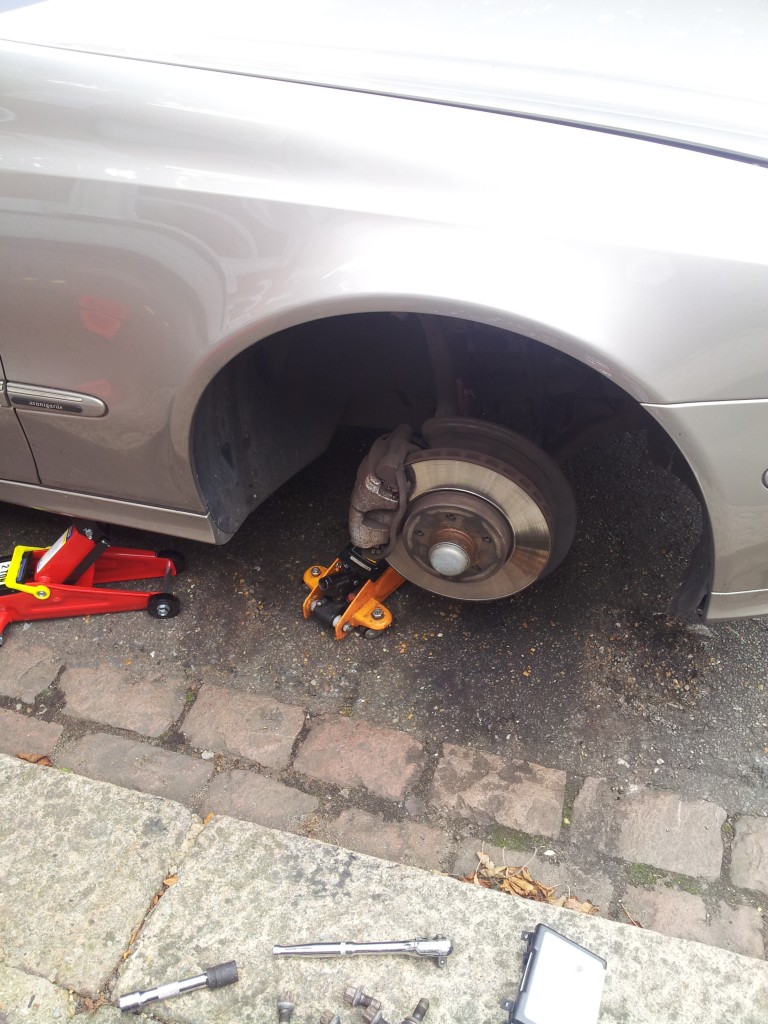
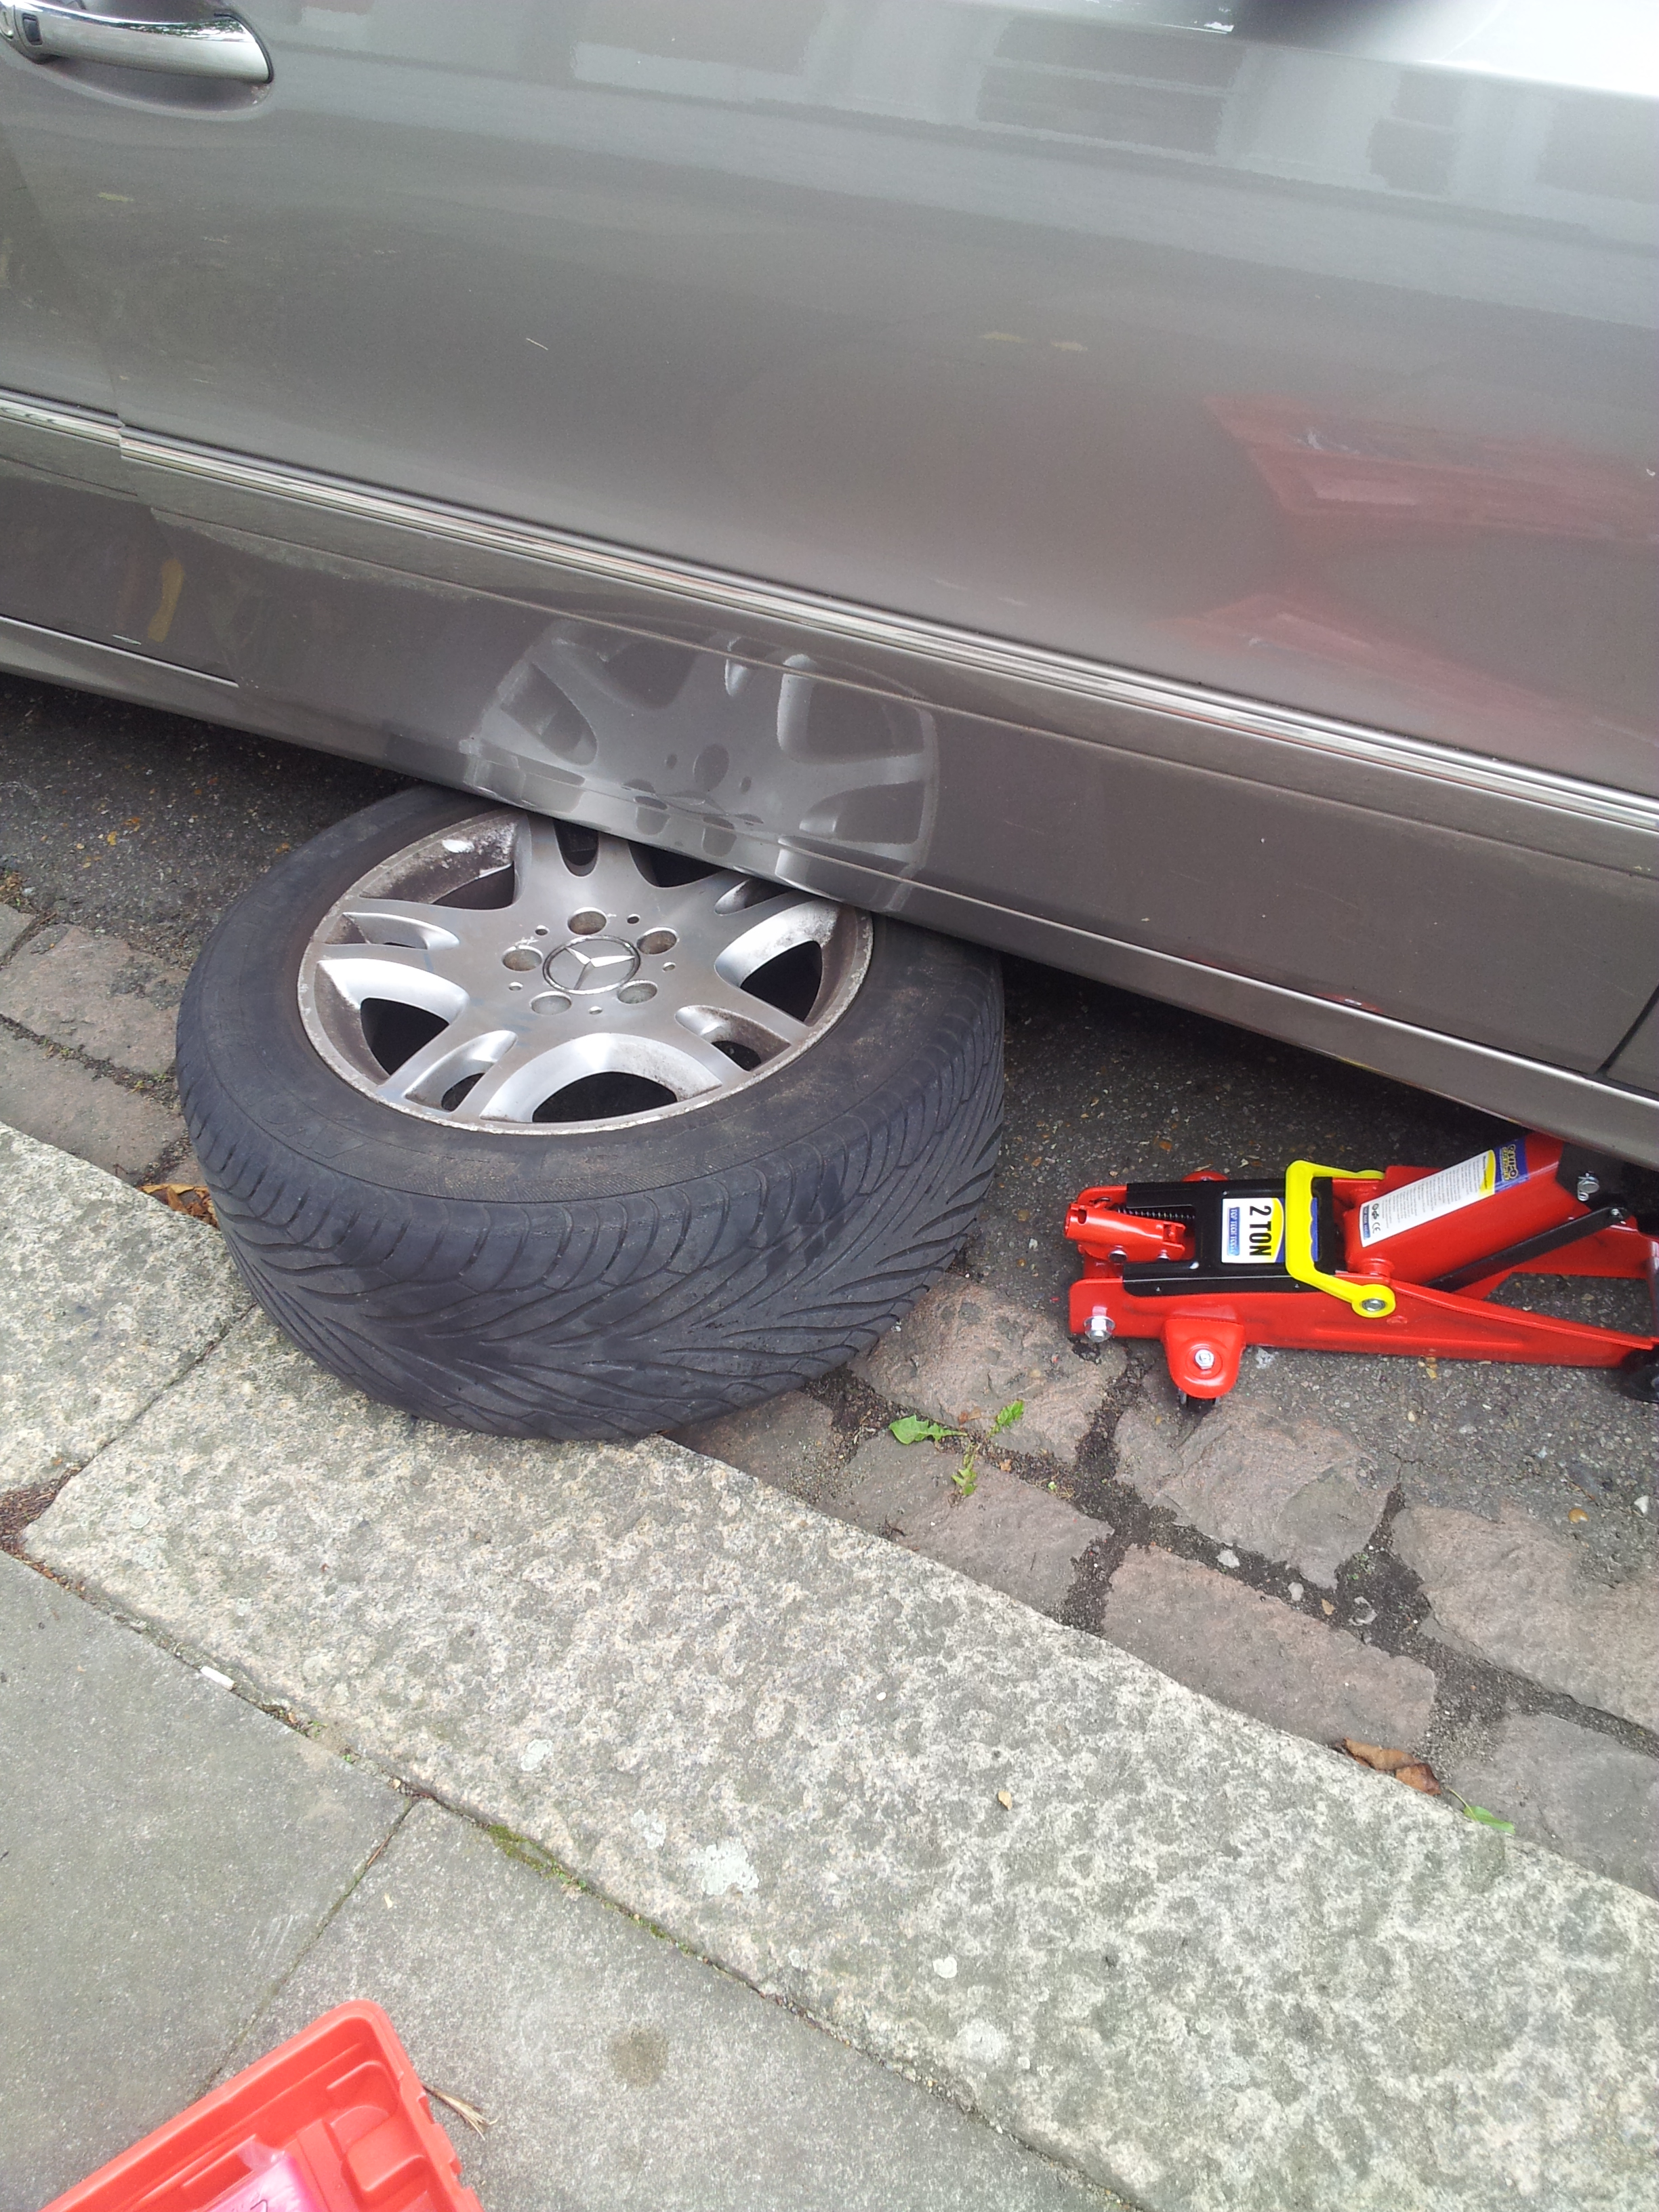
2. Once the SBC has been deactivated, Apply the handbrake, Jack the car up and place it on axle stands ( In my case, use 2 jacks and put the wheel under the car, as the camber on my road meant I*couldn't*get an axle stand in there! ). Then remove the wheel (I started on front right):

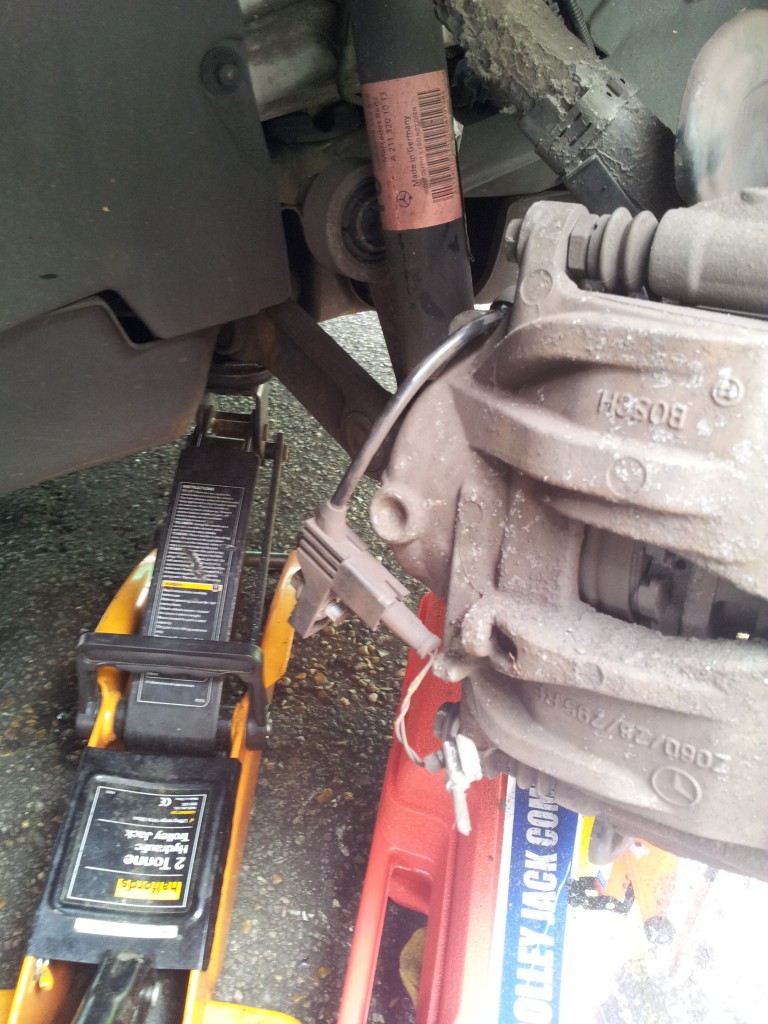
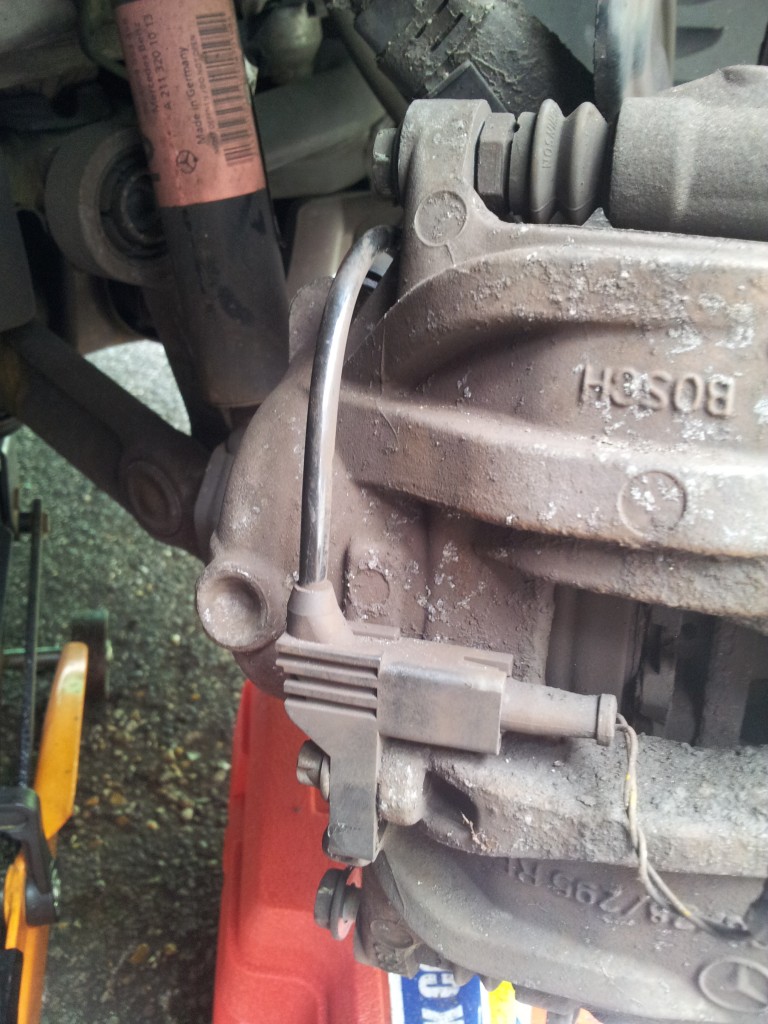
3. Unbolt and detach the pad sensors:
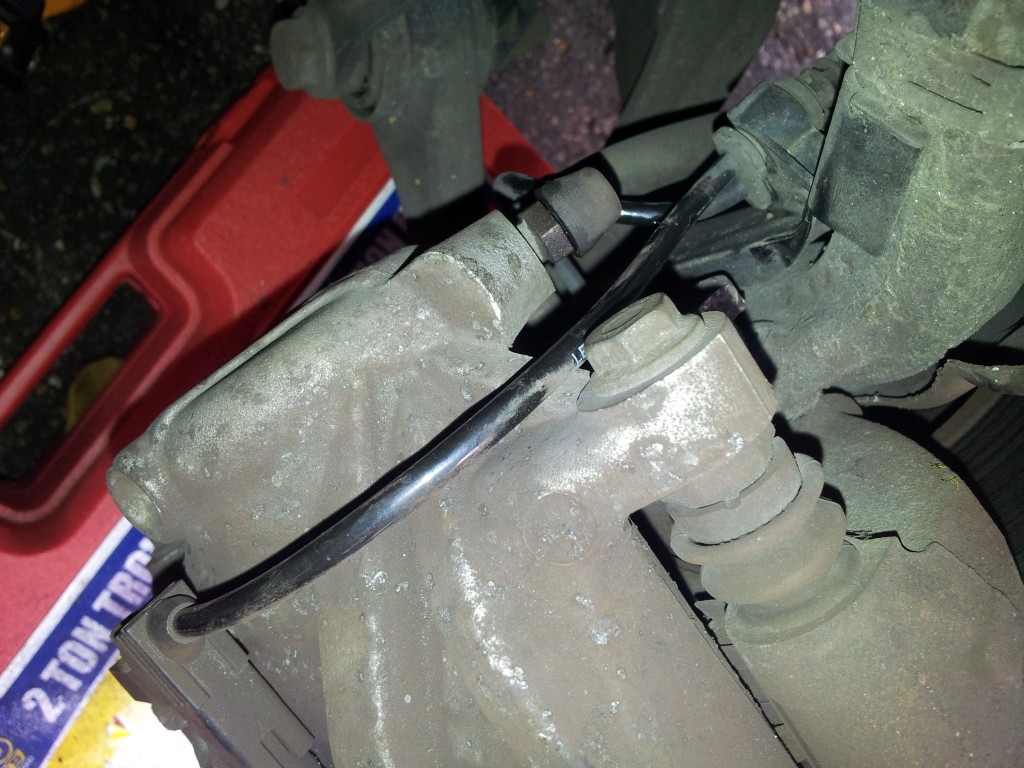
4.*Remove the caliper retaining bolts (one at top and one at bottom), and remove the caliper,*Be sure to support the caliper, (I used the jack box):

5. Once the calipers are unbolted, you can remove pads from the pad carriers:


Once the old pads have been removed, toss them aside")
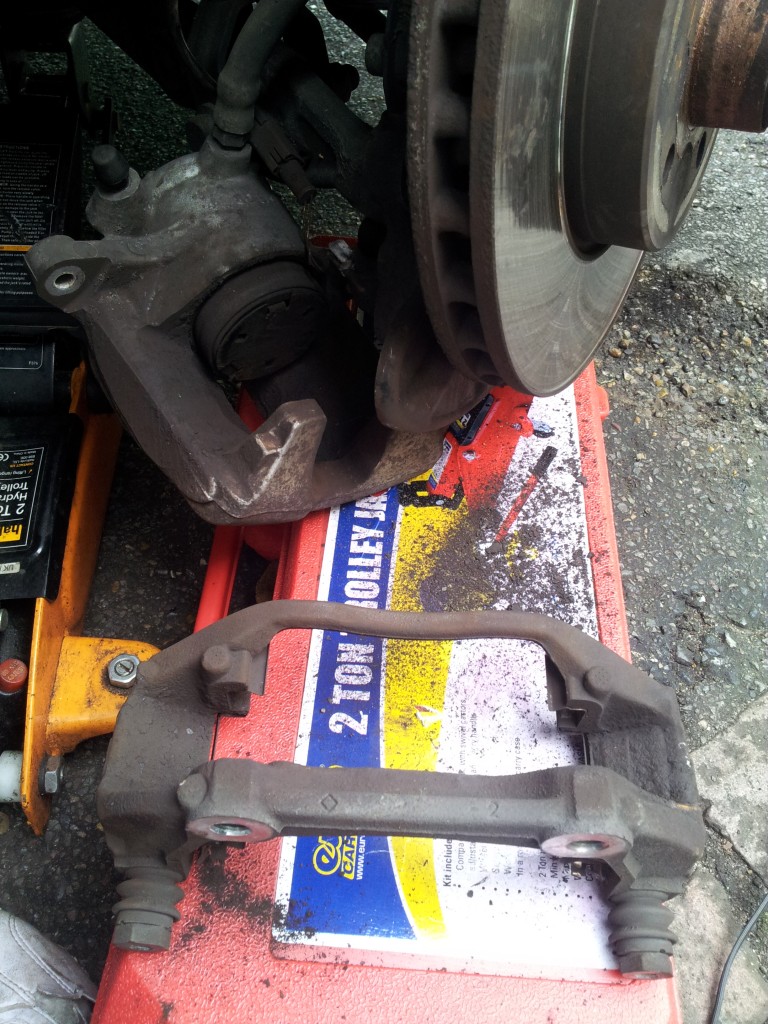
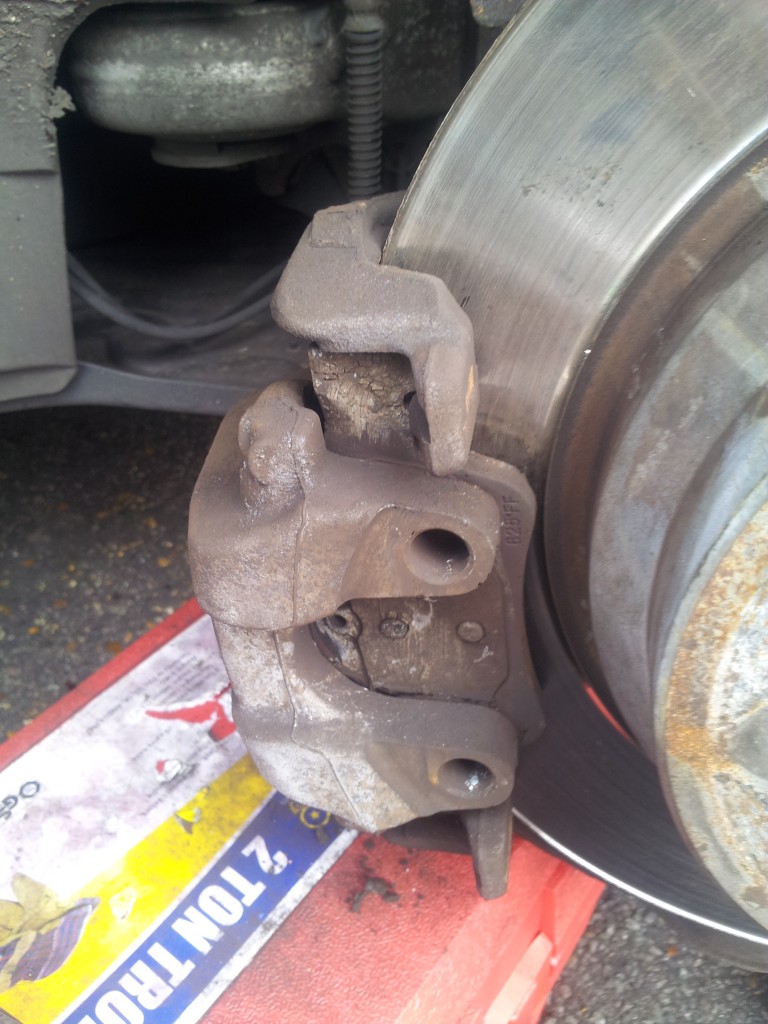
6. Now we should remove the pad carrier, undo the pad carrier bolts:
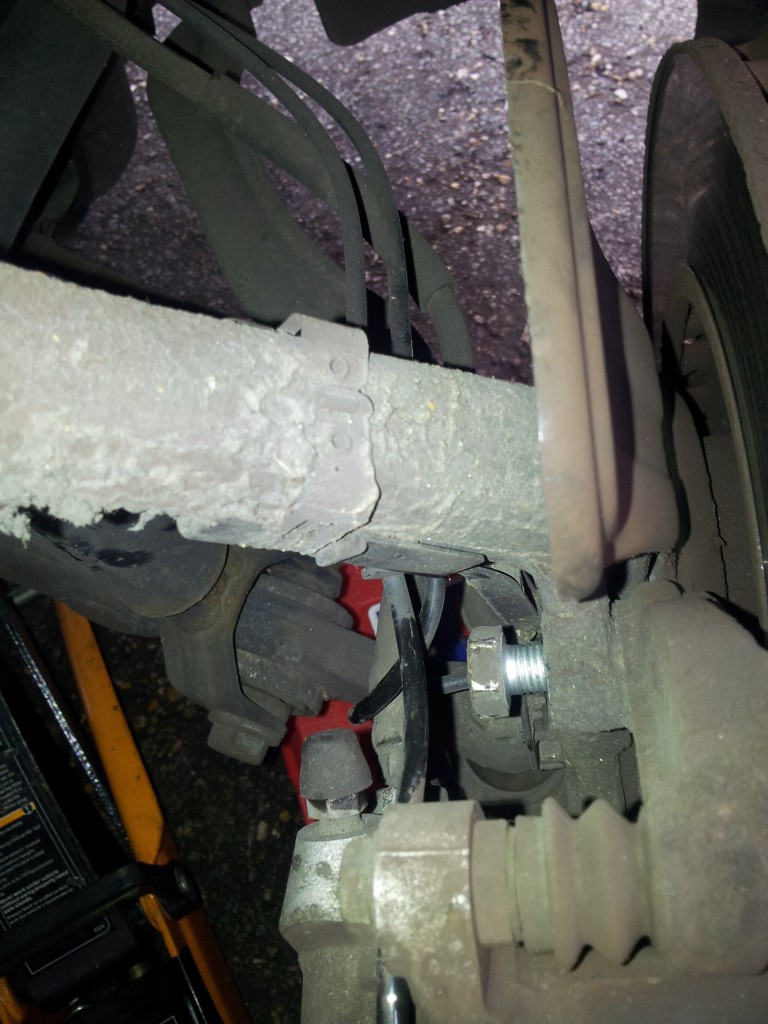
Top and bottom bolts, once removed you can remove the pad carrier:
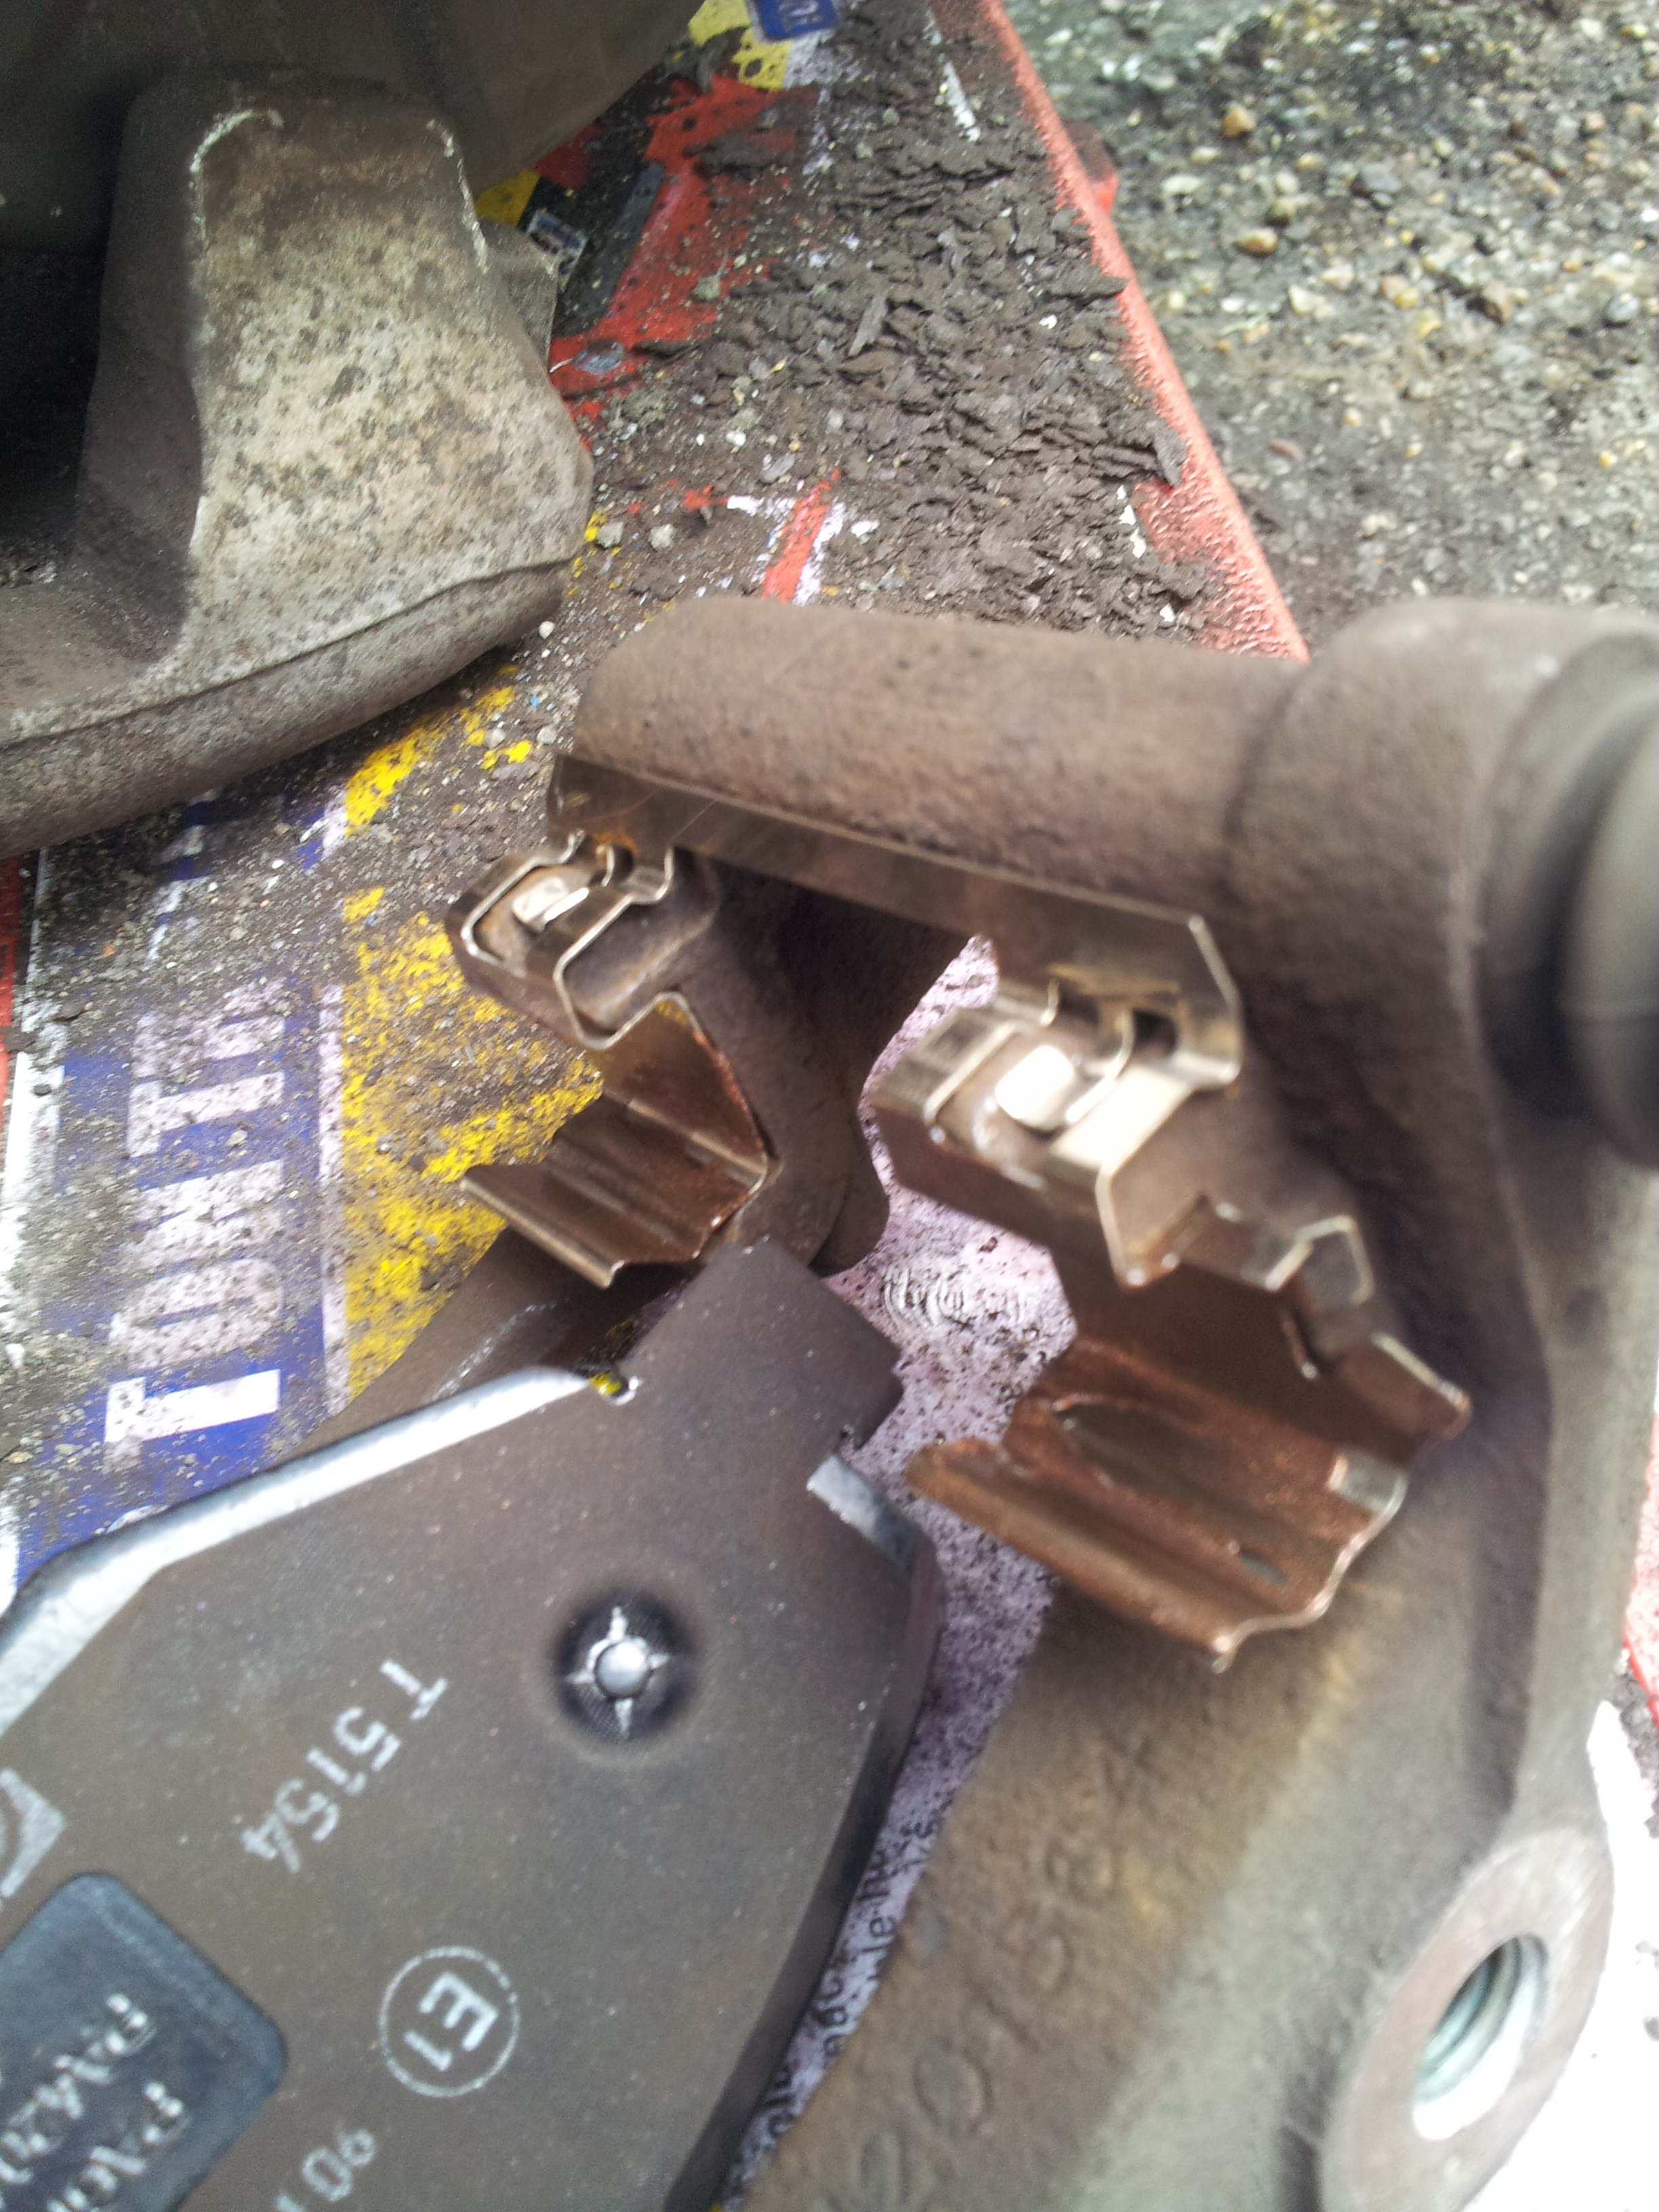
7. Once removed, I removed the pad retaining clips and cleaned up the carrier mounts with a wire brush, this is what tends to cause*squeaky*brakes or binding brakes:
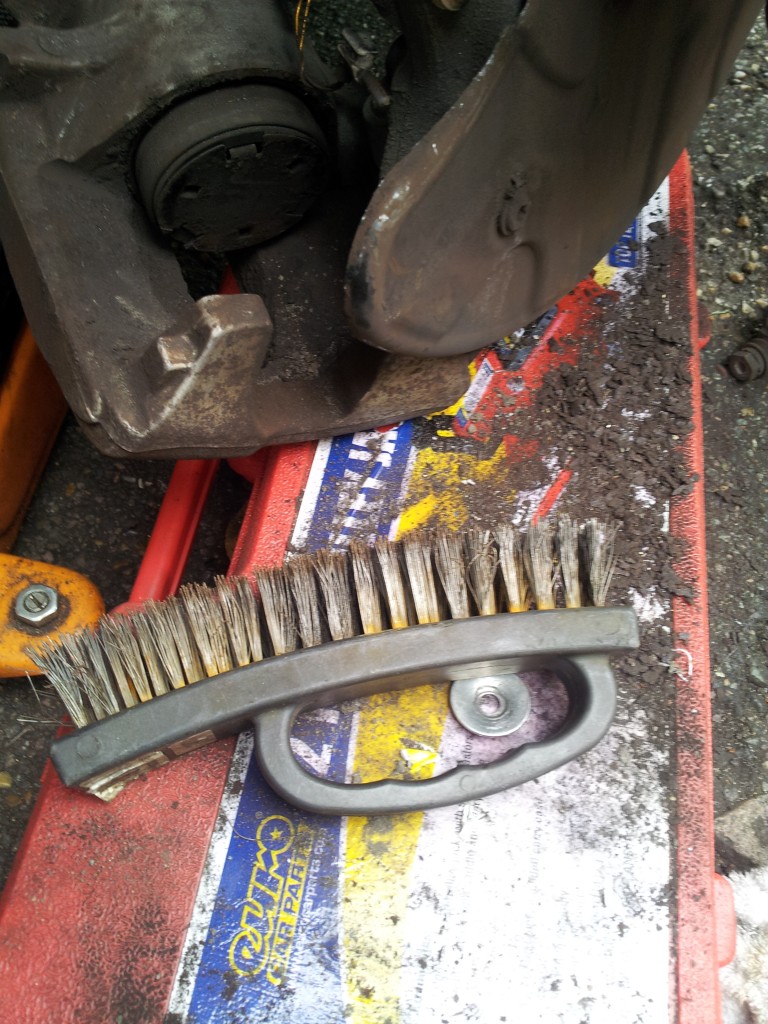
I also cleaned the inside of the caliper area, evidence of the crap that get stuck there is on the jack box!
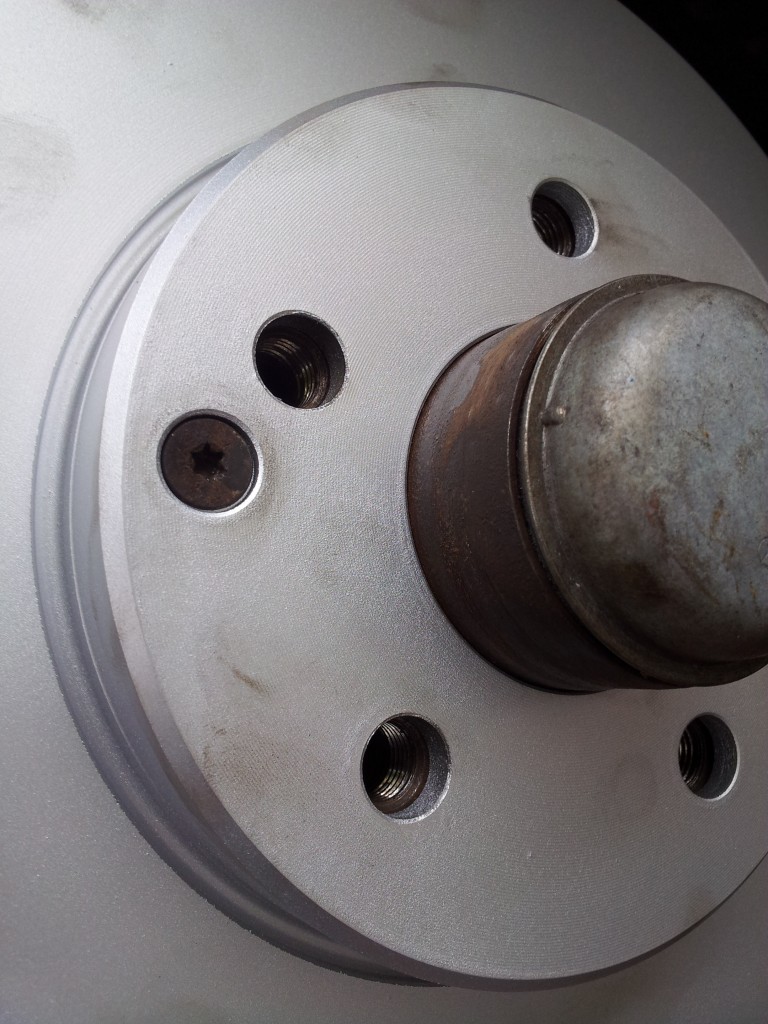
8. The next stage is to remove the disc from the hub. Firstly, remove the Hex nut*retaining*bolt shown below (on a new disc as I forgot to take a before pic:*
Once removed, give the disc a light tap from behind with a rubber mallet. In most cases it will come off without a fight. If the disc has been on there for a long time, its likely that rust/corrosion around the hub centre is keeping it attached. As I did not want to subject the front wheel bearing to lots of shock force, I used some bolts and nuts/washers to slowly introduce pressure on the back of the disk, in the setup below:
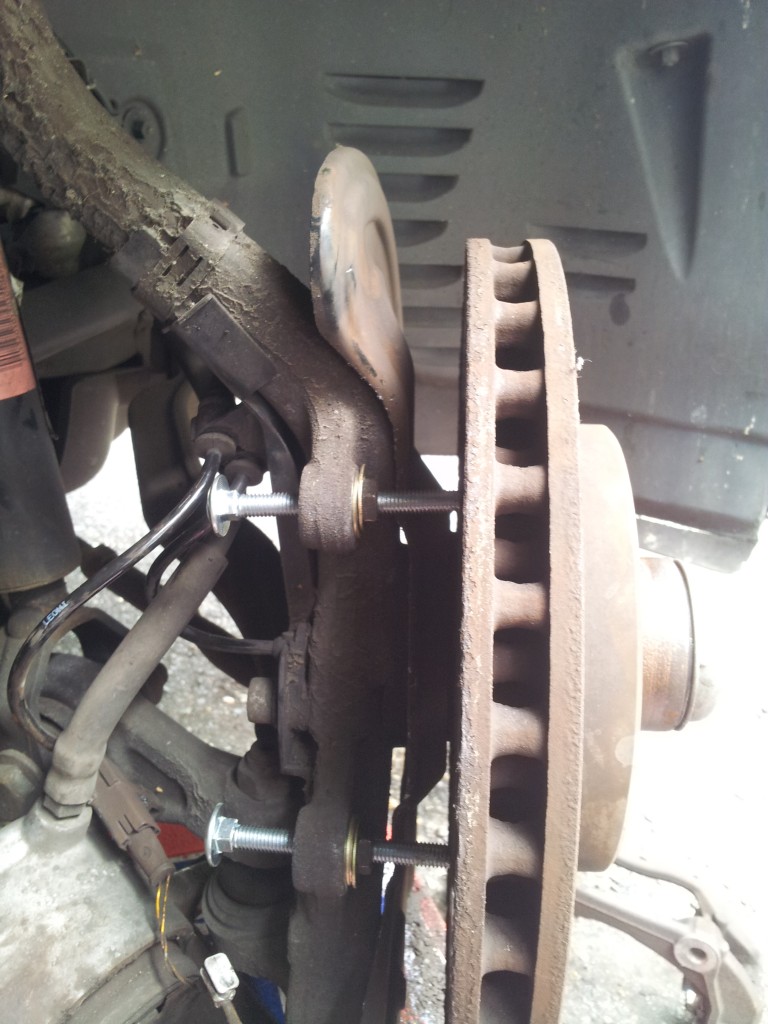
Whilst holding the back of the coach bolts, tighten the top and bottom nuts a couple of turns each, not too much as you do not want to subject the caliper mount to too much force. After there is some pressure on the disc, give it another tap with the rubber mallet. In my case, the bolts needed a couple more turns before the disc popped off:

9. Once the disc is removed, you will be left with the hub face:

Ensure you give the hub face a good clean with a wire brush and a good coating of cooper grease, especially around the center part where it often bonds to the disc:


10. Now that the hub is ready to accept the new disc, offer it up and align the retaining bolt hole:
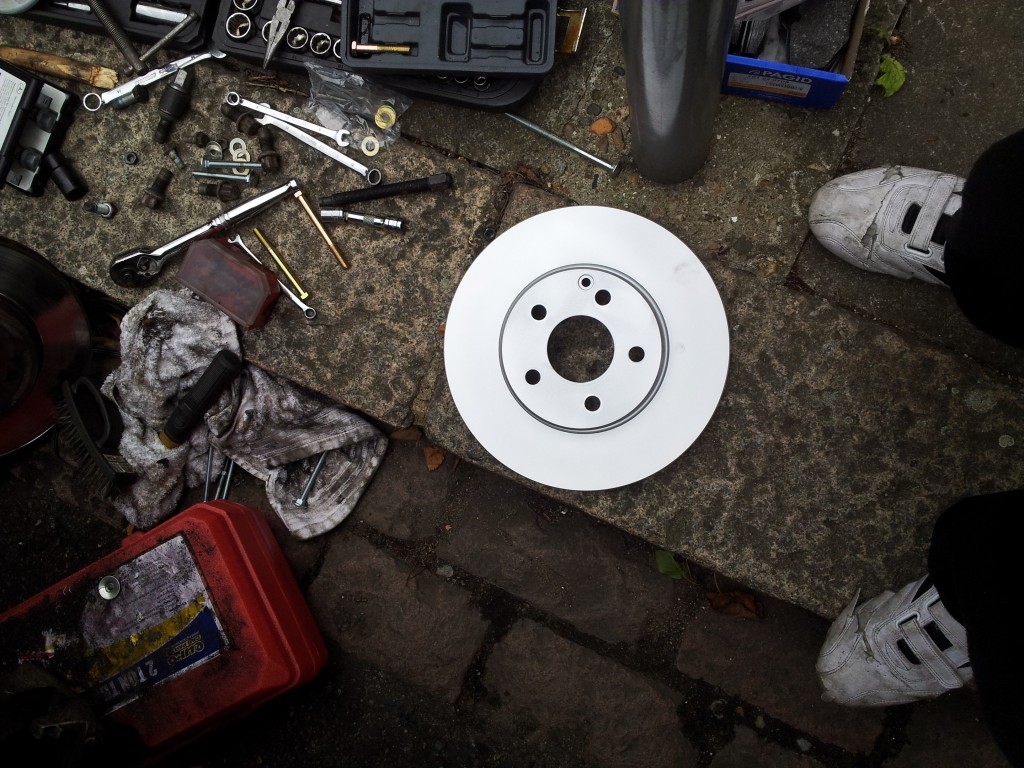
New disc ready to go on.
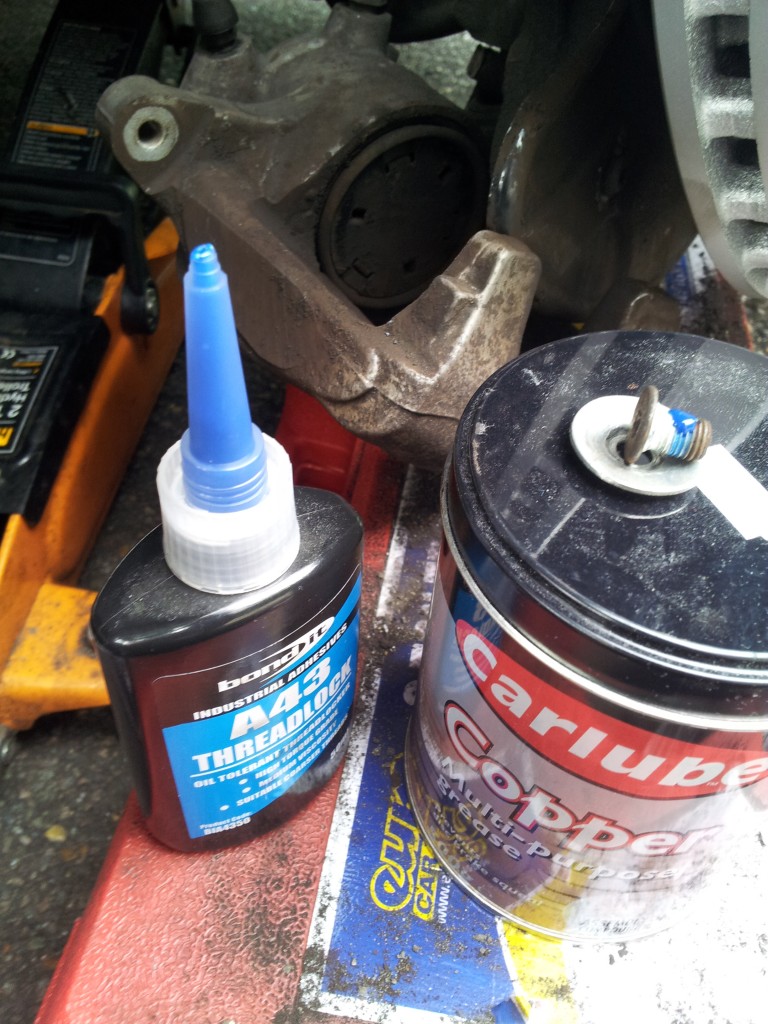
Ensure that you put a little bit of loctite on the retaining screw:
Bolted up and secured in place:
11. Now that the disc is in place and bolted up, lets switch attention to the pads. Firstly we must open the top of the brake reservoir and syphone off brake fluid until it reaches the Min marker. If this is not done, then fluid will overflow when we press the piston back into the caliper. (I have no pictures of this as I forgot to take them
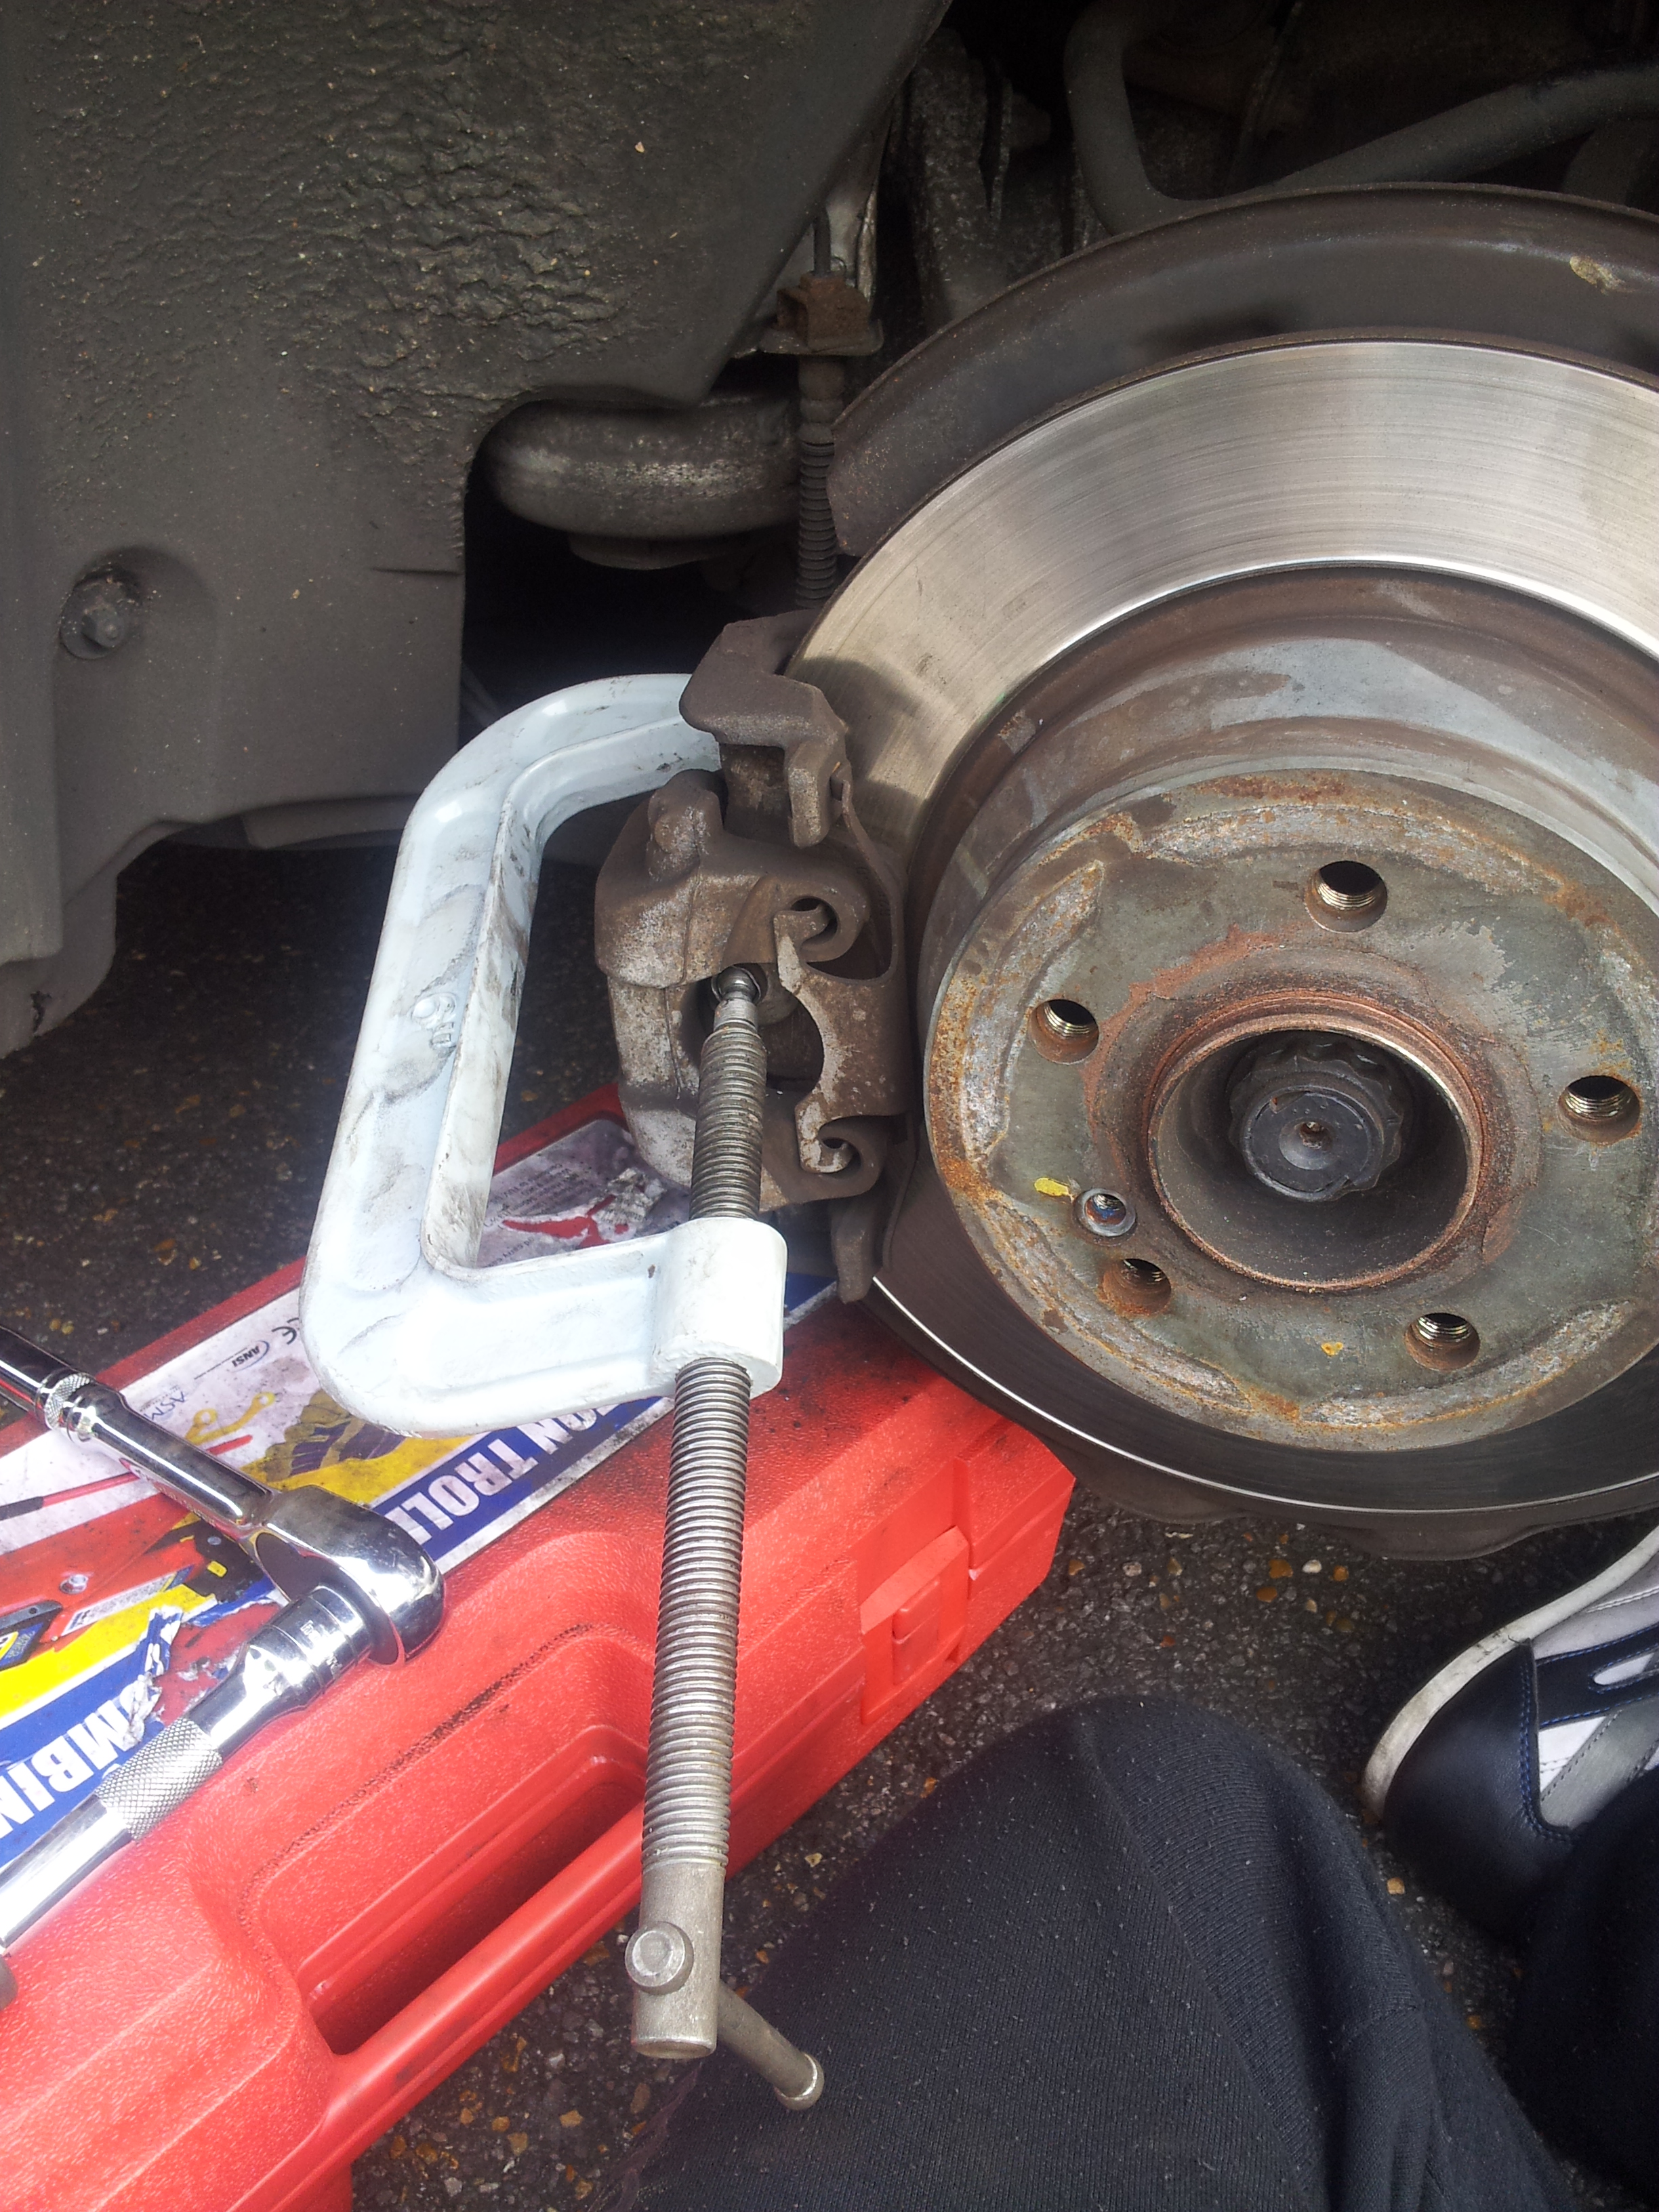
12. We must now push the piston back into the caliper to make way for the new original thickness pads. I used a piece of wood (old broom handle) and a C clamp to slowly wind the piston in like so:
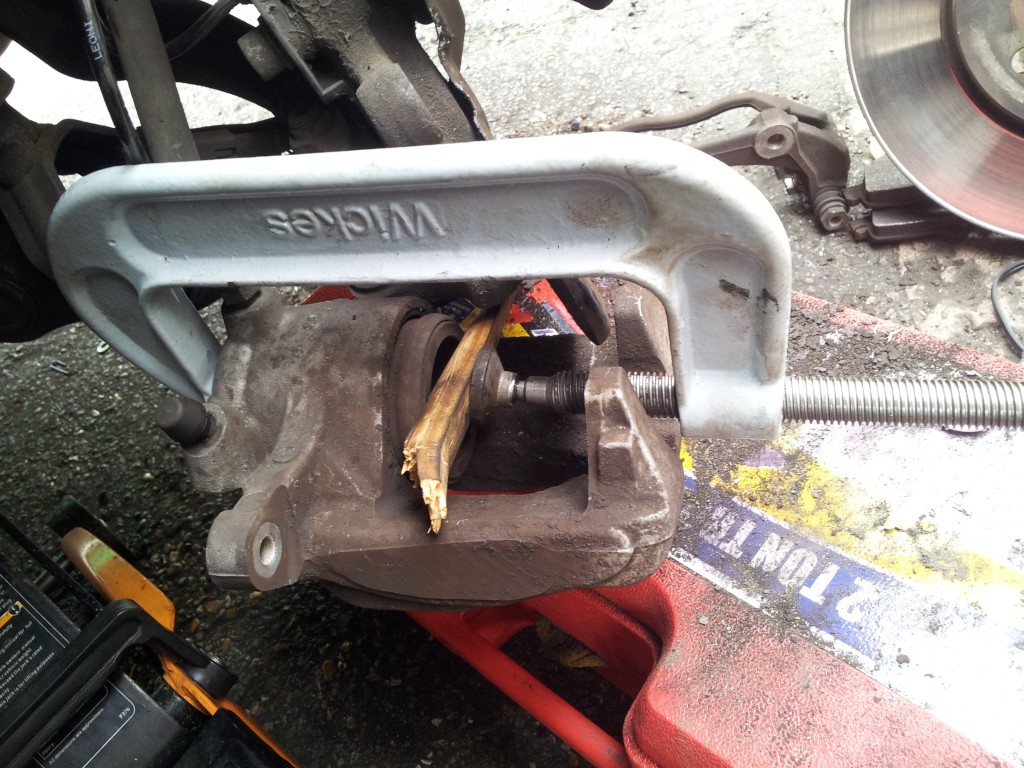
Wind it in slowly, keeping an eye on the brake fluid level, until the piston is flush with the caliper body (being careful not to pinch the rubber surround). Once this is done, you can replace the metal cap that goes inside the piston with the new one from the pad kit
13. *Replace the pad retaning springs/clips with new ones that should be included with the replacement break pads, Give them a coating of copper grease to stop corrosion sealing them in, and ensure they are fully seated.

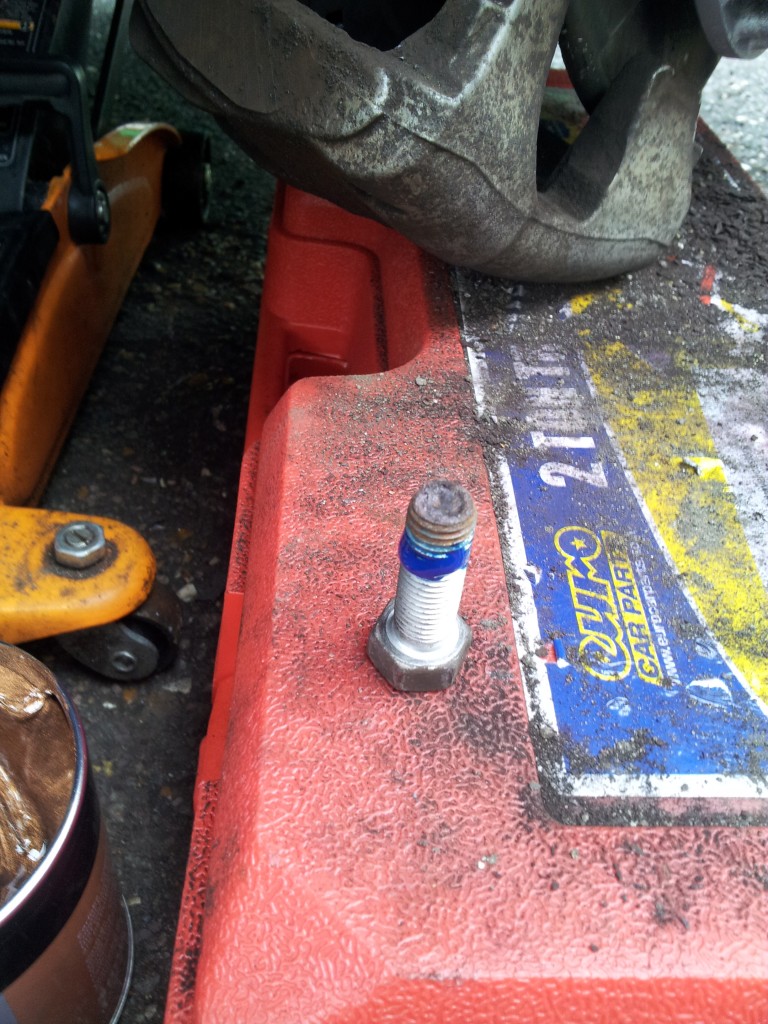
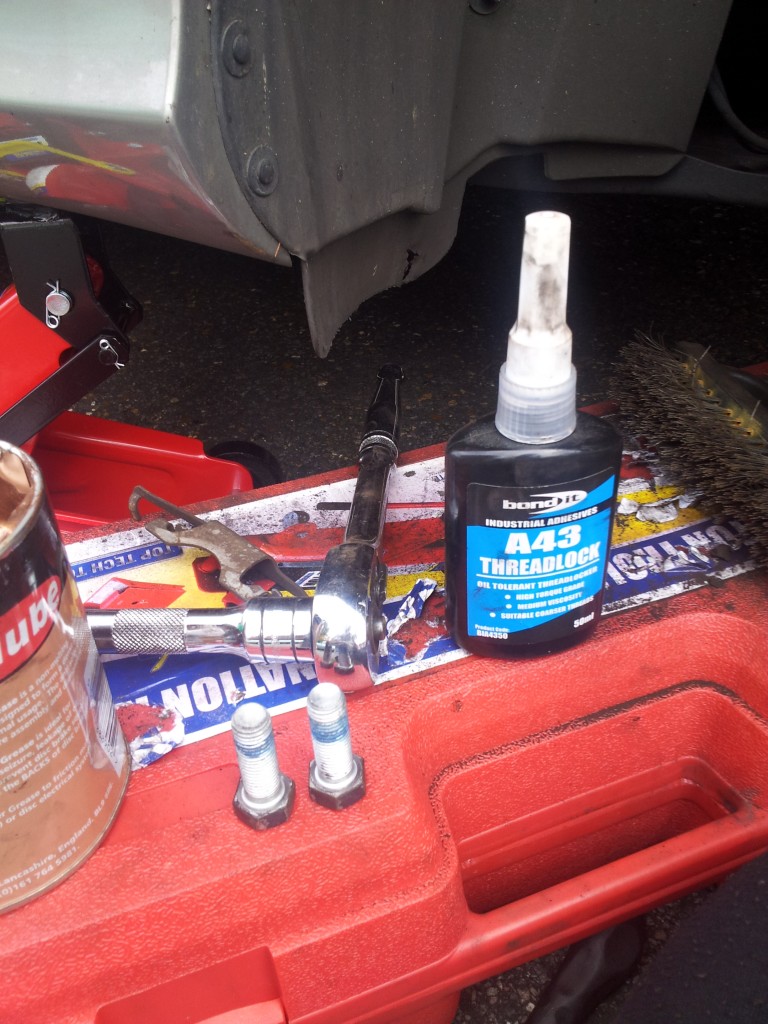
Now its time to refit the pad carrier, you should use new bolts but I reused the old ones as they looked fine. Make sure to apply a bit of thread lock to these bolts as well:
Make sure your bolts arent right next to all the crud like mine where and use them to remount them, I used a 12v torque wrench set to 100nm to ensure they were done up tightly. Once the carrier is in place:
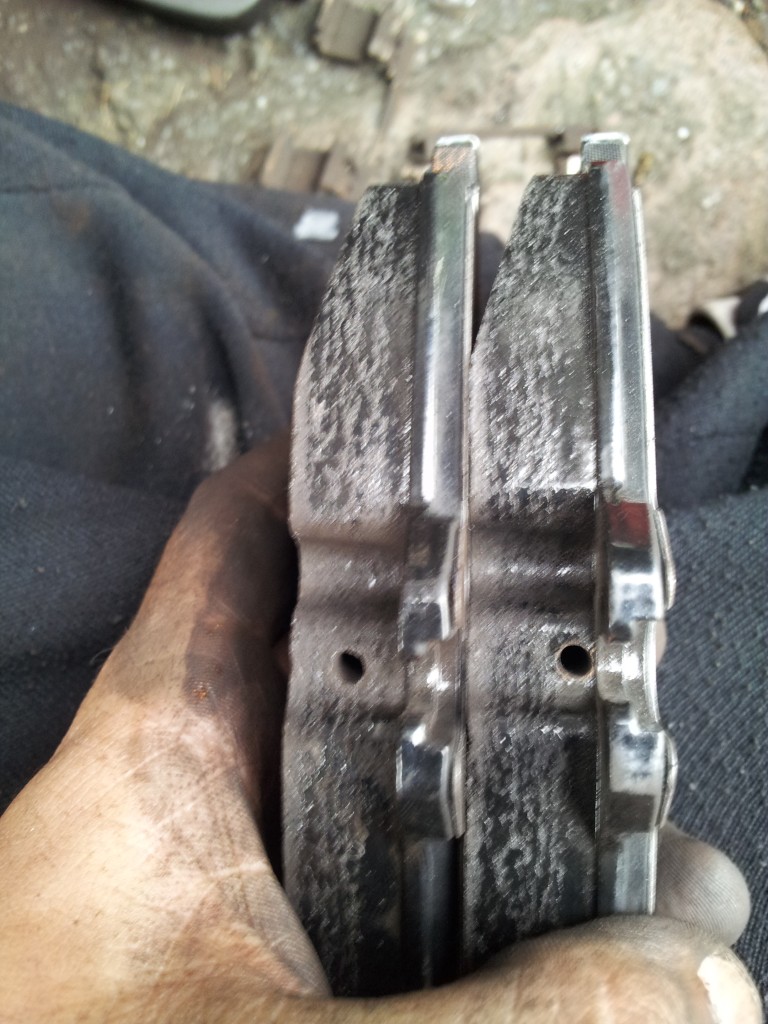
Once the carrier is in place, obtain the new brake pads, Take note, that on the w211, the pads are sided, the right hand side had sensor holes closer to the backing place and the left hand side had holes further away, as such the replacement sensors will only fit their respective side (As they also have different connectors) not sure of the reason for this. *A pic of the left and right side pad together:
Once the pads have been inserted into the carrier, you should be left with something resembling this:
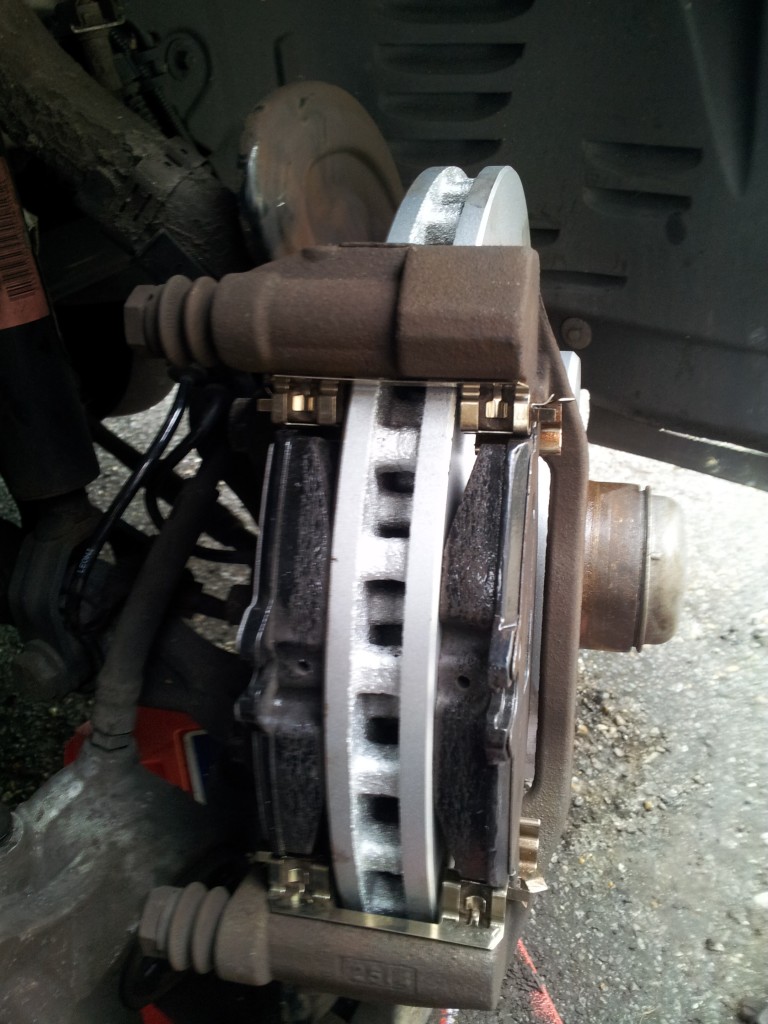
You also start to get a nice sense of*achievement*at this point
14. The next stage is to re-attach the caliper, offer up the caliper to the pad carier and use new bolts (only 2 bolts where provided in my pad set of 4! for some odd reason)
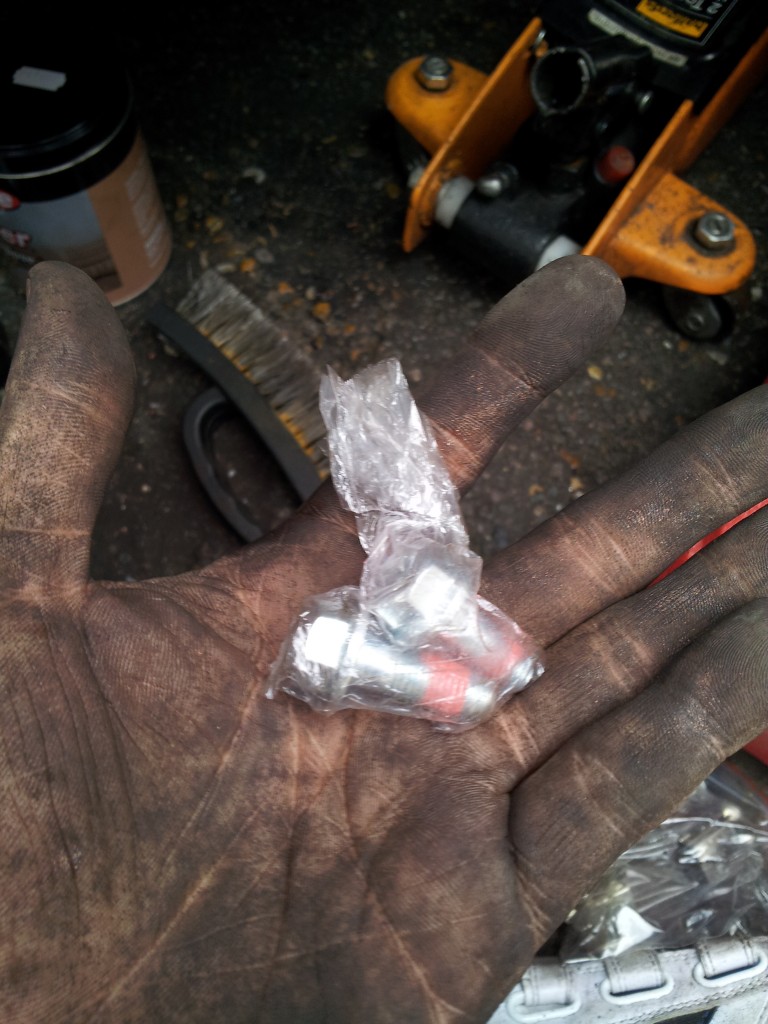
Shiny new bolts, on a not so shiny hand!
Once re-attached (and torqued up correctly) you will have this:
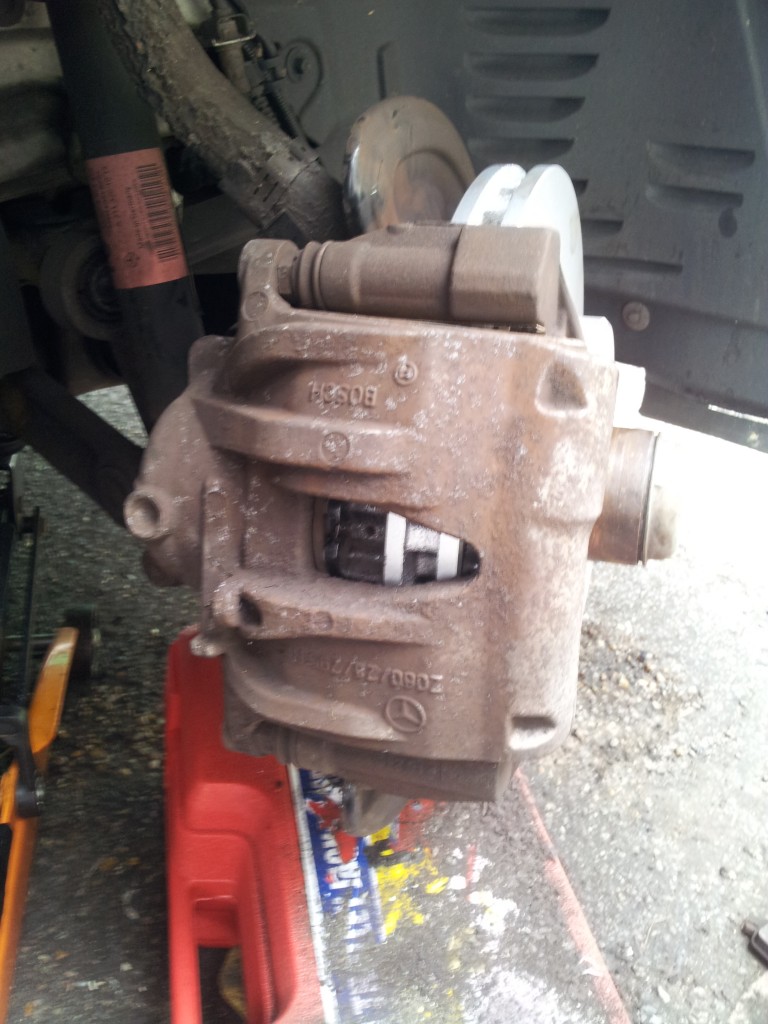
Insert the new pad wear sensor into the pad sensor hole and re-attach the bolt securing the sensor to the caliper, I re-used the old one as it wasnt worn and I managed to break the replacement by fitting it incorrectly:
Thats the front right brake done! Repeat the same process on the left hand side and your front brakes are now done!
Onto the back brakes.
16. Jack and support the car and place wheel chocks in front of the front wheels. I also placed the tyre underneath the car to support it in case it rolled. Ensure the handbrake is off. * Also but the car into neutral. Once SBC was disabled, I was not able to get the car out of park. I used the release button through the rear storage compartment underneath D, Remove the wheel:

I then used the c clamp to compress the piston this way, as I would be changing the pads and the discs anyway.
17.
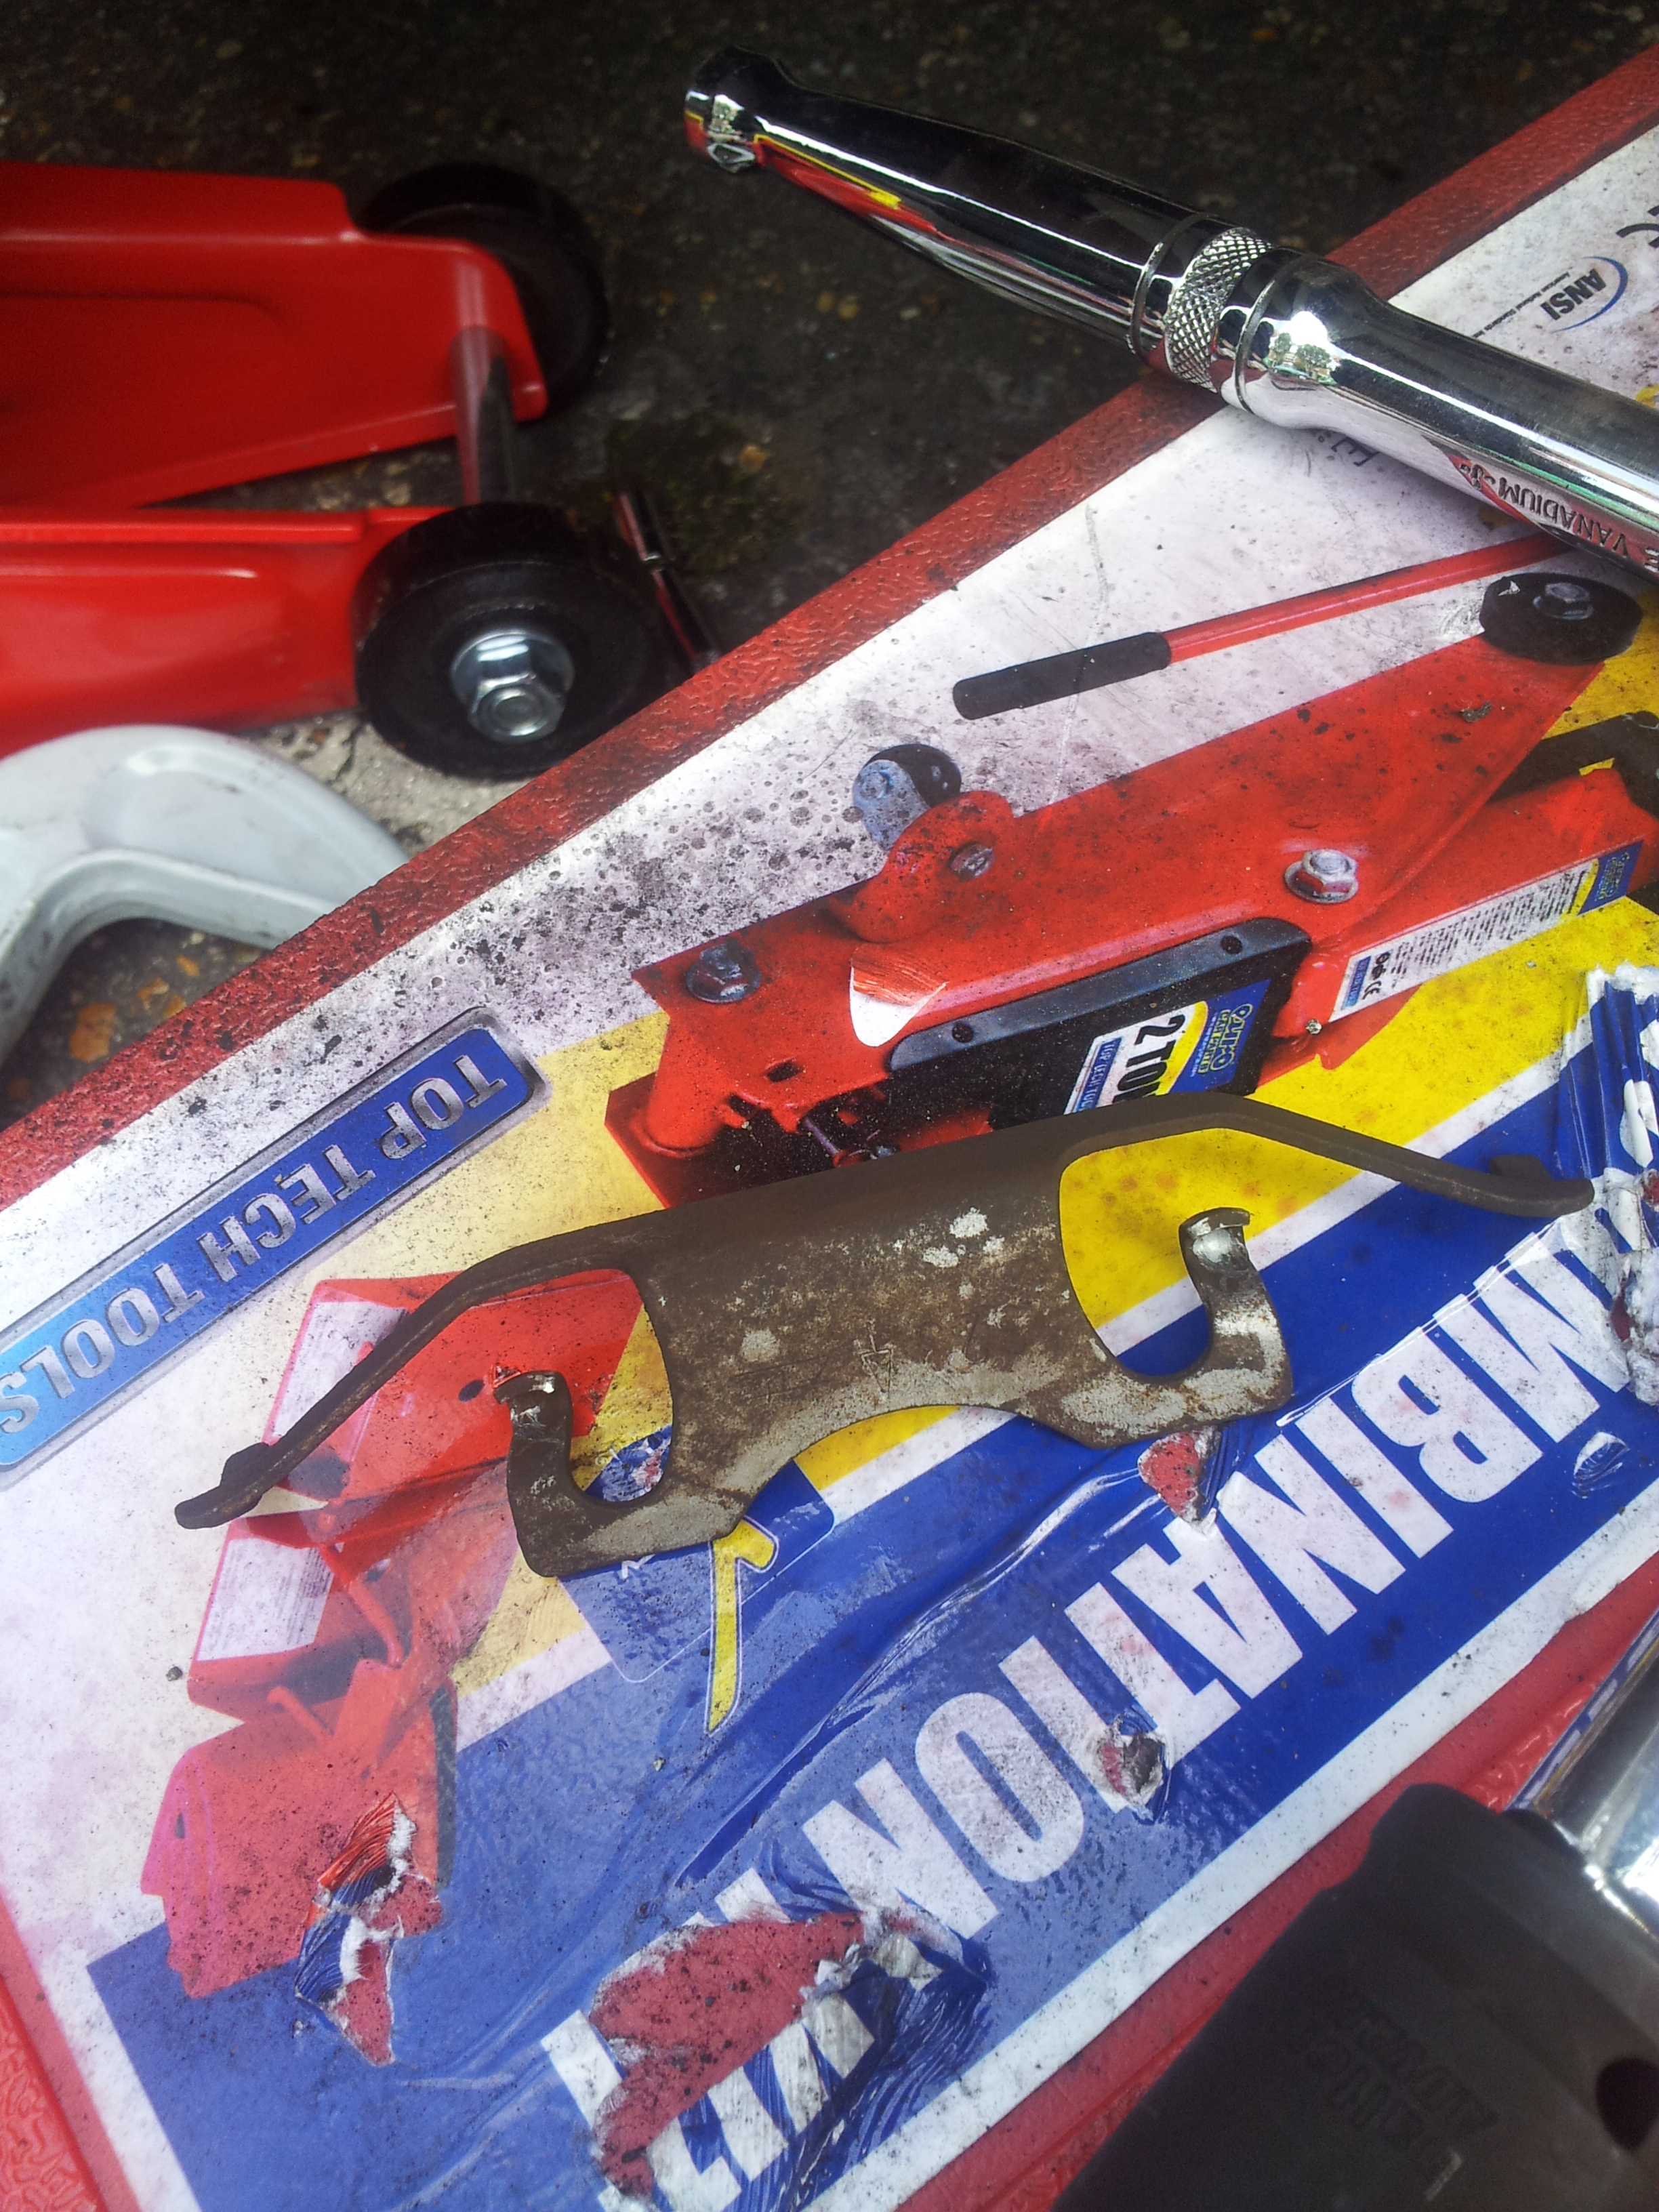
Remove the pad retaining clip. I used a screwdriver to pry it off whilst holding with pliers to ensure it*didn't*fly off.

18. Undo the caliper mounting bolts:

Once removed, support the caliper on the jack box or hang it with a zip tie on the suspension arm.
19. Now is the time to wind out the handbrake shoes. Ensure the handbrake is off and access the adjuster from the right hand side via a wheel bolt hole. A picture paints a thousand words here:
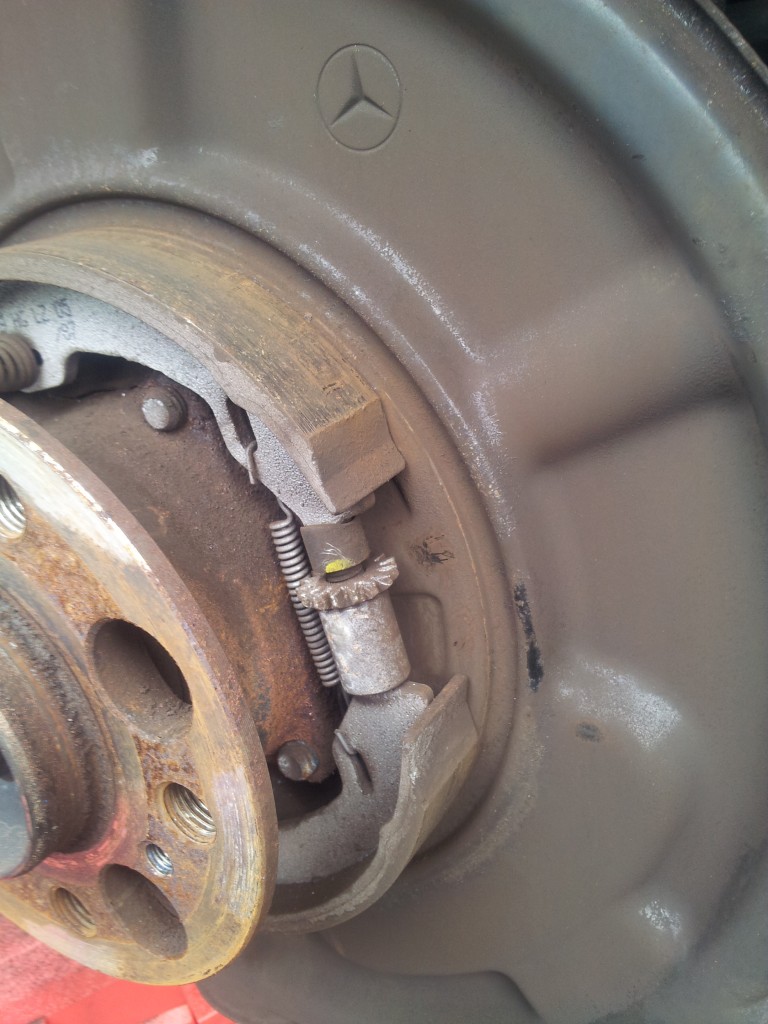
I always forget the direction as its different for each side. To figure it out I turned it 4-6 turns until it stopped the back disc from turning, then backed it out 10 turns the other way. You can now remove the disc retaining bolt and *remove the disc.
20. Both my rear discs came off without issues and i*didn't*have to use my pusher bolts.
21. Bolt the new discs in on the same way as the front, ensuring the hub is cleaned and copper greased up.
22. Replace the clips in the caliper in the same way as the front and re insert the back pads, ensuring to use copper grease on the clips.
23. Readjust the clutch adjuster until the disc cannot be turned and back of 2-3 turns. Ensure that the same number of turns is used on both sides for equal adjustment.
24. Re bolt the carrier to car, ensuring the bolts are loctited up.
25. Replace the wheels and lower the car.
26. SBC must now be re-actived to push the pistons out against the pads. Via star: *Control modules - > Chasis -> SBC - > activate SBC following maintenance. Replace disks.
27. SBC will then recharge the system 3-4 times and push each caliper's pads out to the discs. It then presents you with a pressure readout for each wheel. Ensure that the fluid level does not drop below Min in this process, or the brakes will have to be bled if air is sucked in.
28. Done! Drive carefully at first, being sure to brake fairly firmly from high speed a couple of times to seat the pads and the discs. (note, some people remove the protectctive surface on the discs before*installing*them. I chose to let the pads do the job).
Let me know any questions in the comment section
Here is a guide on how to change the brake pads and discs on a W211 E class Mercedes.
Pre-facelift W211's built before the June 2006 facelift*have Mercedes's very odd SBC braking system (please note, Post-facelift cars have a "normal" braking system that does not need to be disabled. SBC uses a sensor in the brake pedal to tell an electronic valves to push fluid down hydraulic braking pipes to then actuate the brake calipers individually. This uses a very high pressure brake fluid resevoir that gets charged when one of the following happens:
- The car is unlocked
- The doors are opened
- The brake pedal is pushed
- The reservoir pressure falls below a certain point
- The moon aligns with the sun
Some other methods to disable SBC include:
- Unplugging the SBC pump (NOT*RECOMMENDED, as this will load the car with fault codes)*
- Disconnecting both the Primary and AUX batteries (the way I would do it)
- Using a 3rd party SBC disable tool (that can be bought from ebay etc)
1. Starting on STAR, disable SBC (Control modules - > Chasis -> SBC - > Deactivate SBC. After carrying this out, the dashboard will display the following:
2. Once the SBC has been deactivated, Apply the handbrake, Jack the car up and place it on axle stands ( In my case, use 2 jacks and put the wheel under the car, as the camber on my road meant I*couldn't*get an axle stand in there! ). Then remove the wheel (I started on front right):

3. Unbolt and detach the pad sensors:
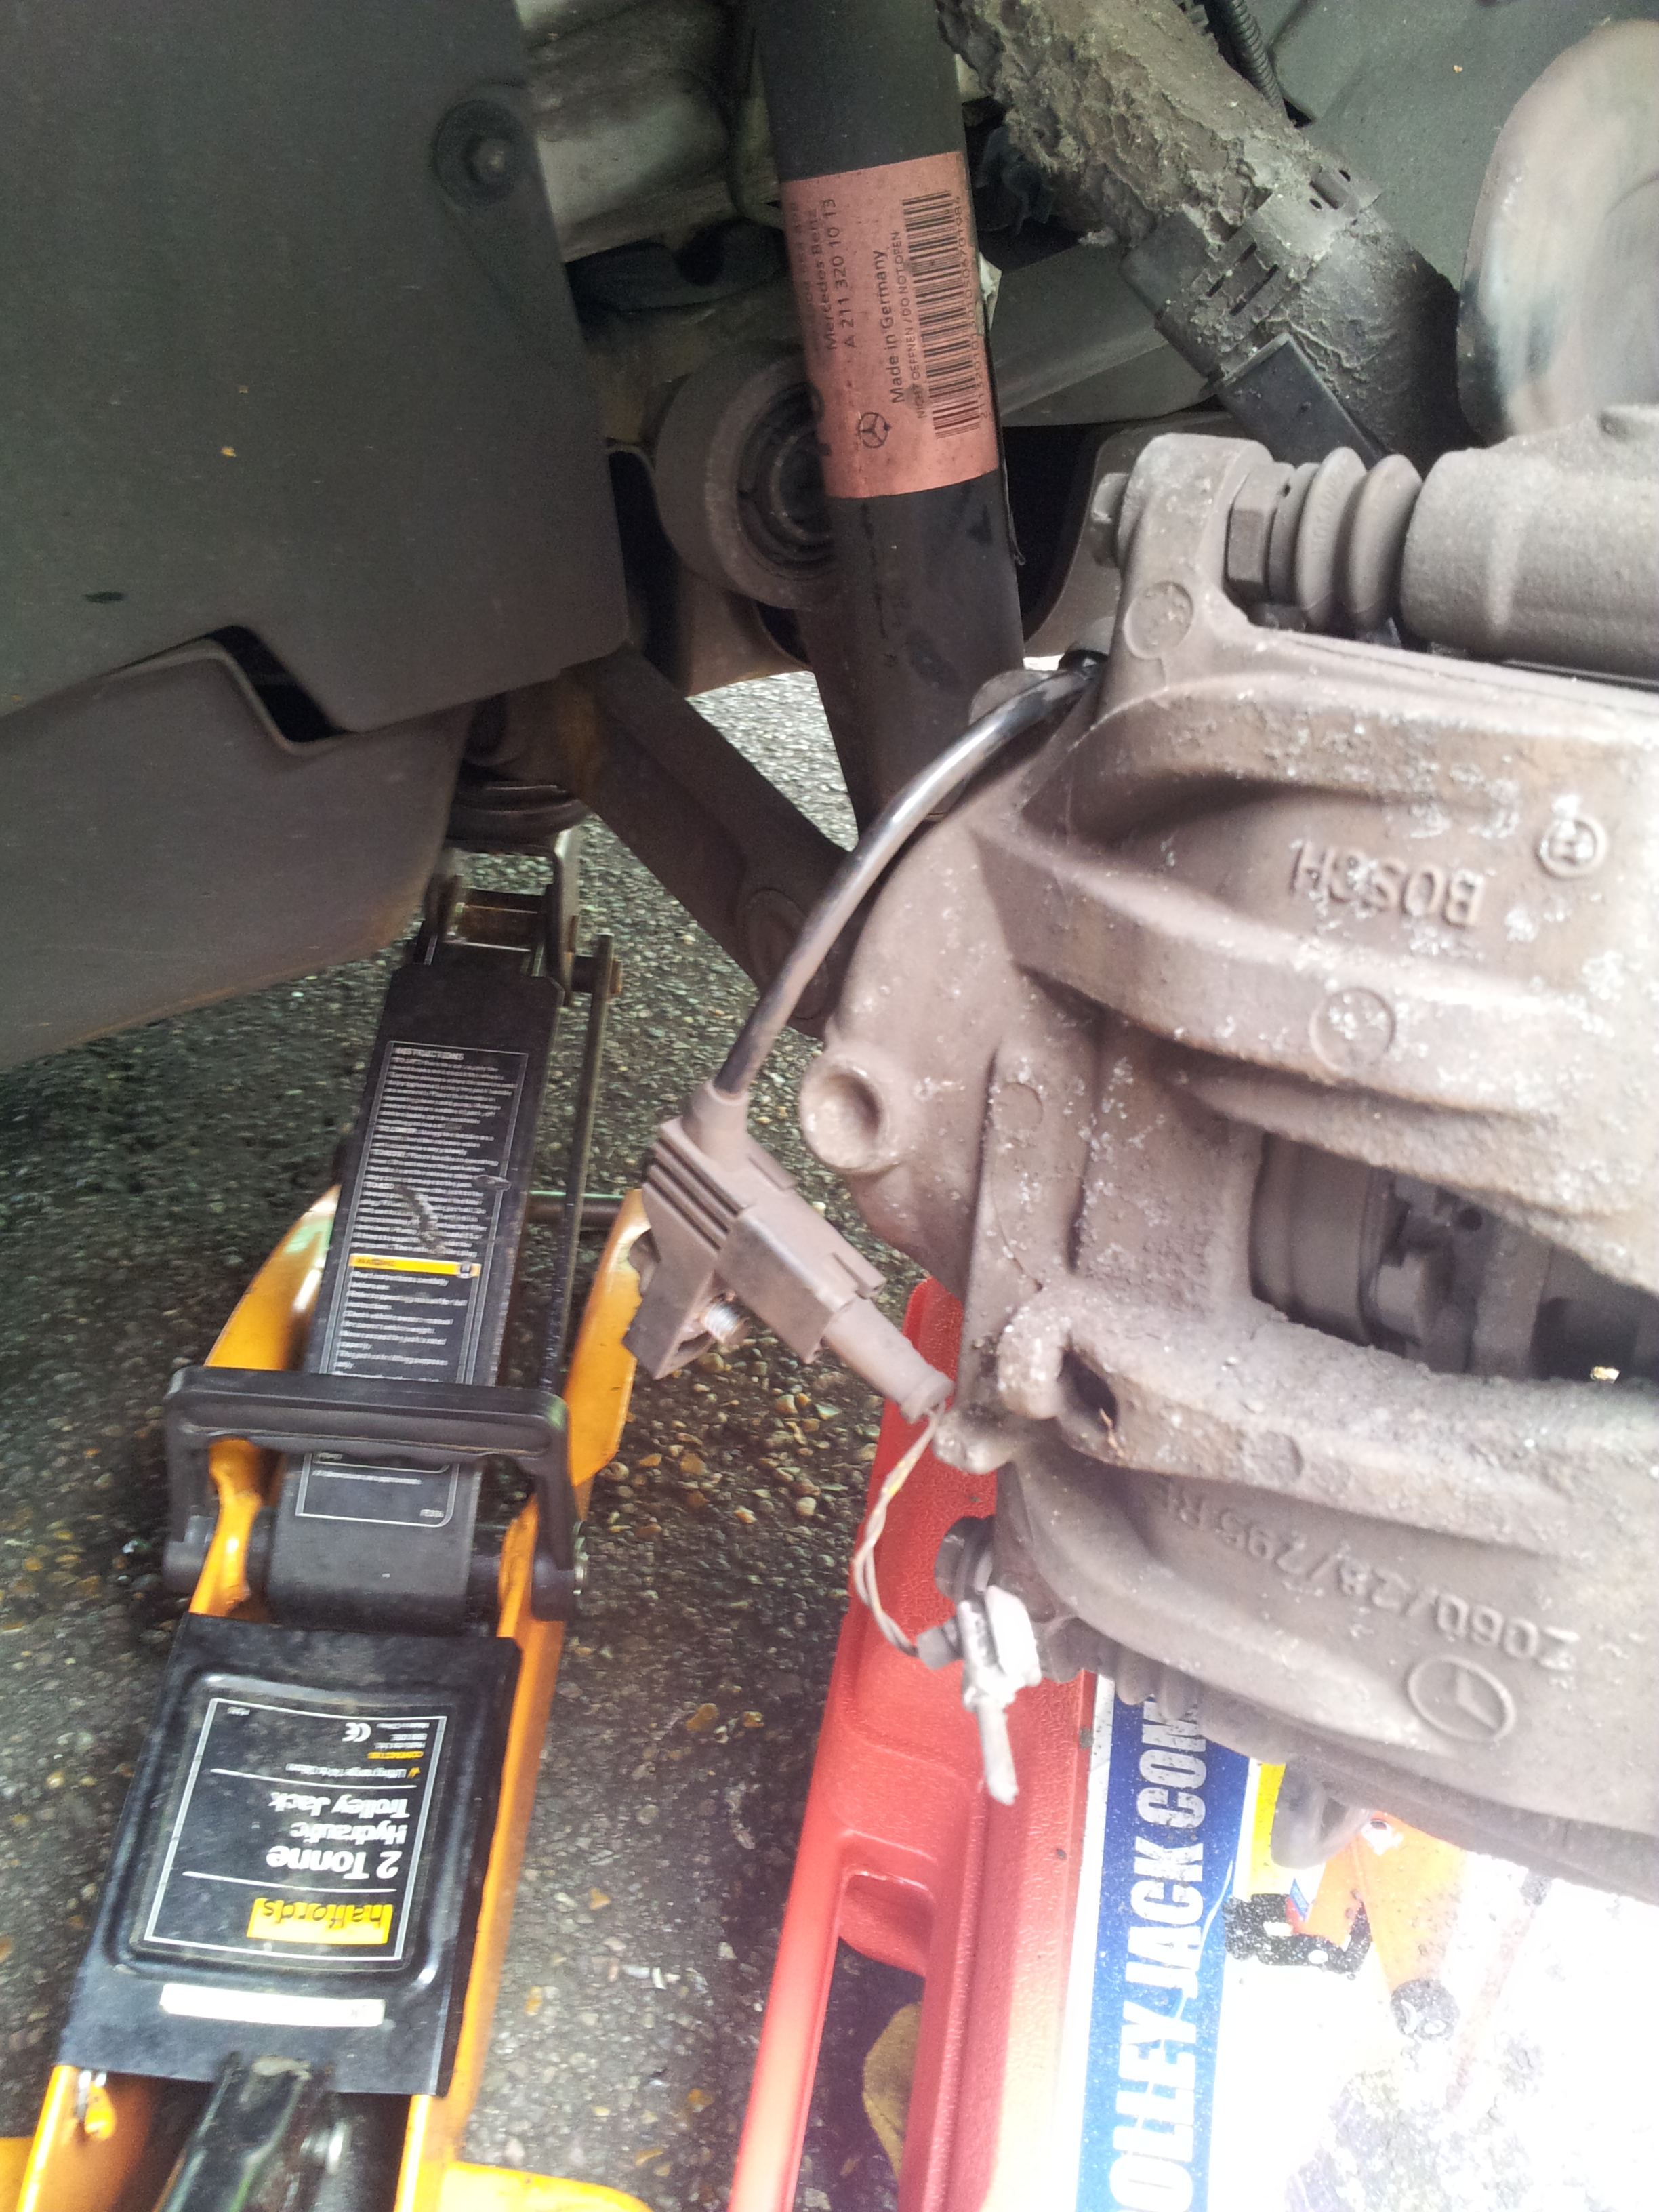
4.*Remove the caliper retaining bolts (one at top and one at bottom), and remove the caliper,*Be sure to support the caliper, (I used the jack box):
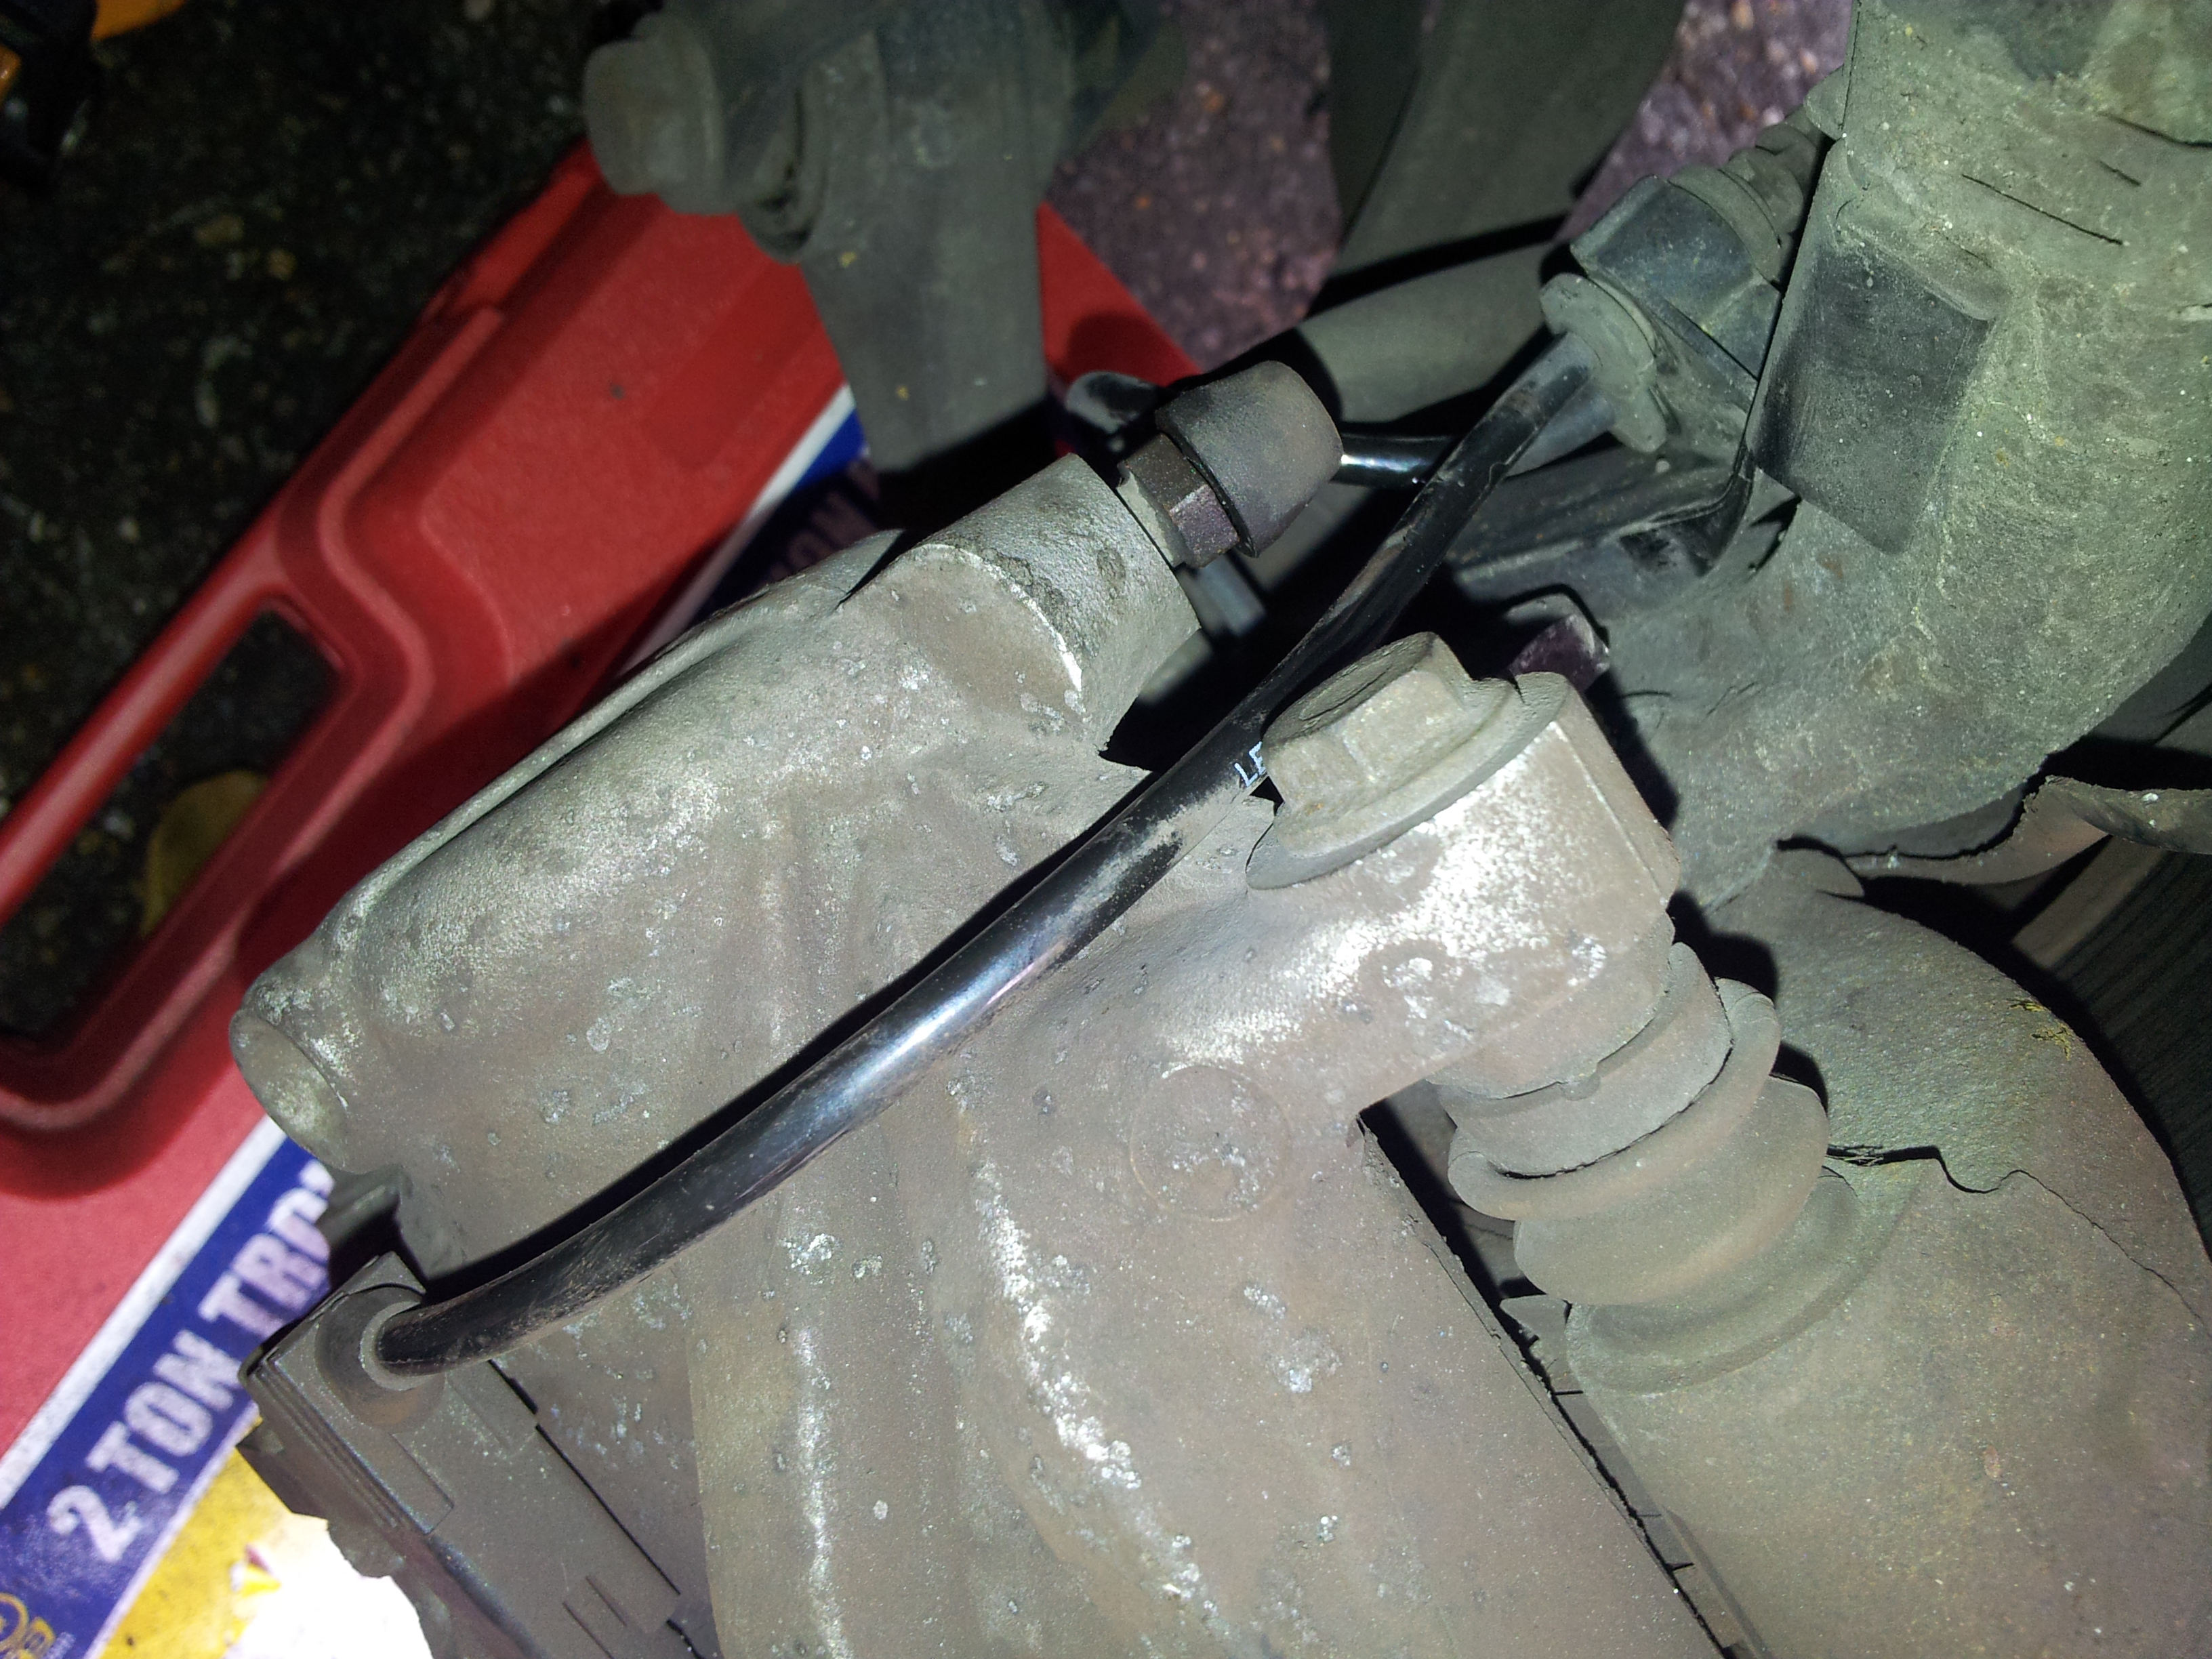
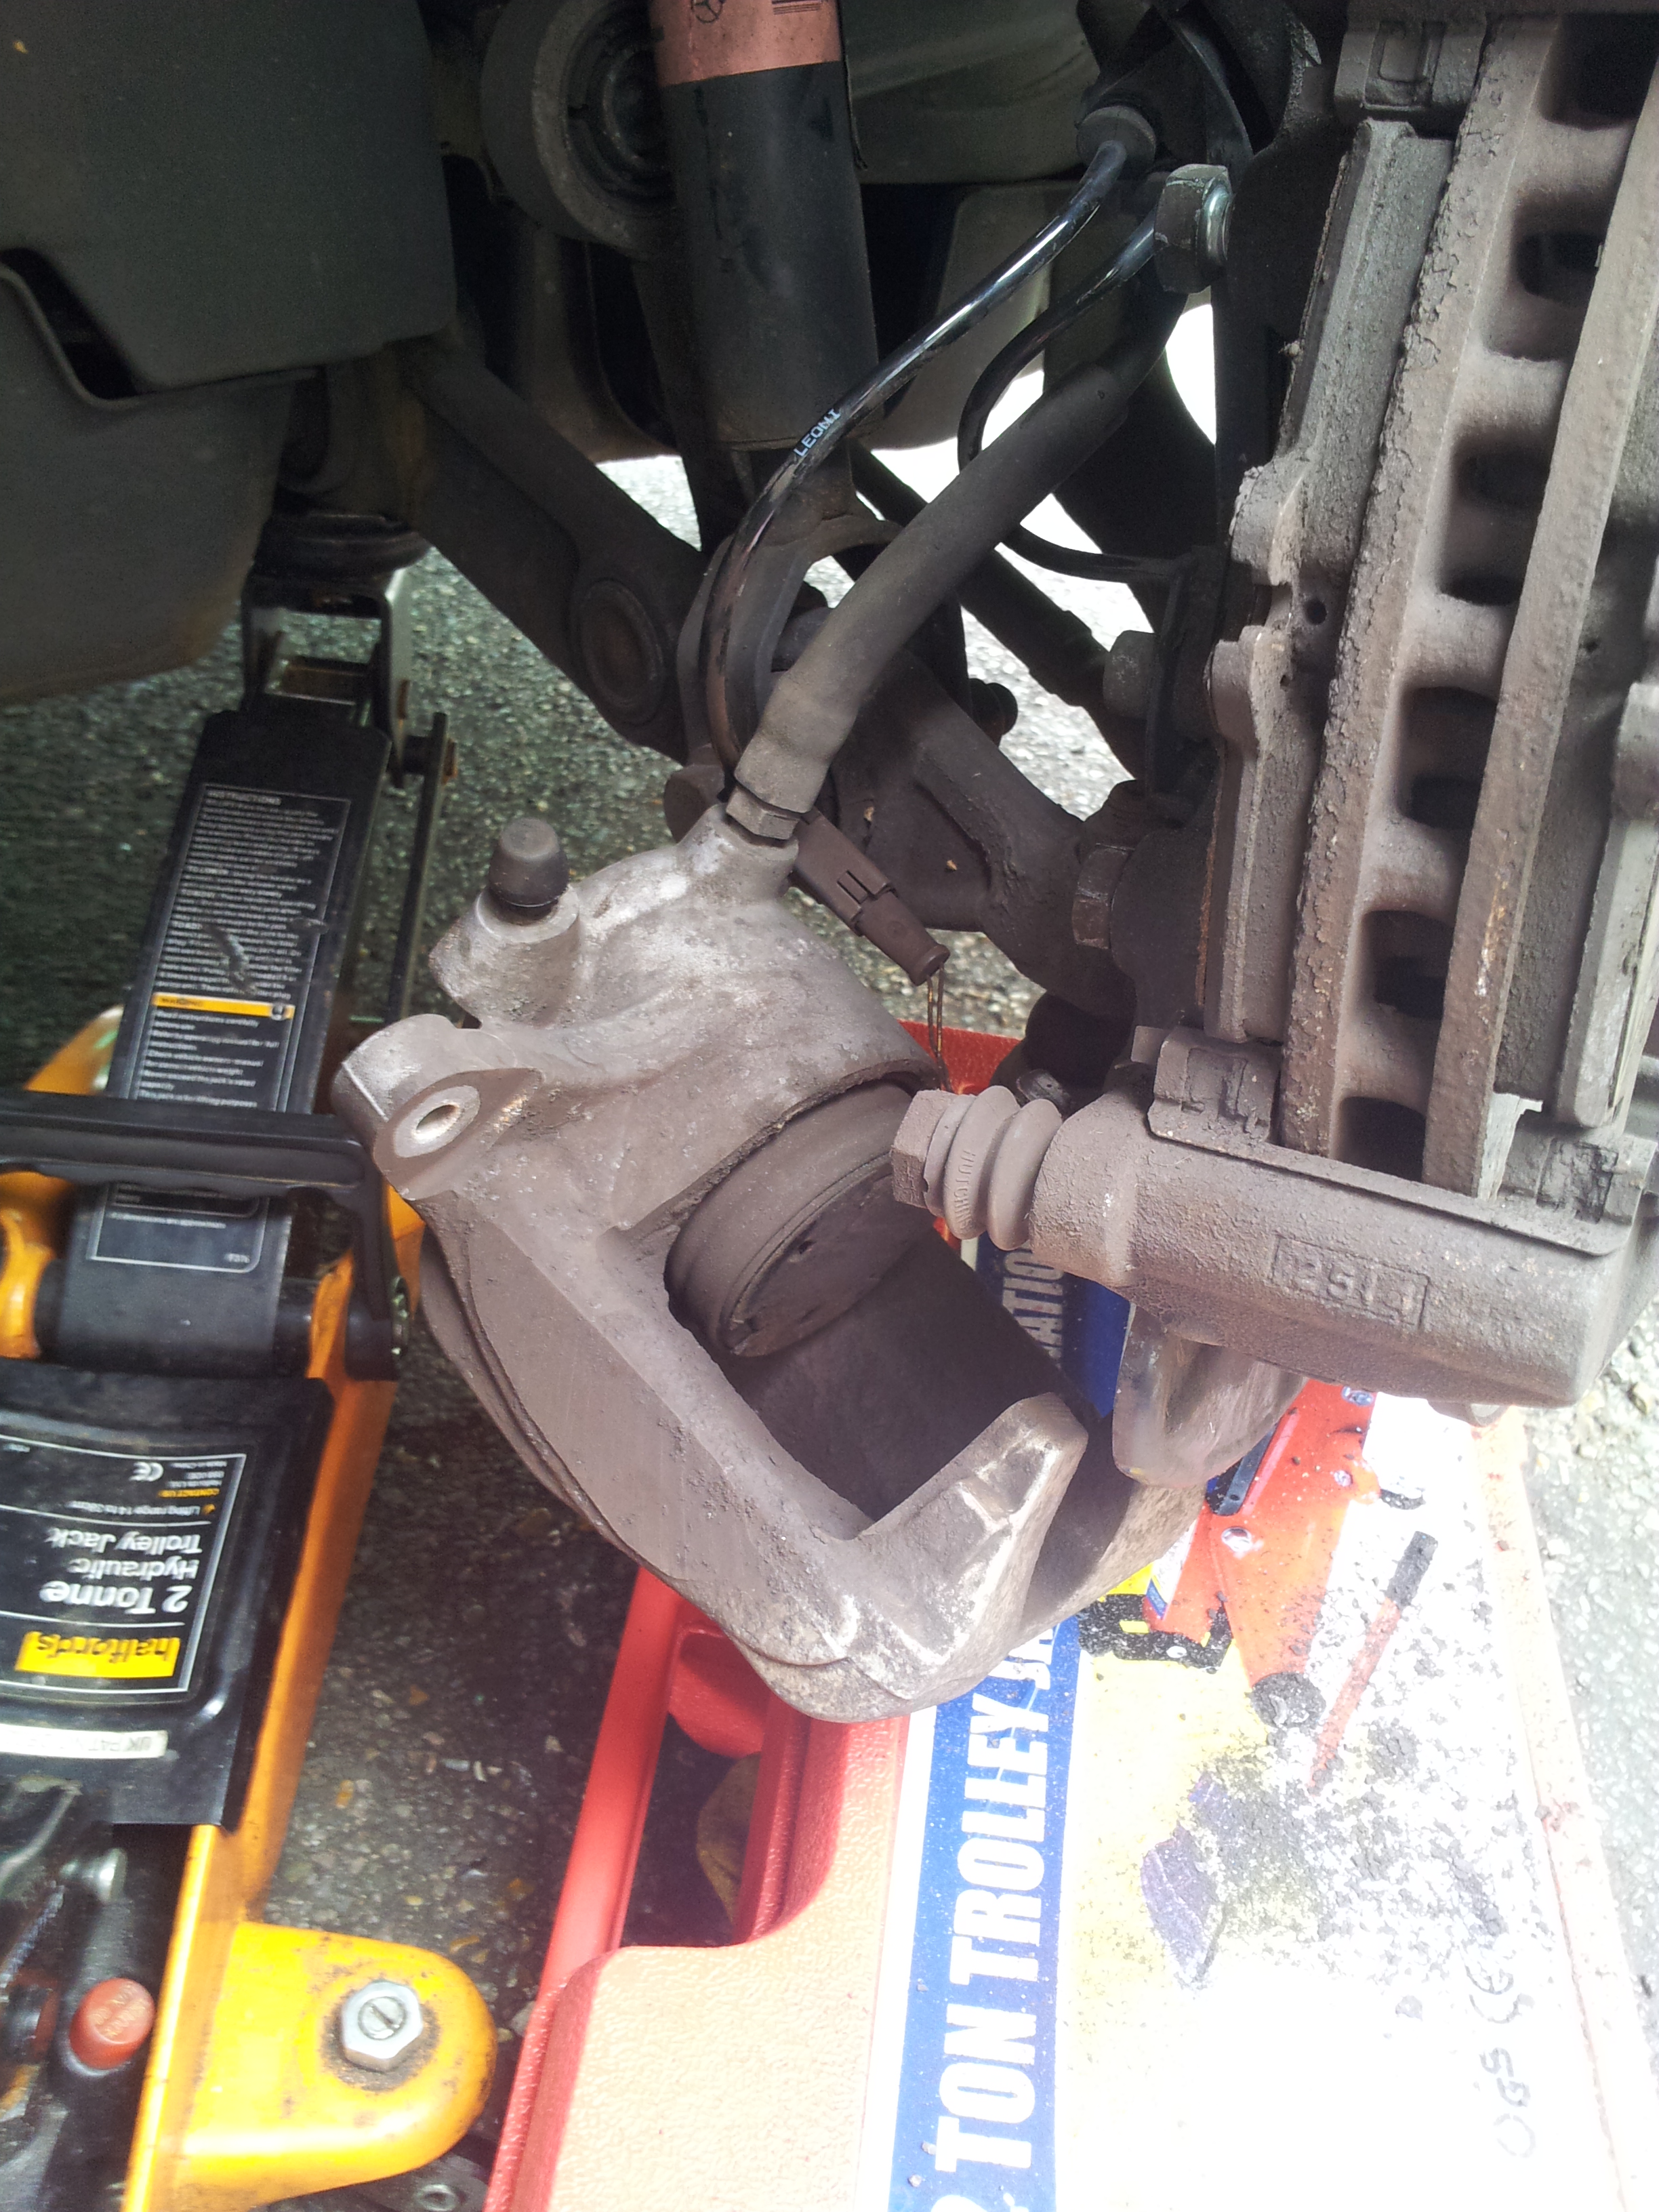
5. Once the calipers are unbolted, you can remove pads from the pad carriers:
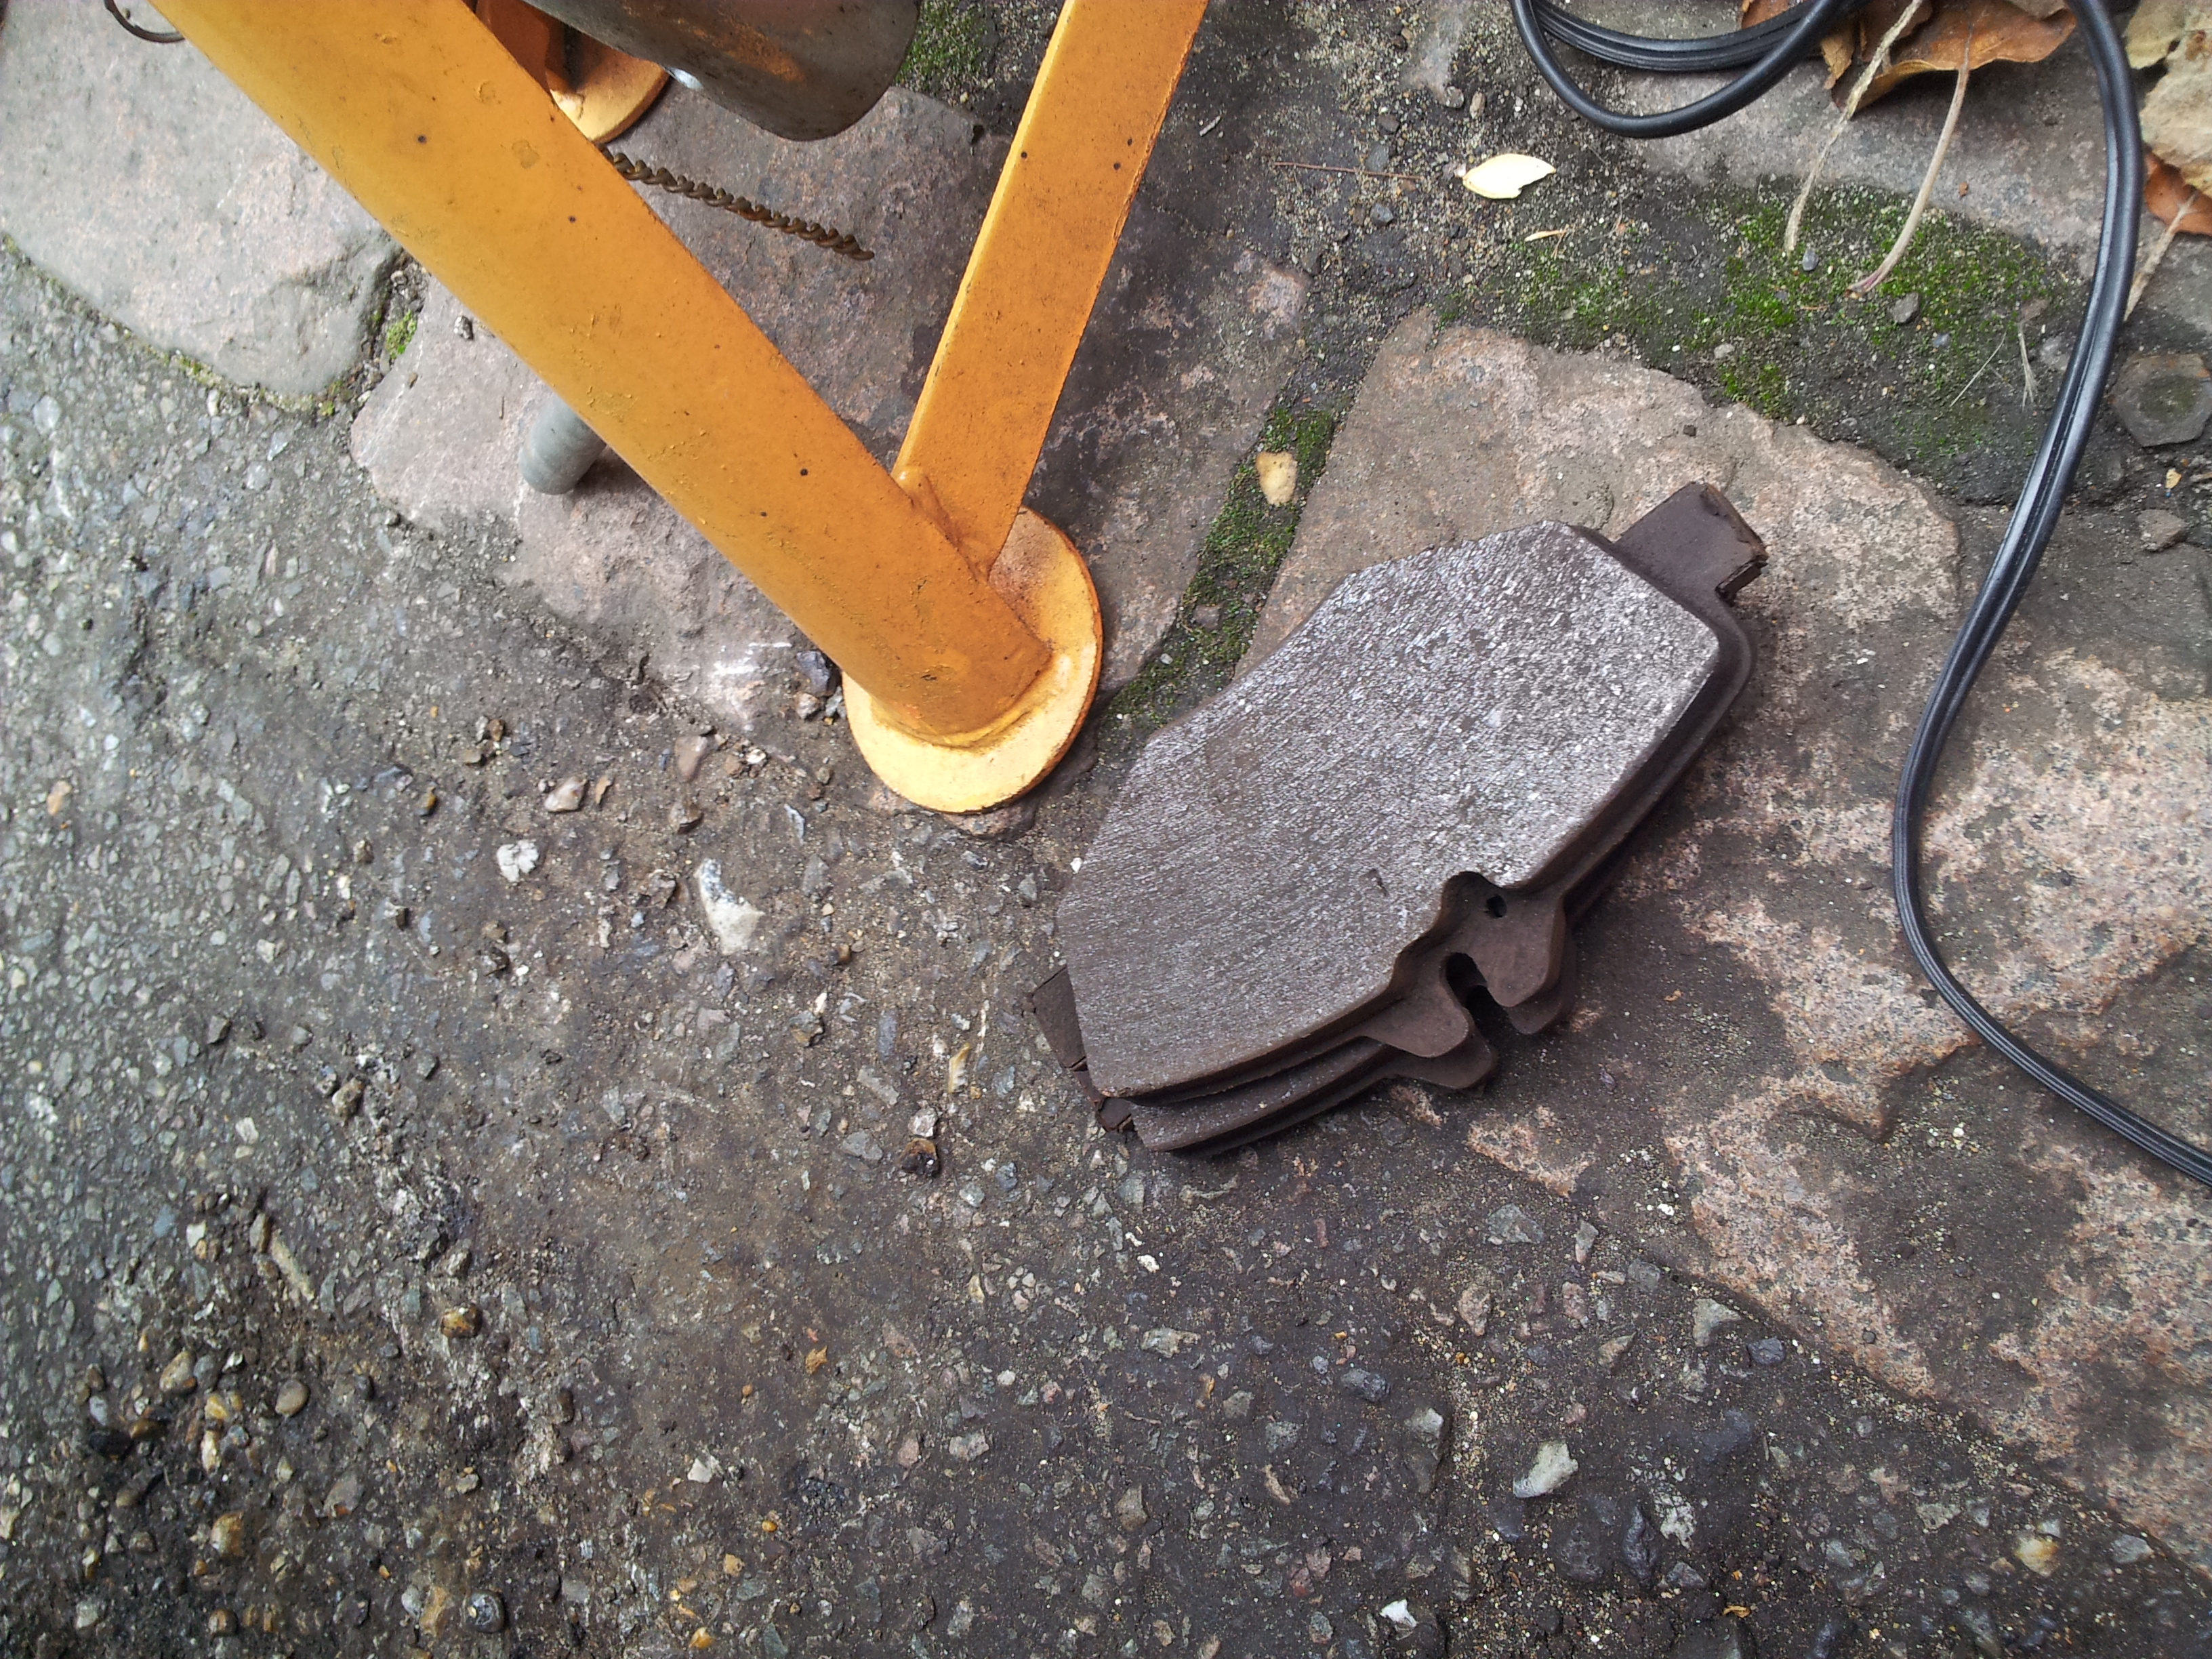
Once the old pads have been removed, toss them aside
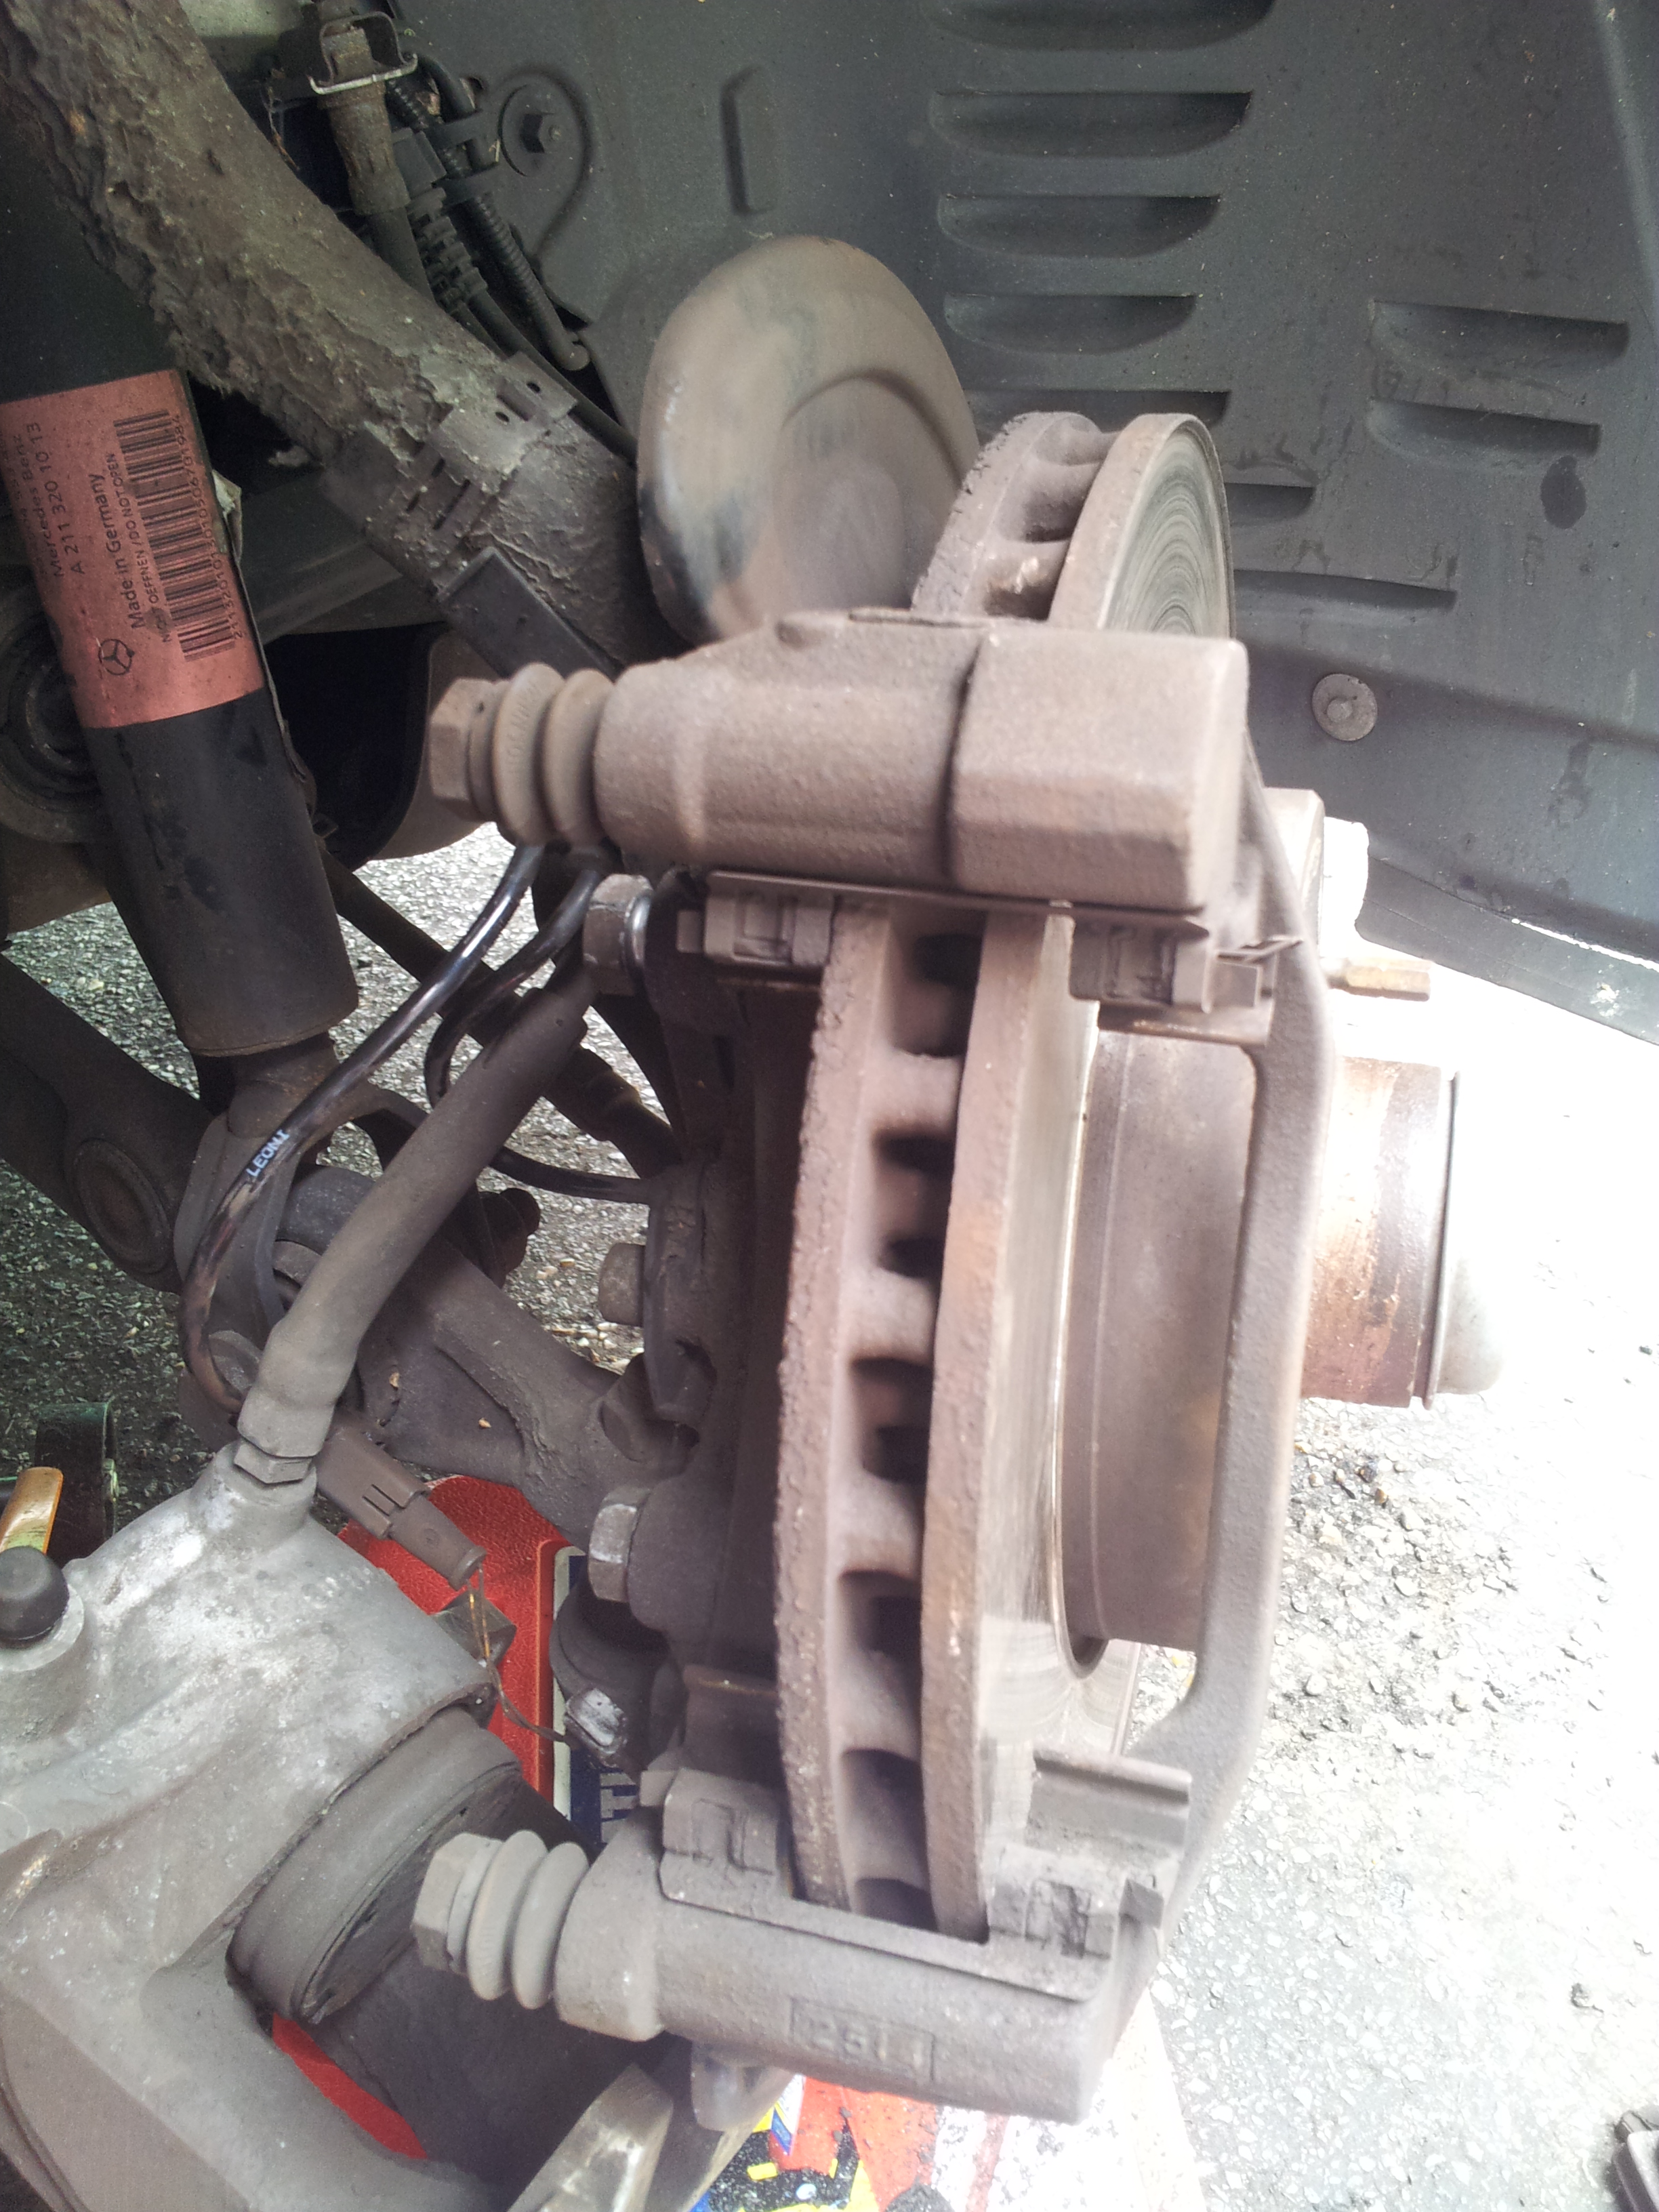
6. Now we should remove the pad carrier, undo the pad carrier bolts:
Top and bottom bolts, once removed you can remove the pad carrier:

7. Once removed, I removed the pad retaining clips and cleaned up the carrier mounts with a wire brush, this is what tends to cause*squeaky*brakes or binding brakes:

I also cleaned the inside of the caliper area, evidence of the crap that get stuck there is on the jack box!
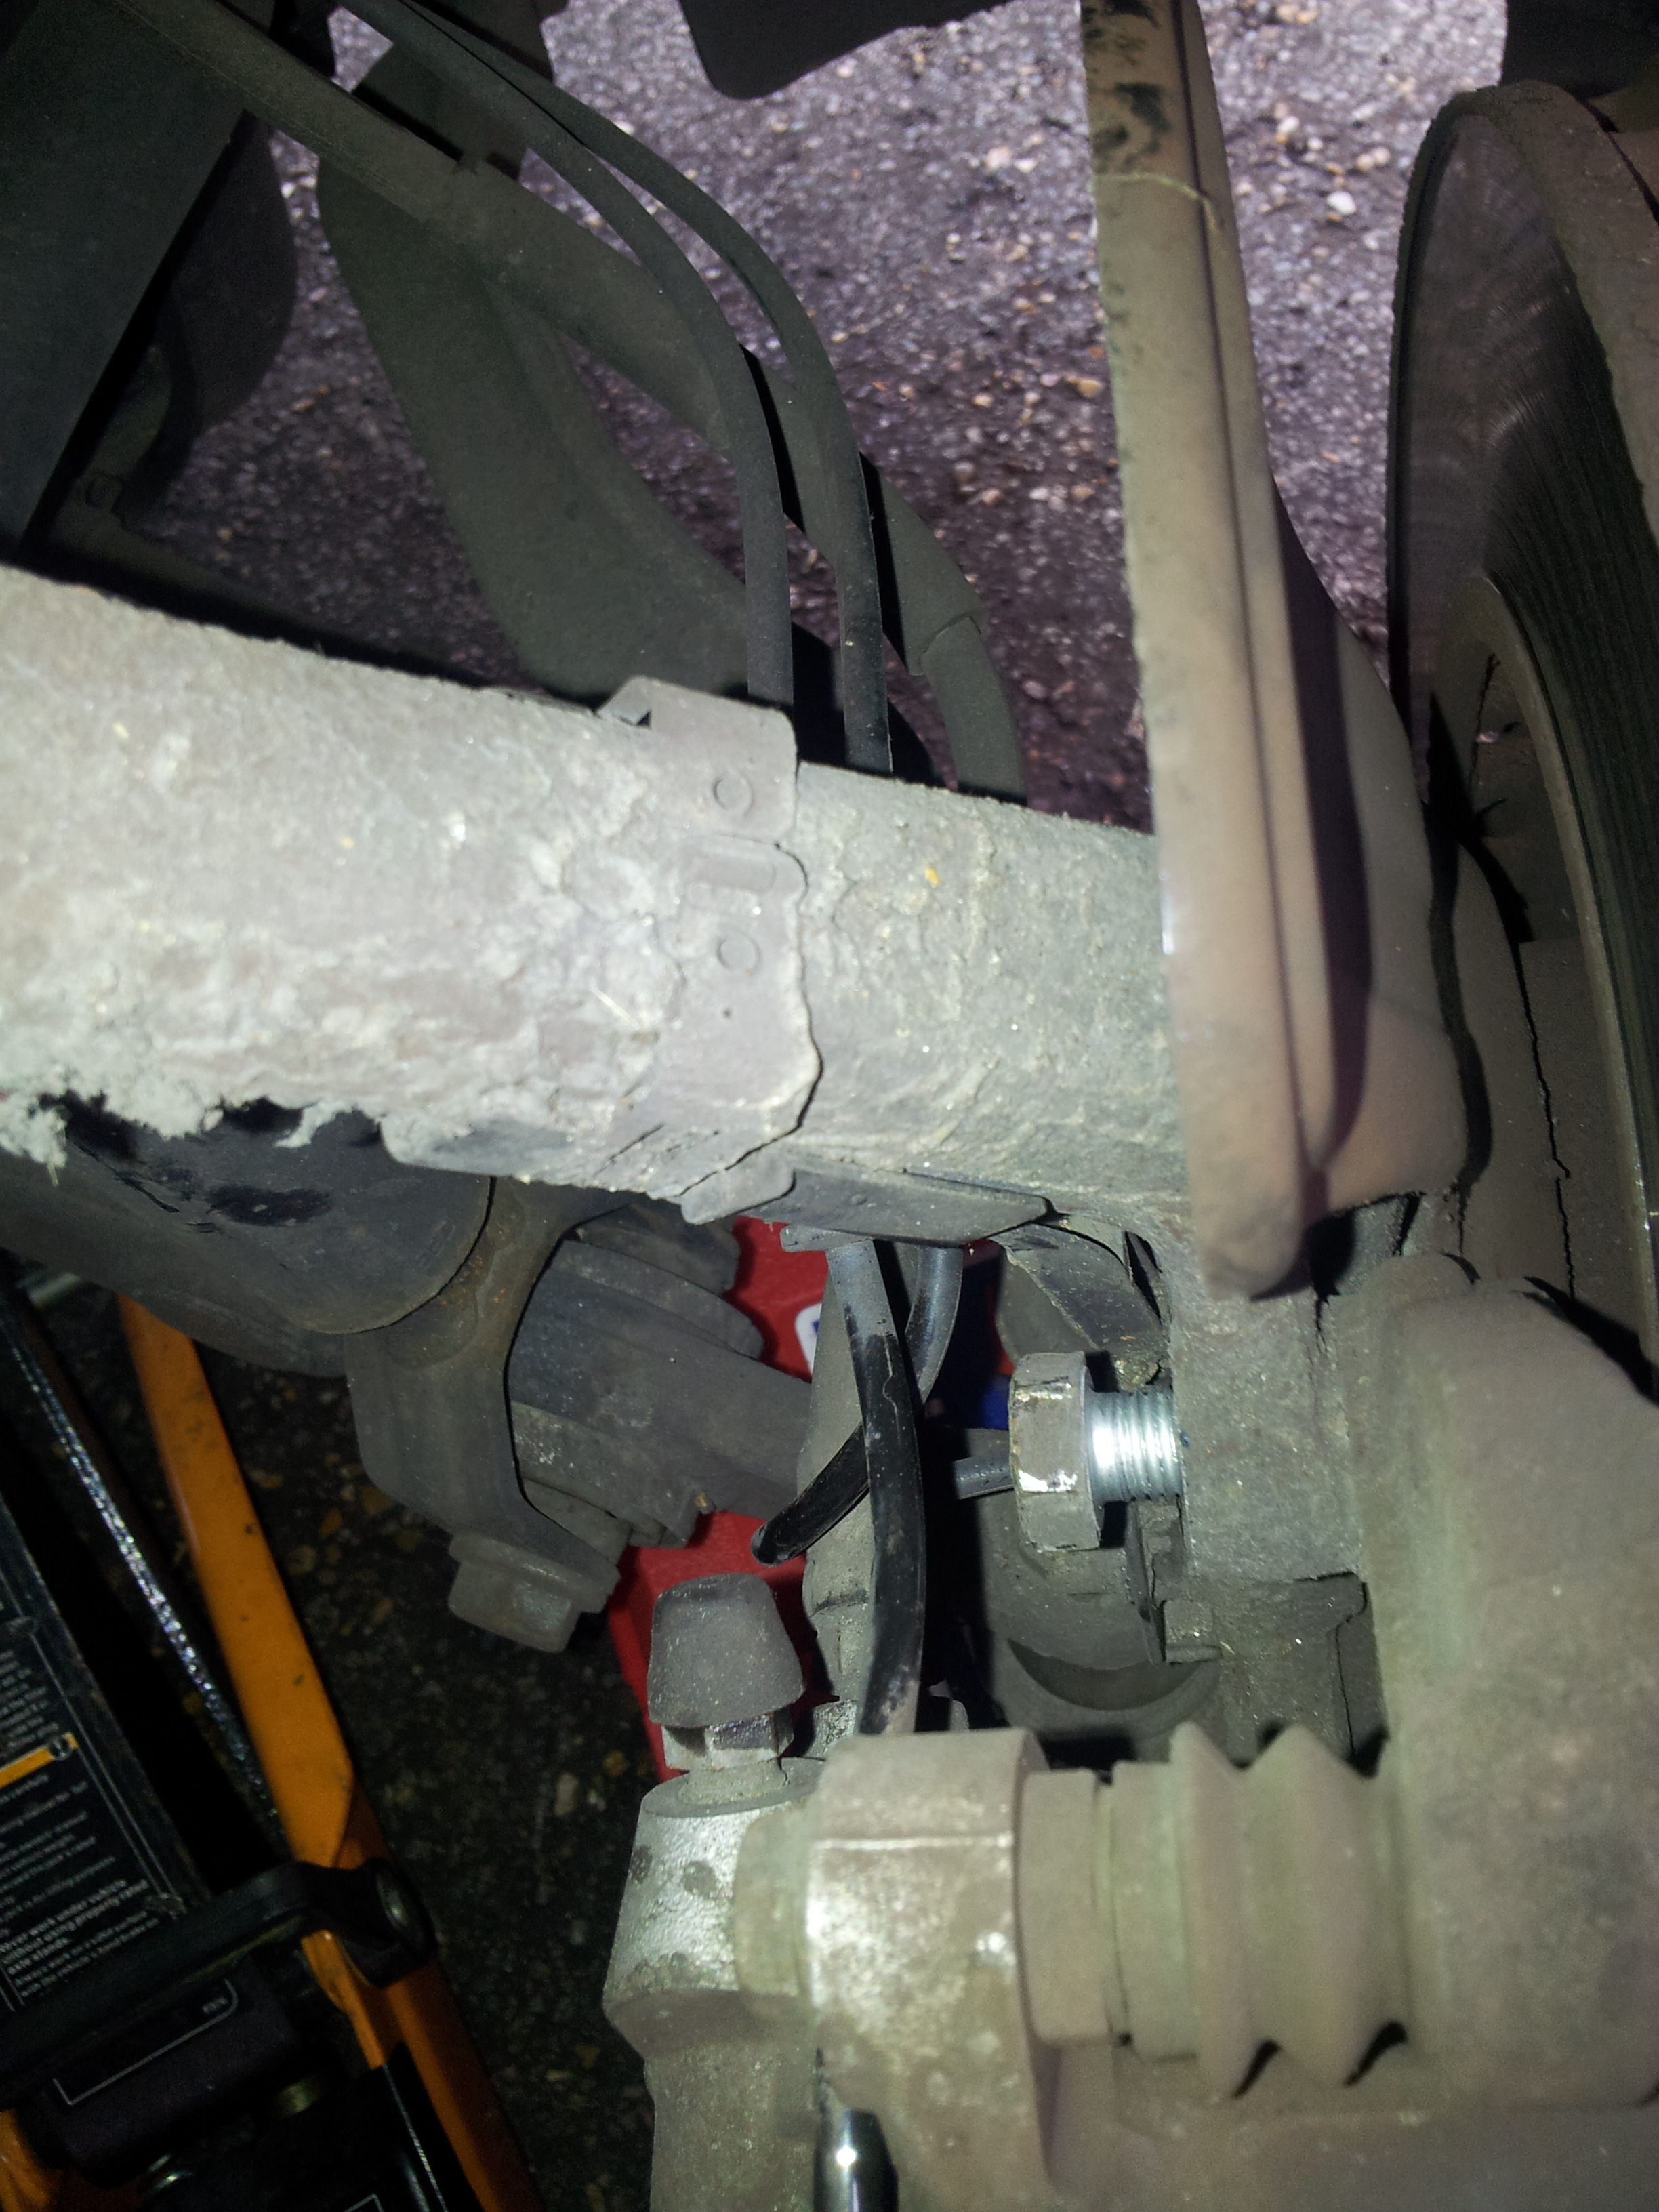
8. The next stage is to remove the disc from the hub. Firstly, remove the Hex nut*retaining*bolt shown below (on a new disc as I forgot to take a before pic
:*

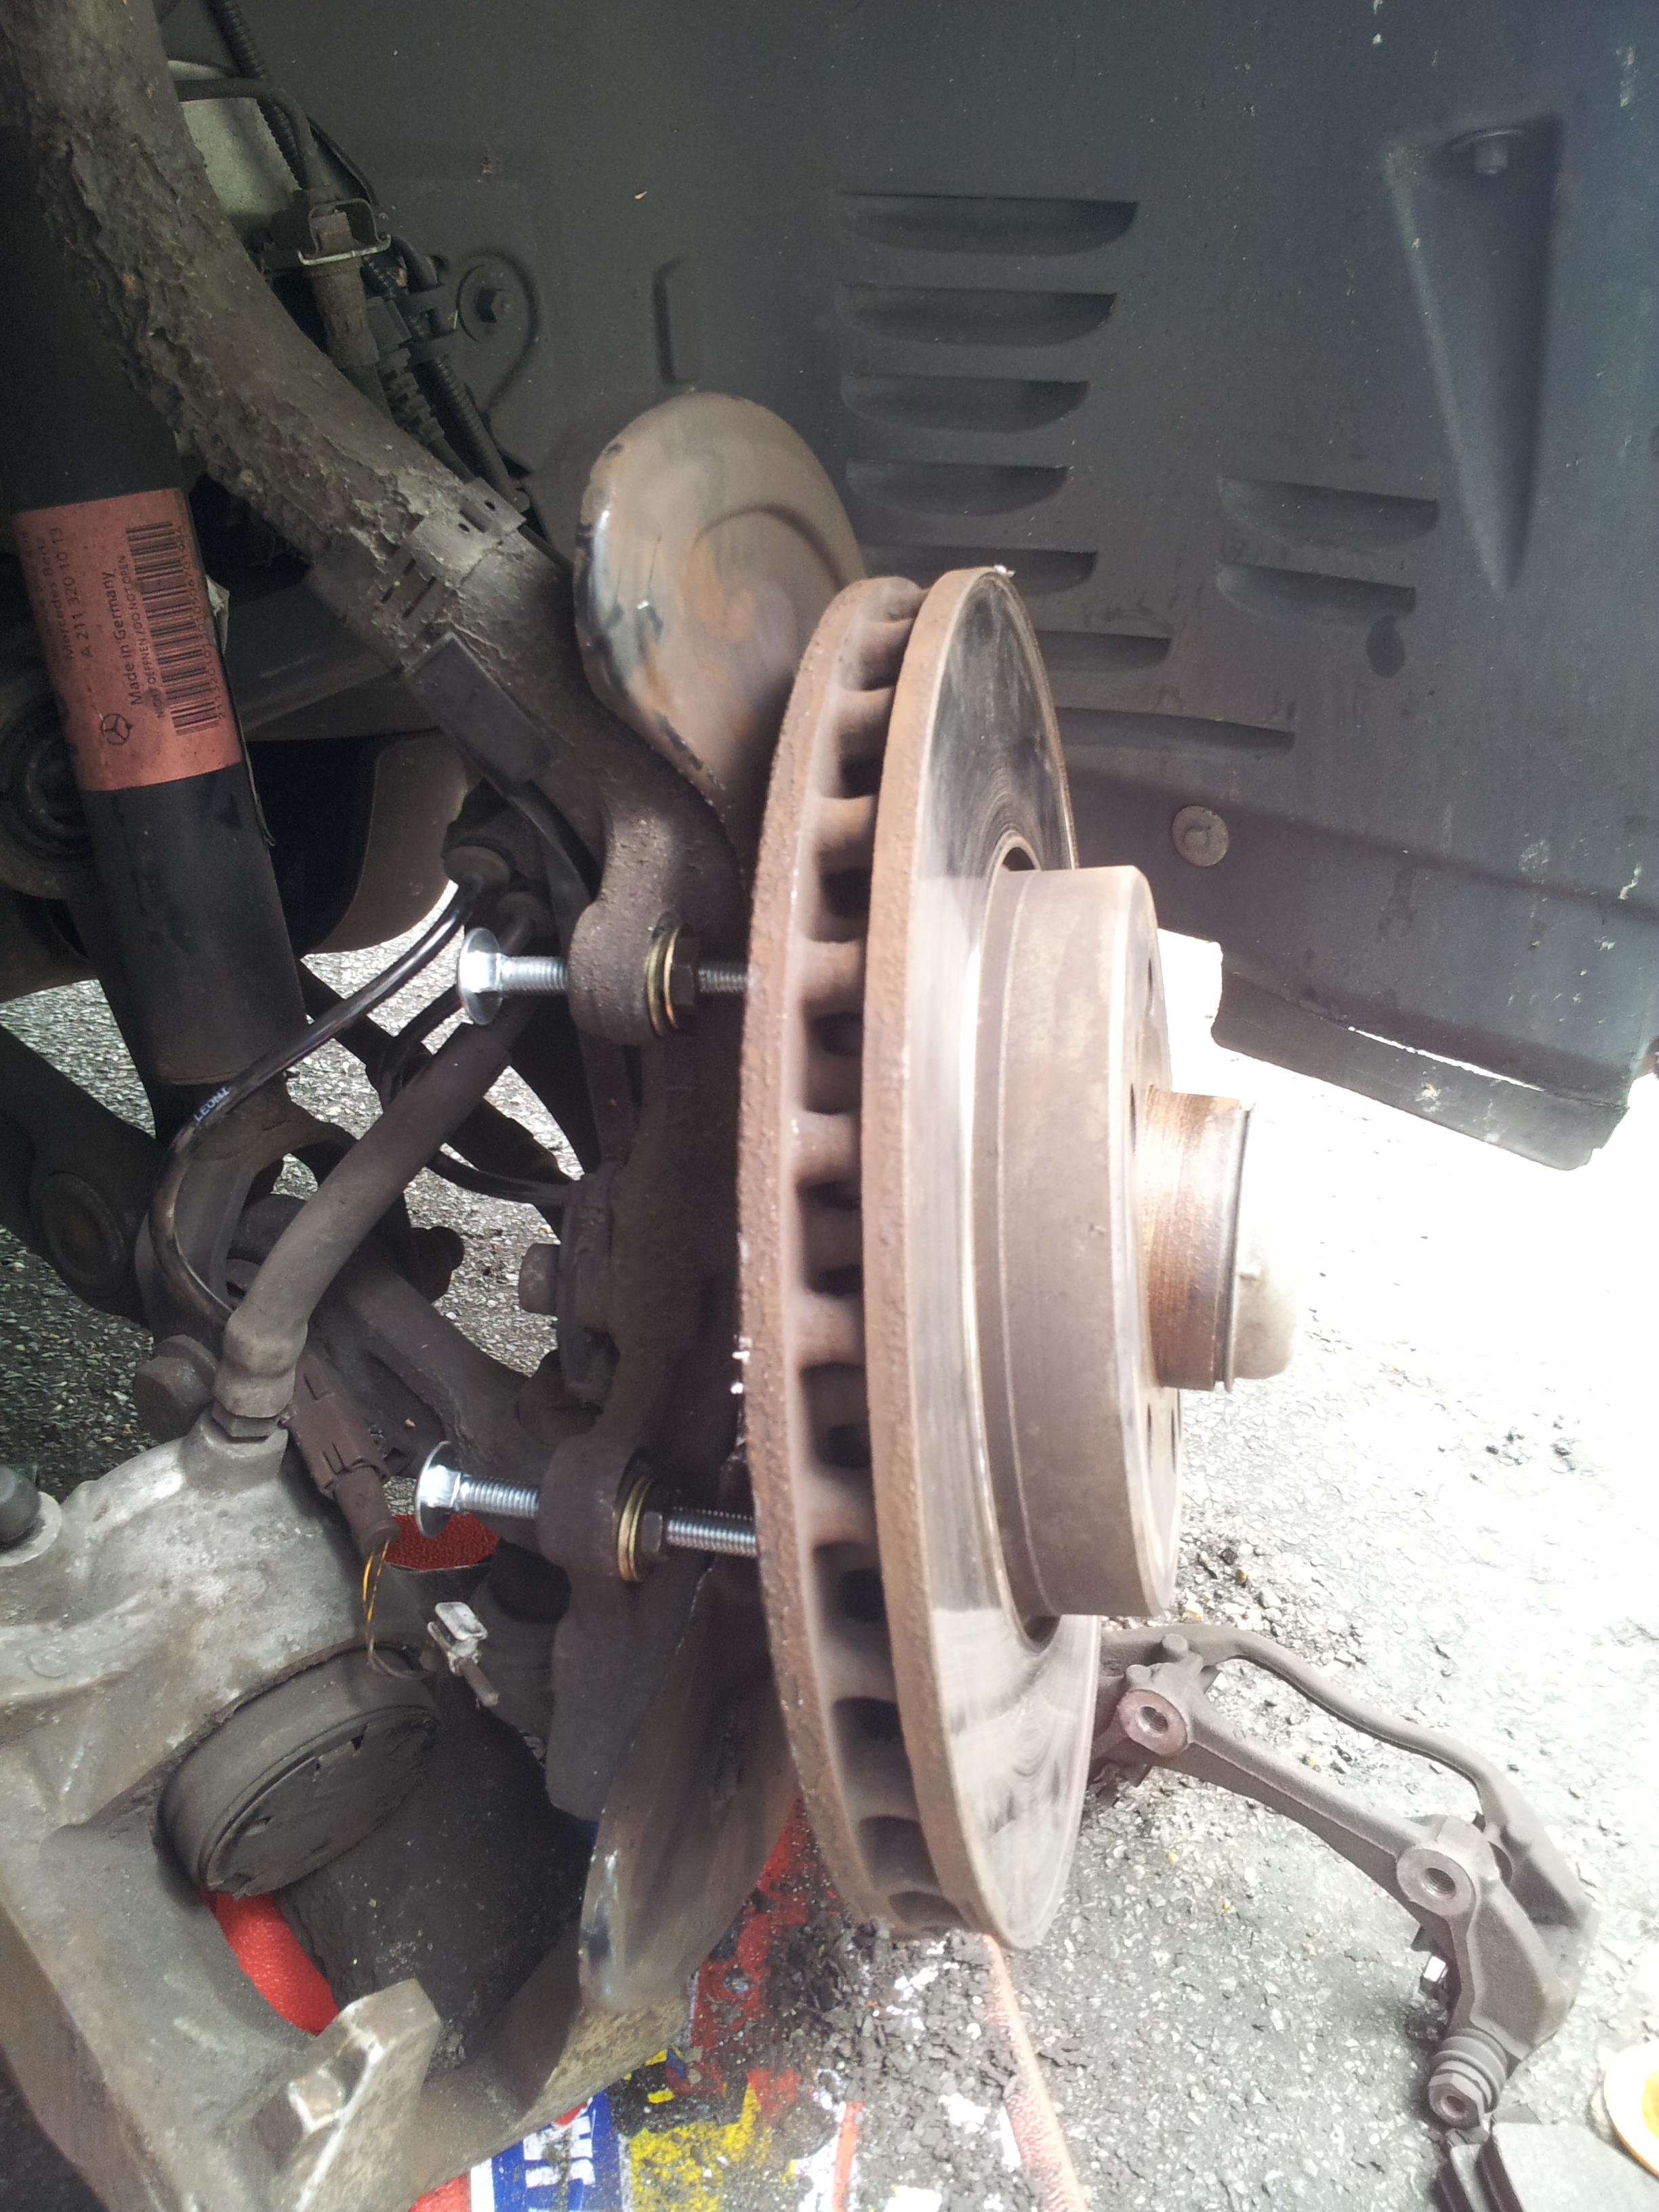
Once removed, give the disc a light tap from behind with a rubber mallet. In most cases it will come off without a fight. If the disc has been on there for a long time, its likely that rust/corrosion around the hub centre is keeping it attached. As I did not want to subject the front wheel bearing to lots of shock force, I used some bolts and nuts/washers to slowly introduce pressure on the back of the disk, in the setup below:
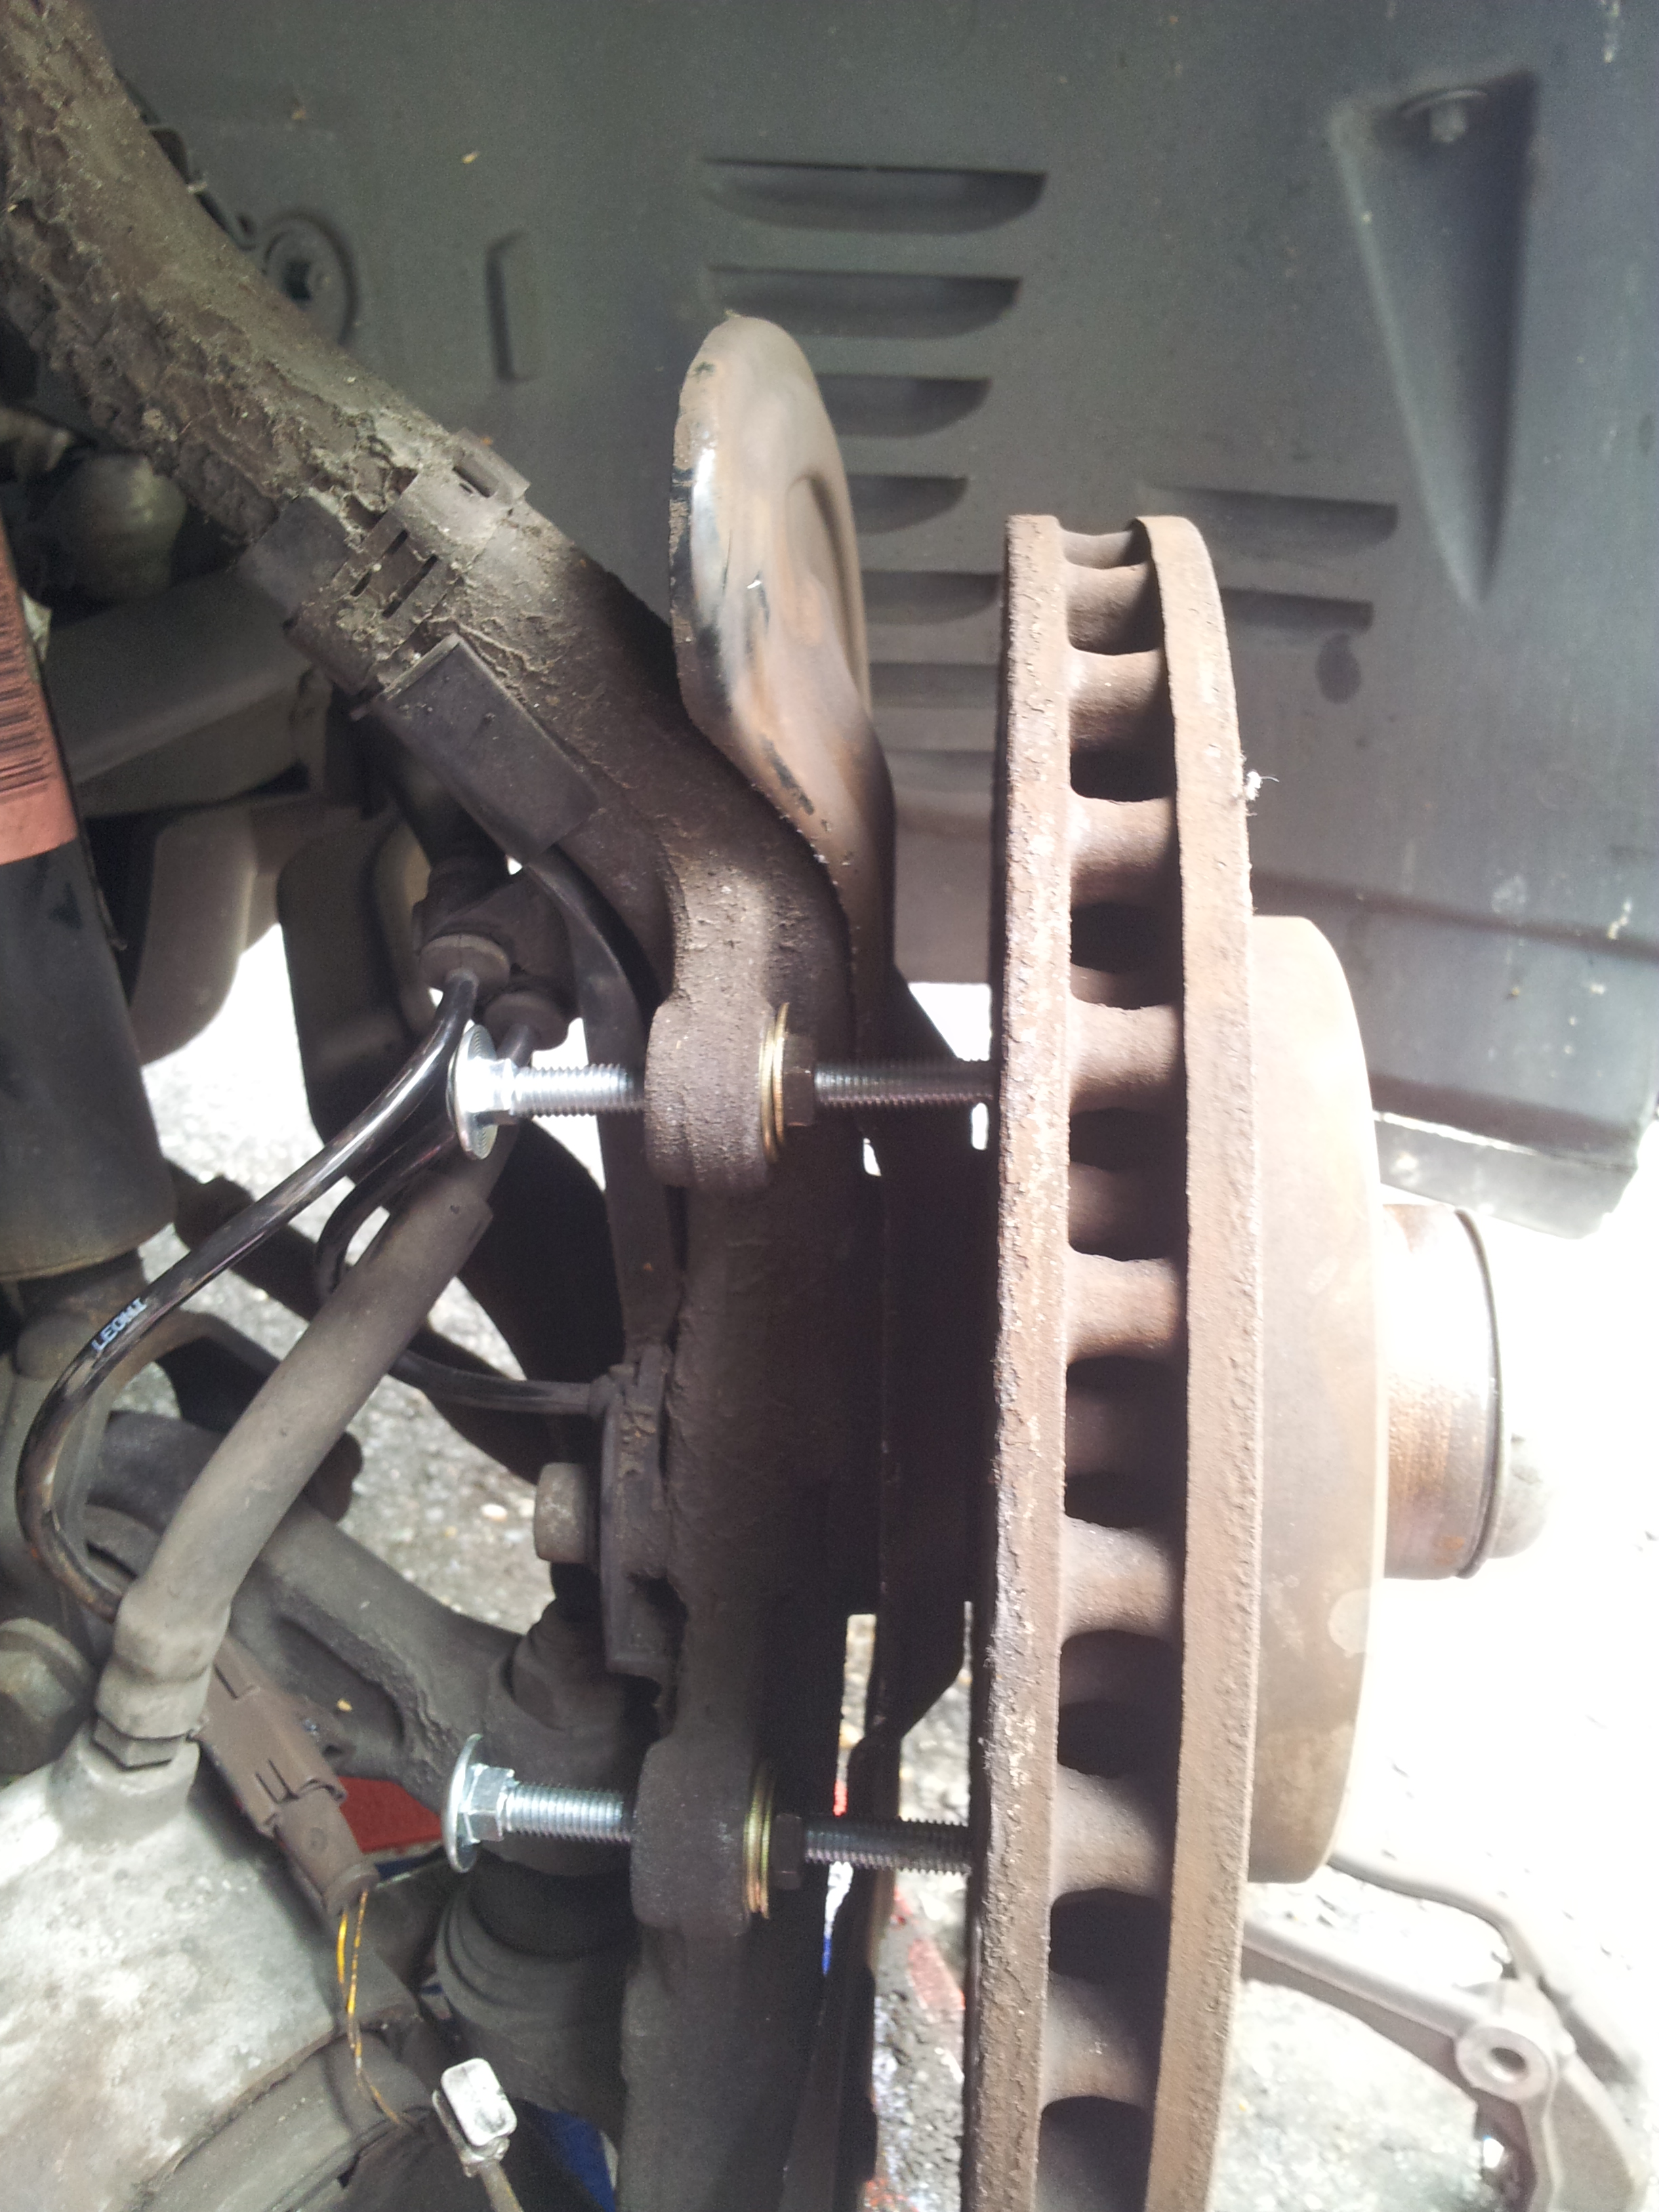
Whilst holding the back of the coach bolts, tighten the top and bottom nuts a couple of turns each, not too much as you do not want to subject the caliper mount to too much force. After there is some pressure on the disc, give it another tap with the rubber mallet. In my case, the bolts needed a couple more turns before the disc popped off:
9. Once the disc is removed, you will be left with the hub face:
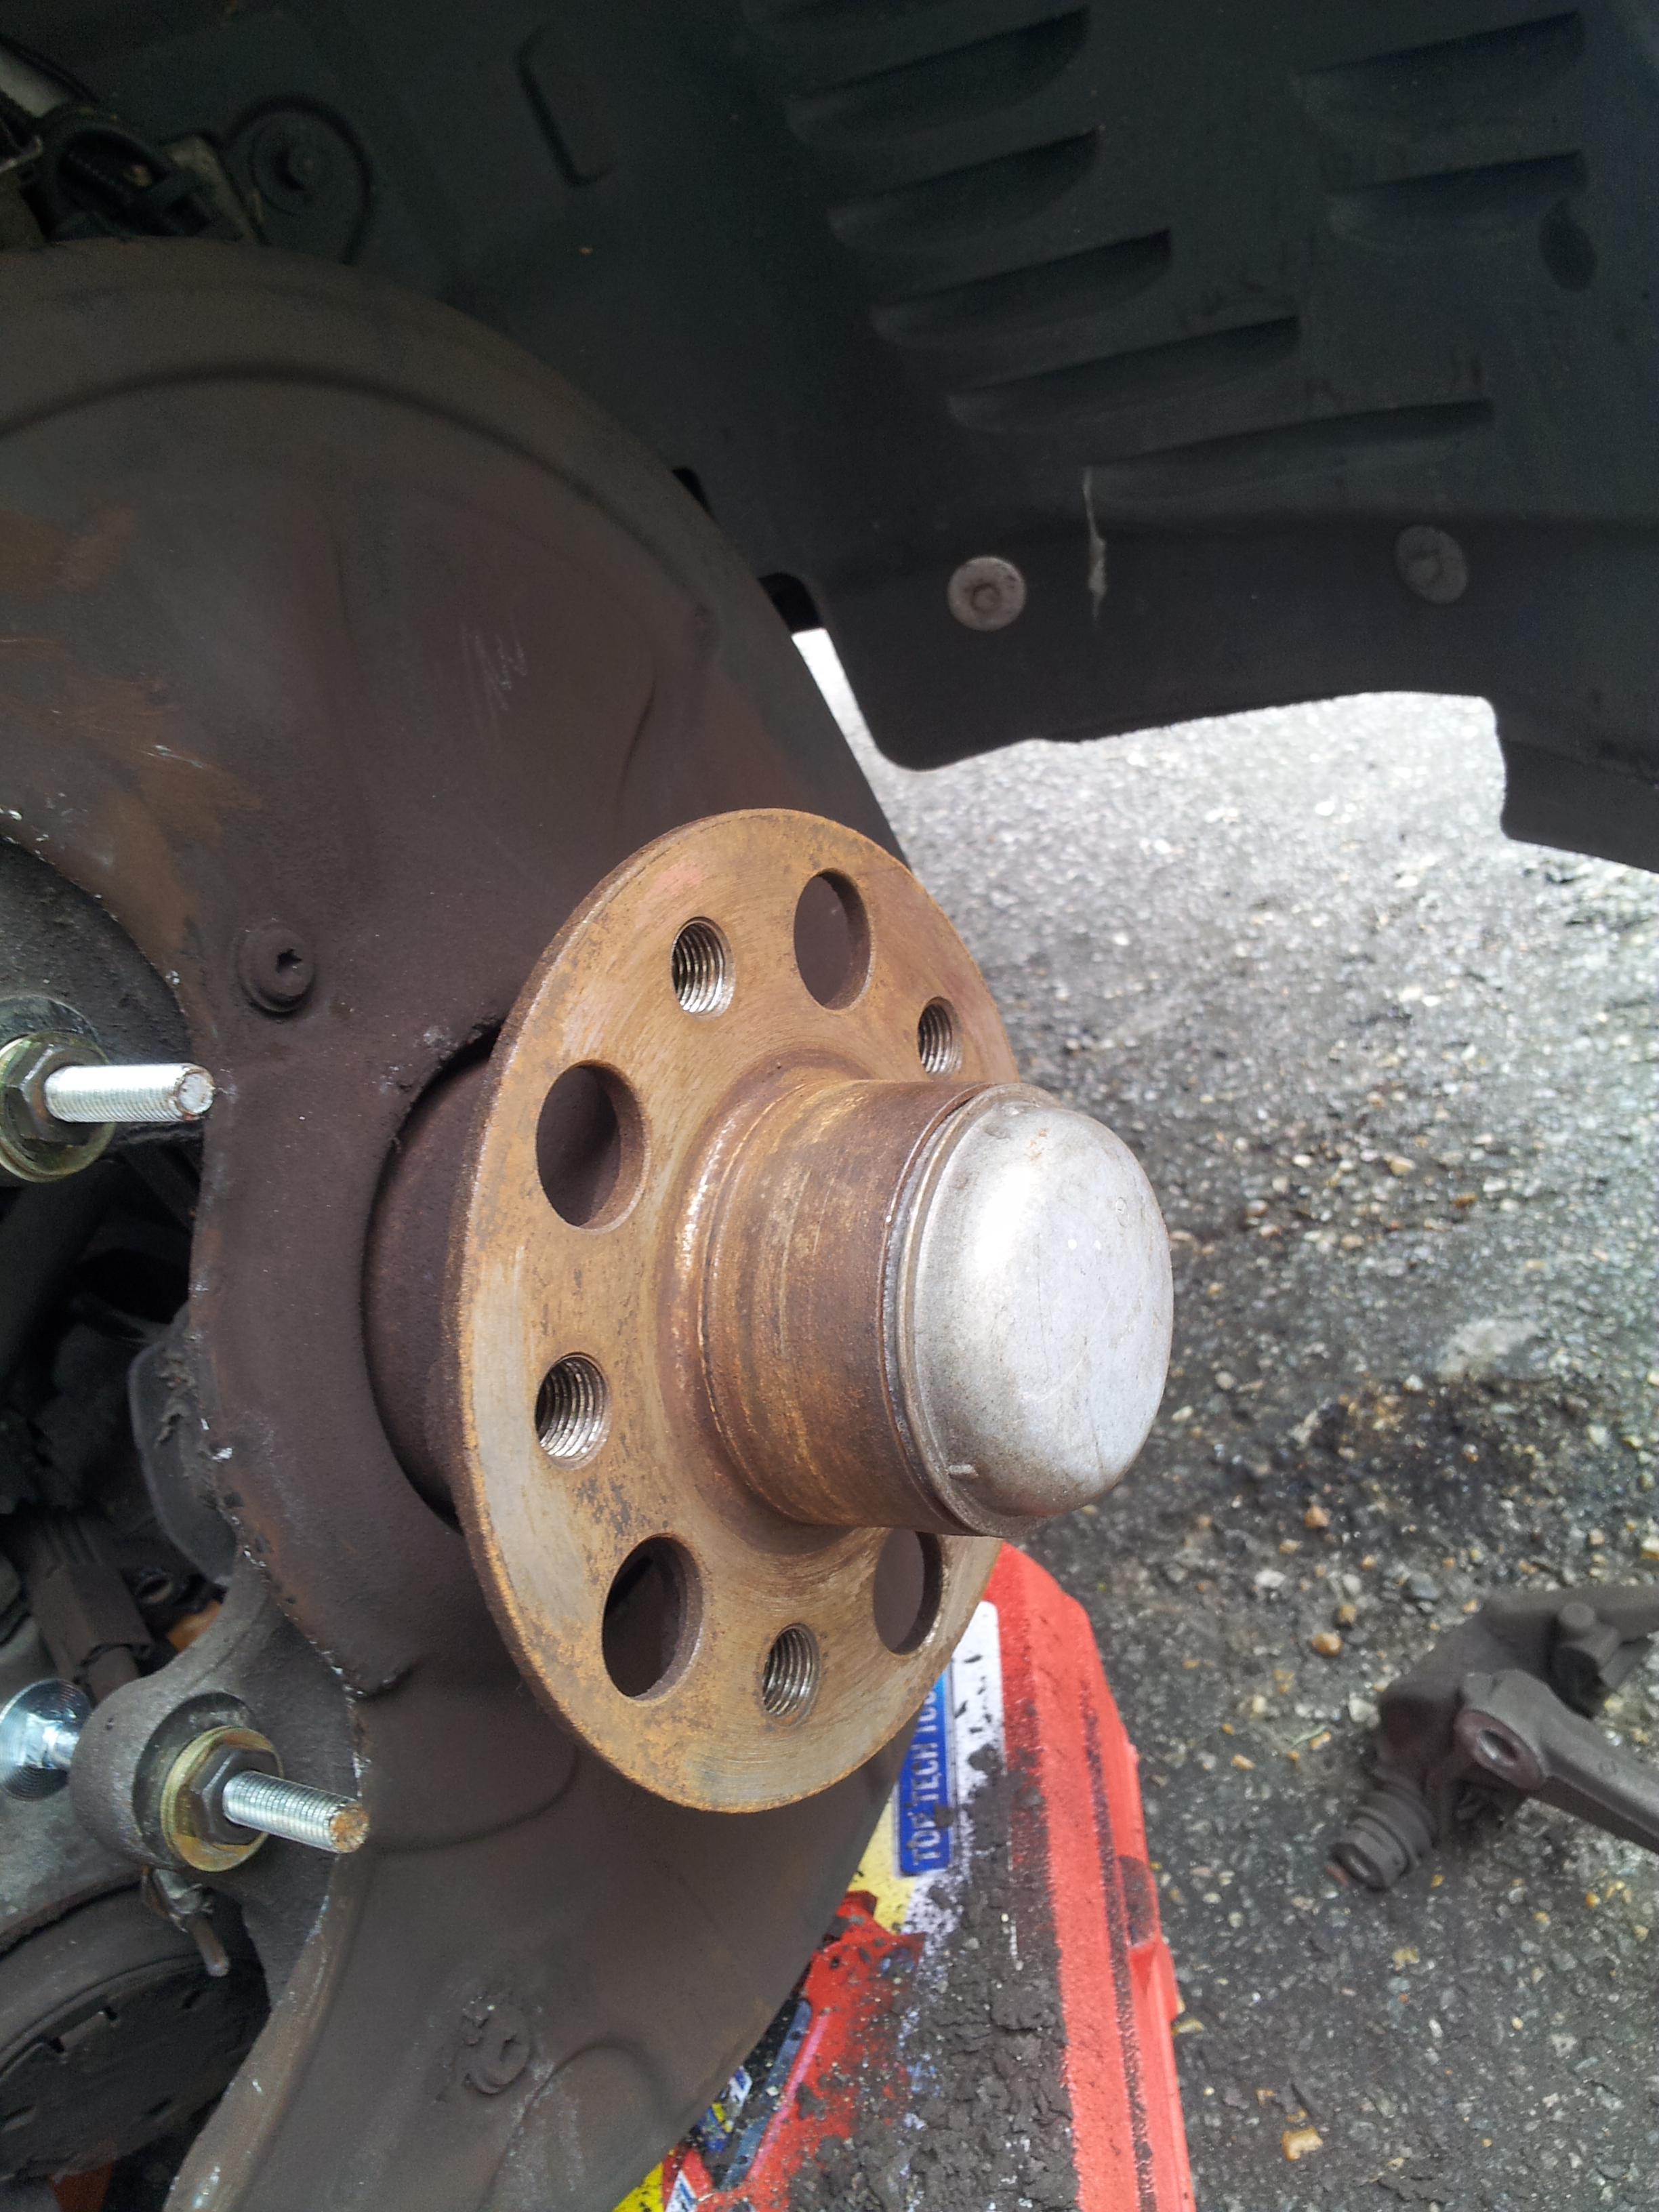
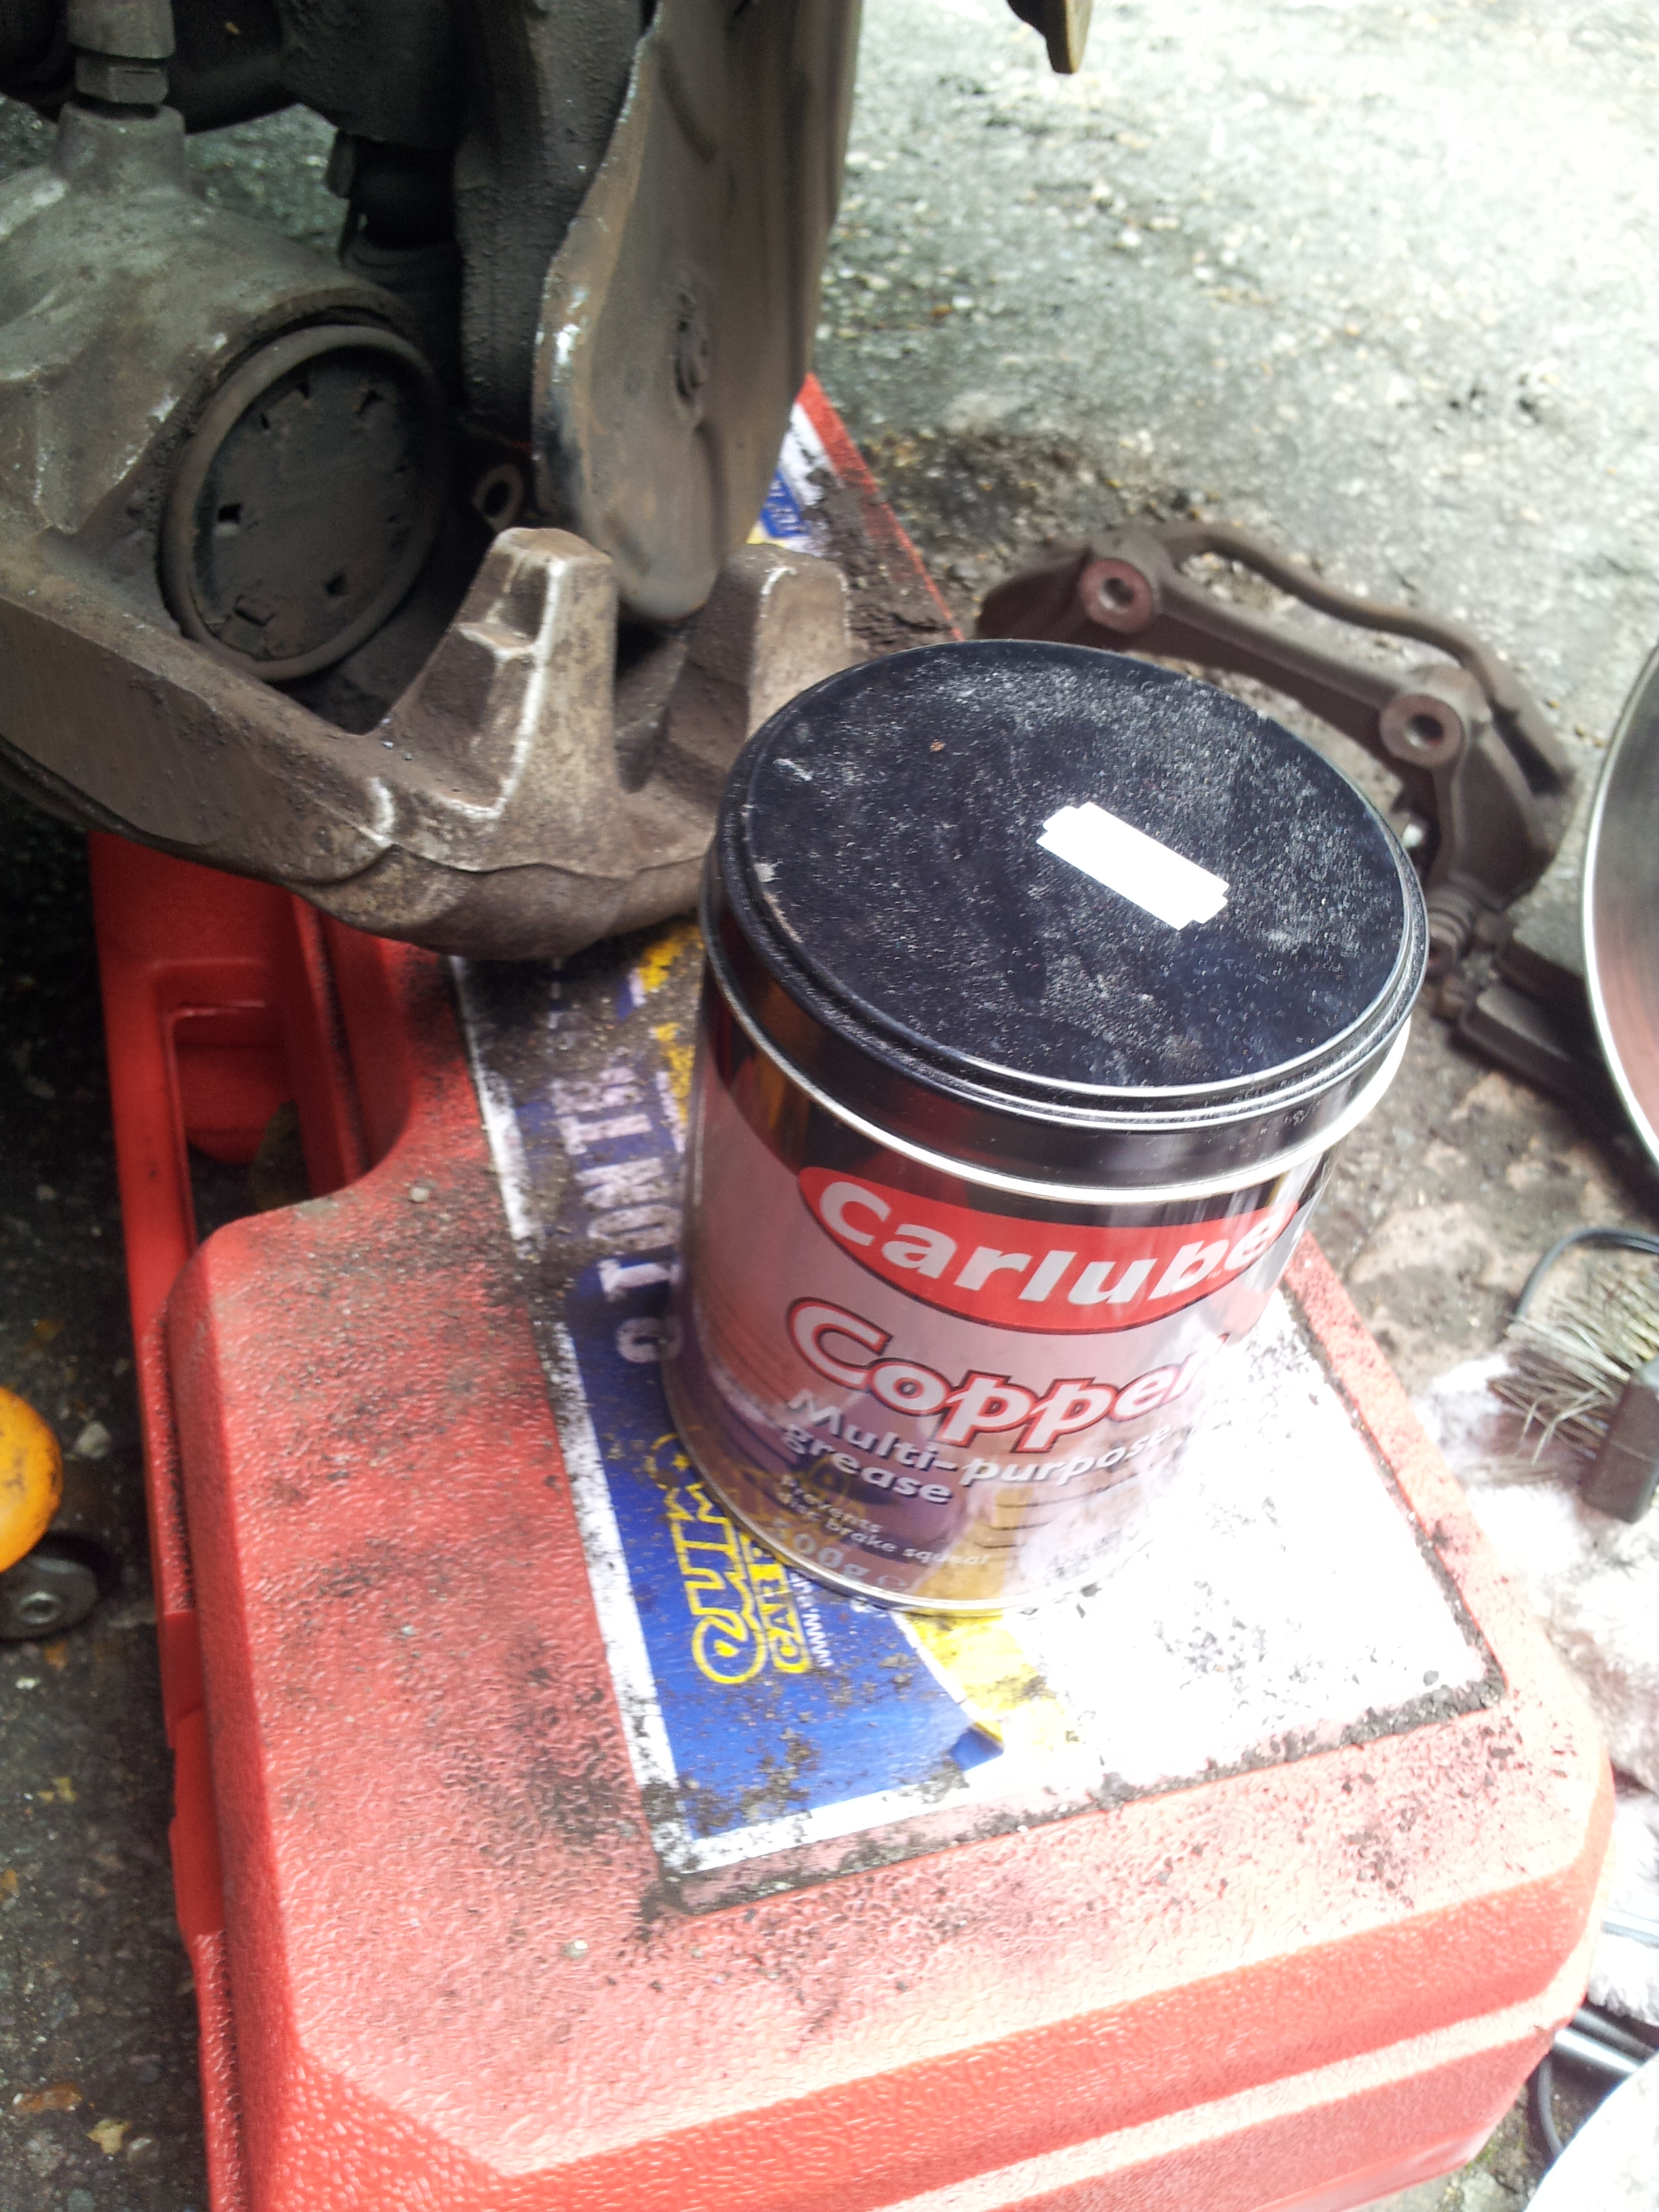
Ensure you give the hub face a good clean with a wire brush and a good coating of cooper grease, especially around the center part where it often bonds to the disc:

10. Now that the hub is ready to accept the new disc, offer it up and align the retaining bolt hole:

New disc ready to go on.
Ensure that you put a little bit of loctite on the retaining screw:

Bolted up and secured in place:
11. Now that the disc is in place and bolted up, lets switch attention to the pads. Firstly we must open the top of the brake reservoir and syphone off brake fluid until it reaches the Min marker. If this is not done, then fluid will overflow when we press the piston back into the caliper. (I have no pictures of this as I forgot to take them
12. We must now push the piston back into the caliper to make way for the new original thickness pads. I used a piece of wood (old broom handle) and a C clamp to slowly wind the piston in like so:

Wind it in slowly, keeping an eye on the brake fluid level, until the piston is flush with the caliper body (being careful not to pinch the rubber surround). Once this is done, you can replace the metal cap that goes inside the piston with the new one from the pad kit
13. *Replace the pad retaning springs/clips with new ones that should be included with the replacement break pads, Give them a coating of copper grease to stop corrosion sealing them in, and ensure they are fully seated.
Now its time to refit the pad carrier, you should use new bolts but I reused the old ones as they looked fine. Make sure to apply a bit of thread lock to these bolts as well:

Make sure your bolts arent right next to all the crud like mine where
and use them to remount them, I used a 12v torque wrench set to 100nm to ensure they were done up tightly. Once the carrier is in place:
Once the carrier is in place, obtain the new brake pads, Take note, that on the w211, the pads are sided, the right hand side had sensor holes closer to the backing place and the left hand side had holes further away, as such the replacement sensors will only fit their respective side (As they also have different connectors) not sure of the reason for this. *A pic of the left and right side pad together:

Once the pads have been inserted into the carrier, you should be left with something resembling this:

You also start to get a nice sense of*achievement*at this point
14. The next stage is to re-attach the caliper, offer up the caliper to the pad carier and use new bolts (only 2 bolts where provided in my pad set of 4! for some odd reason)

Shiny new bolts, on a not so shiny hand!
Once re-attached (and torqued up correctly) you will have this:

Insert the new pad wear sensor into the pad sensor hole and re-attach the bolt securing the sensor to the caliper, I re-used the old one as it wasnt worn and I managed to break the replacement by fitting it incorrectly:

Thats the front right brake done! Repeat the same process on the left hand side and your front brakes are now done!
Onto the back brakes.
16. Jack and support the car and place wheel chocks in front of the front wheels. I also placed the tyre underneath the car to support it in case it rolled. Ensure the handbrake is off. * Also but the car into neutral. Once SBC was disabled, I was not able to get the car out of park. I used the release button through the rear storage compartment underneath D, Remove the wheel:
I then used the c clamp to compress the piston this way, as I would be changing the pads and the discs anyway.
17.
Remove the pad retaining clip. I used a screwdriver to pry it off whilst holding with pliers to ensure it*didn't*fly off.

18. Undo the caliper mounting bolts:
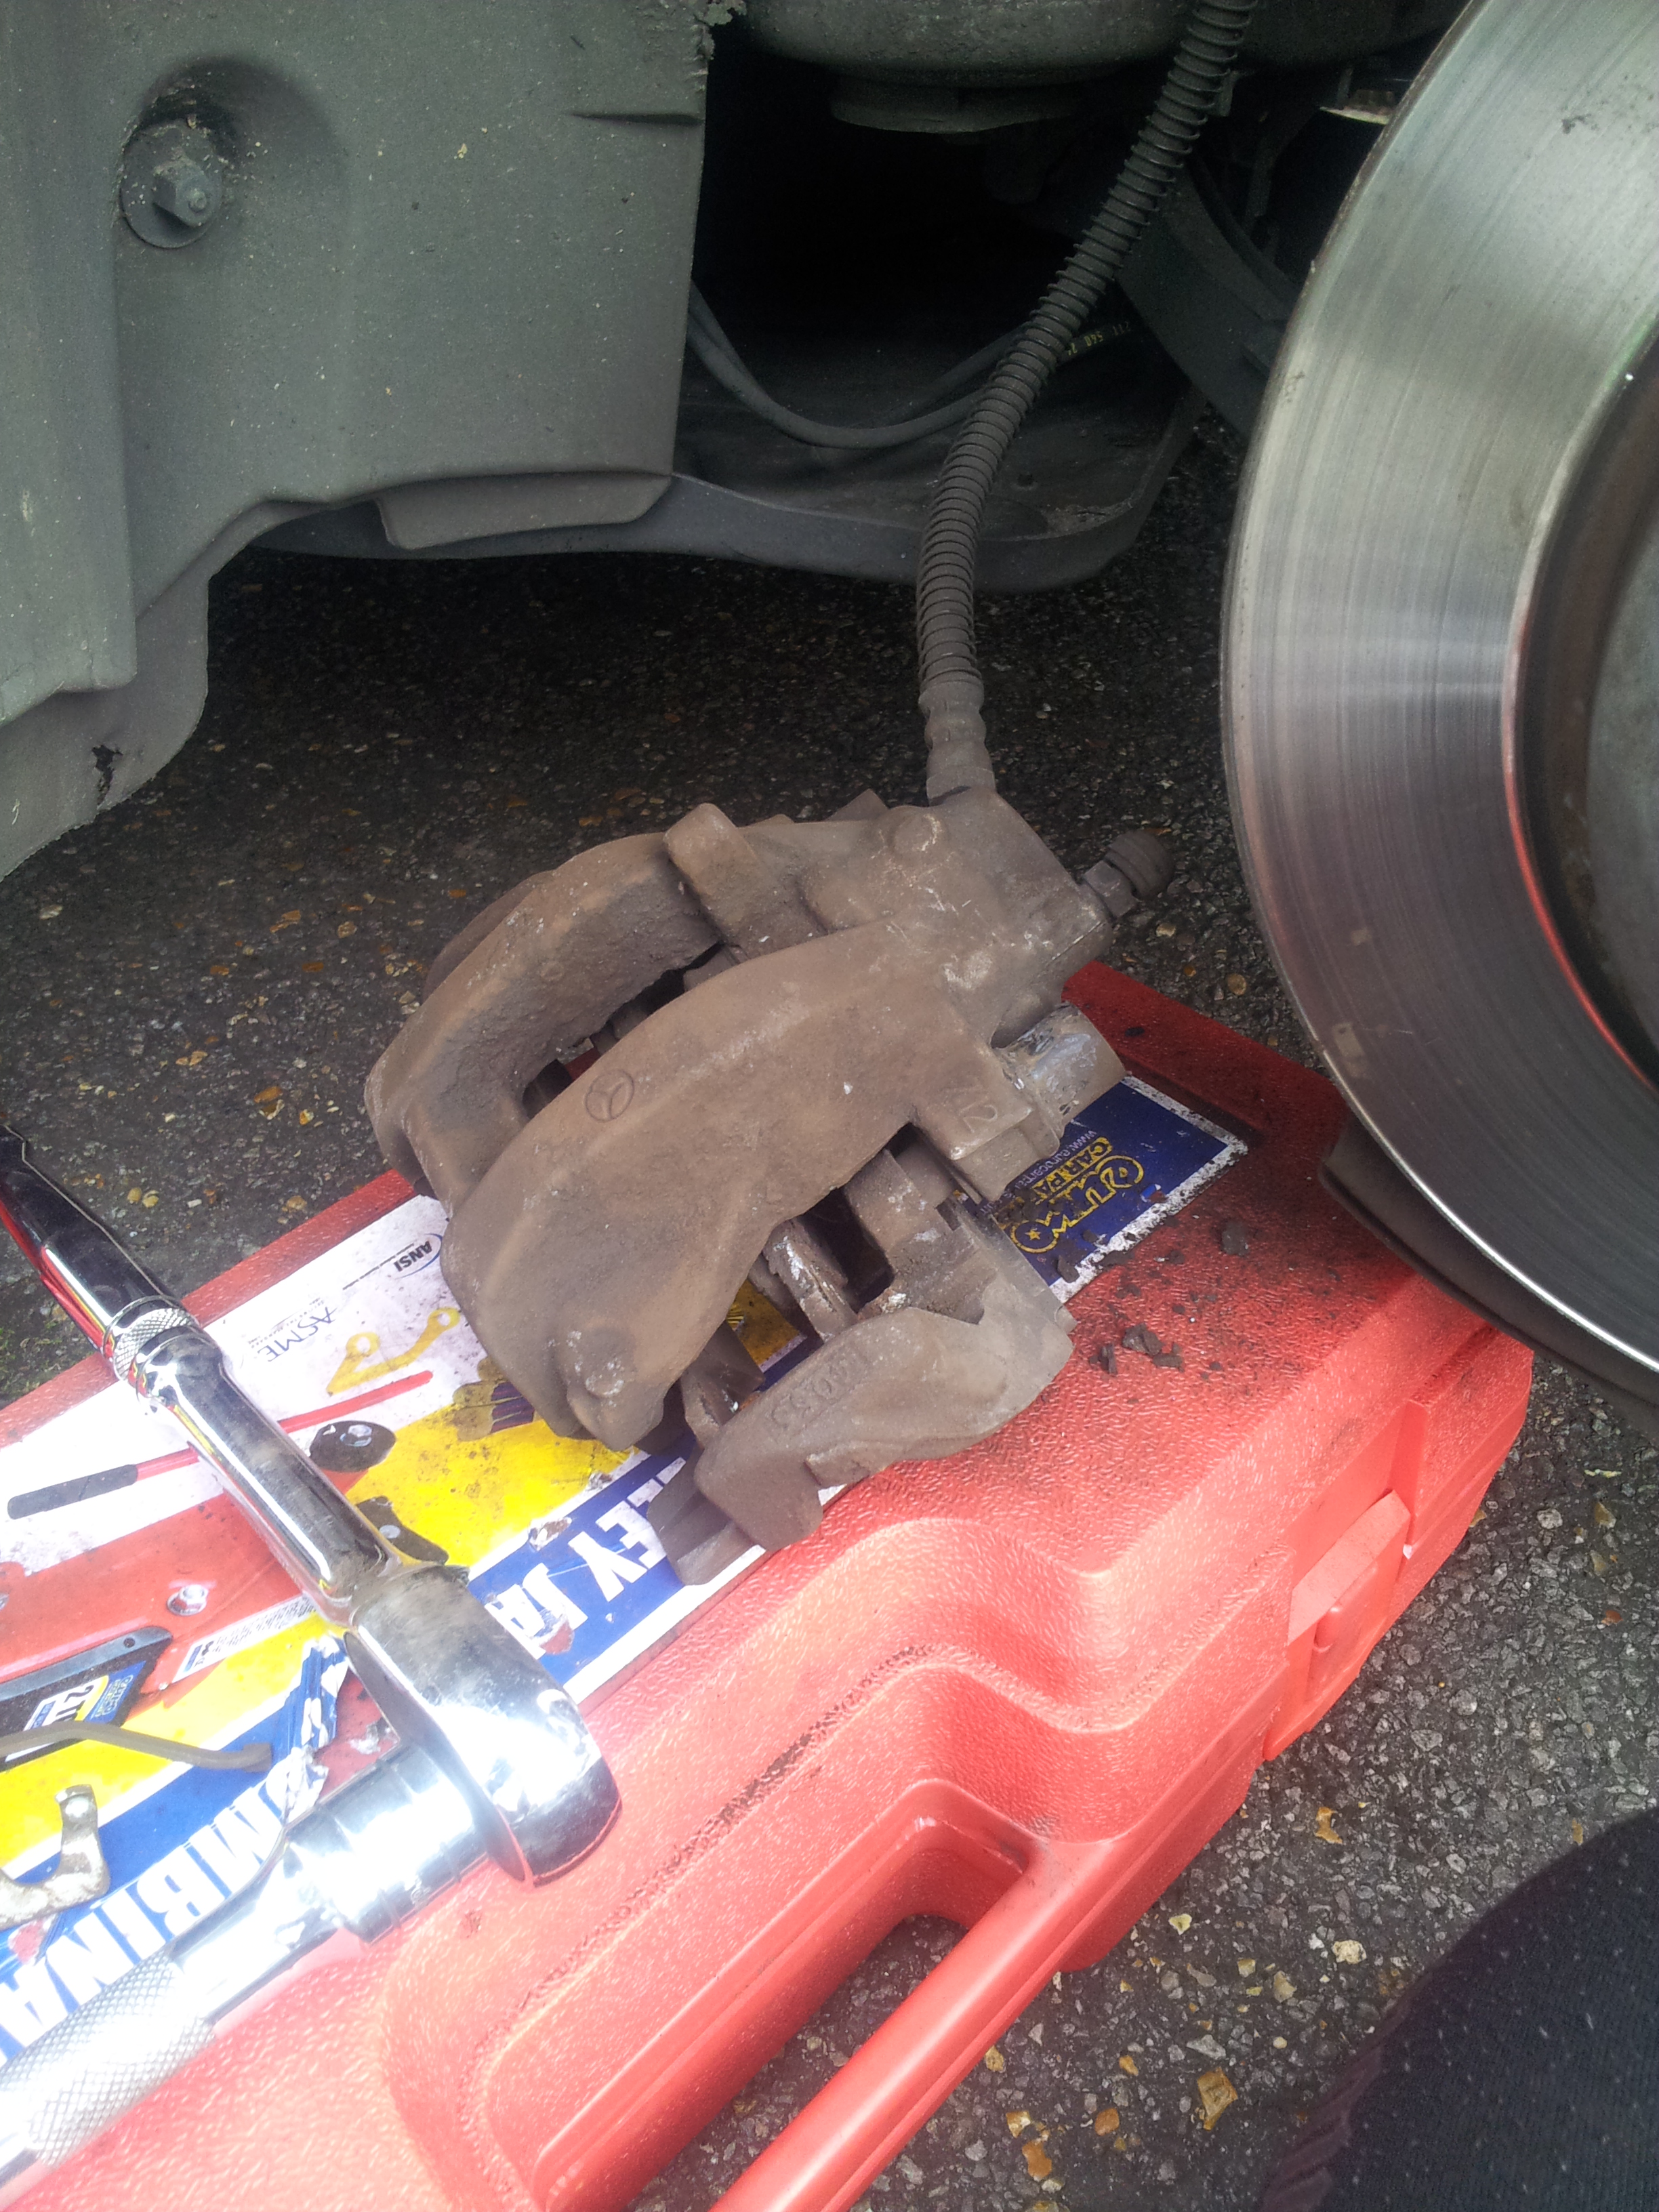
Once removed, support the caliper on the jack box or hang it with a zip tie on the suspension arm.
19. Now is the time to wind out the handbrake shoes. Ensure the handbrake is off and access the adjuster from the right hand side via a wheel bolt hole. A picture paints a thousand words here:

I always forget the direction as its different for each side. To figure it out I turned it 4-6 turns until it stopped the back disc from turning, then backed it out 10 turns the other way. You can now remove the disc retaining bolt and *remove the disc.
20. Both my rear discs came off without issues and i*didn't*have to use my pusher bolts.
21. Bolt the new discs in on the same way as the front, ensuring the hub is cleaned and copper greased up.
22. Replace the clips in the caliper in the same way as the front and re insert the back pads, ensuring to use copper grease on the clips.
23. Readjust the clutch adjuster until the disc cannot be turned and back of 2-3 turns. Ensure that the same number of turns is used on both sides for equal adjustment.
24. Re bolt the carrier to car, ensuring the bolts are loctited up.

25. Replace the wheels and lower the car.
26. SBC must now be re-actived to push the pistons out against the pads. Via star: *Control modules - > Chasis -> SBC - > activate SBC following maintenance. Replace disks.
27. SBC will then recharge the system 3-4 times and push each caliper's pads out to the discs. It then presents you with a pressure readout for each wheel. Ensure that the fluid level does not drop below Min in this process, or the brakes will have to be bled if air is sucked in.
28. Done! Drive carefully at first, being sure to brake fairly firmly from high speed a couple of times to seat the pads and the discs. (note, some people remove the protectctive surface on the discs before*installing*them. I chose to let the pads do the job).
Let me know any questions in the comment section