MBAK.

Member
Joined
Jun 24, 2019
Messages
10
Reaction score
6
Your Mercedes
A140 W168 elegance
This thread is about a Mercedes A140 W168 elegance (1999/2000)

Hi there!

I'm new to this forum, so if this thread isn't posted at the right subfora, please remove if necessary. Besides that, English is not my native language, so please forgive and correct me if I used the wrong (technical) terms for some car parts.

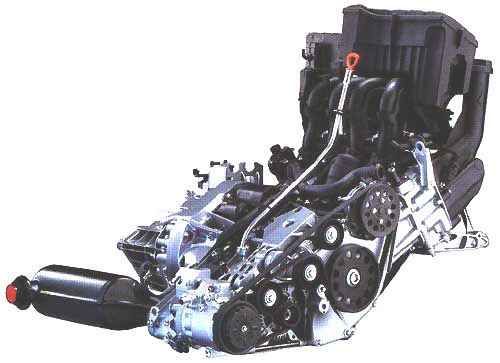
Recently, my GF her car car made a "screaming" noise coming from somewhere near the engine. After a check-up at her garage, they found out a bad the v-belt was causing the noise. They charged her a few hundred euro's to fix it, so we decided to do it ourselves.

Since they only told her about the v-belt (turning up the AC, Dynamo, water pump and power steering) needed to be changed, it was the only part I ordered at that time. Later, when we picked up her car, it turned out that some pullies needed to be changed too.

We decided just to replace the v-belt (which would be a very tough job according to the garage, took us just 45-60m due the lack of space) and to replace the pullies a week later. Unfortunately, the tension pully broke down anyway, so it will need a new v-belt too.

Now, changing the pullies will indeed be a "tough"/tougher job from what I've seen. Due to the very limited space to work, the dynamo and AC have to come loose and from what I've read the AC need to be refilled afterwards. Refilling the AC is a job I can't to for sure.

My questions:

- Is it possible to remove JUST the dynamo and leave the AC in place? If not; why?
- Does the AC indeed need to be refilled if you remove it to make space? If so; why?
- Is is possible to only remove the pullies? Or is it necessary to change the whole set at once? So like the tensioner itself as well as the pollies attached to the body. If so; why?
- I am ordering the parts here: winparts.nl (Did not make it a link due policy), is there a particular brand I need to avoid? Or is it all just fine?

The reason I want to know "why" at every point is because it is a learning proces for me too which makes it important to me to understand why things work a certain way. Please help me learn :)

I think that's it for now, if more information is needed, please let me know and I'll provide. :)

With kind regards,

MBAK
 
OP
M

MBAK.

Member
Joined
Jun 24, 2019
Messages
10
Reaction score
6
Your Mercedes
A140 W168 elegance
  • Thread Starter
  • Thread starter
  • #3
The tensioner pulley is only held by one bolt. Just make a tool to unscrew the bolt.

Thanks for your reply! :)

I indeed noticed it being attached with just one bolt. So I can just pull that one out and replace it with a new one instead of replacing the whole set?

Btw, there is also another pully which is worn out pretty much. It is the top one with those ribs. The ribs are pretty much gone so I guess that one has to go too?

I guess the same principle accounts for this one too? Just one bolt and that’s it?
 

ajlsl600

Senior Member
Joined
Nov 18, 2013
Messages
9,070
Reaction score
6,055
Location
france
Your Mercedes
clk3202001,sl6002003 with everything regrettably sold ,A class 170cdi auto. NG/TF1800 ML250
if? required you should be able to move the AC to one side, leaving the pipes connected and the AC supported .you should bite the bullet and change all the pulleys you can and reduce the chance of another failure and belt replacement/cost/headache. you can find some inf here. i did mine 4 yr ago look at crank pulley as well as the rubber bonding in them can give way, thats no fun either, i checked and found mine ok ,but still have the new pulley.


http://www.aclassinfo.co.uk/page.1.169.htm
 

EmilysDad

Senior Member
Joined
May 8, 2012
Messages
12,157
Reaction score
5,718
Location
Bury Lancs
Your Mercedes
ML350
You won't need to remove the a/c gas from the air conditioning system to just replace a V belt ... the a/c compressor will stay where it is when the V belt is removed. Like wise the dynamo (actually it's an alternator ;))
I don't know specifically about your engine, but the generally, when the tension is off the V belt you will just be able to remove the belt from the engine
 
OP
M

MBAK.

Member
Joined
Jun 24, 2019
Messages
10
Reaction score
6
Your Mercedes
A140 W168 elegance
  • Thread Starter
  • Thread starter
  • #7
if? required you should be able to move the AC to one side, leaving the pipes connected and the AC supported .you should bite the bullet and change all the pulleys you can and reduce the chance of another failure and belt replacement/cost/headache. you can find some inf here. i did mine 4 yr ago look at crank pulley as well as the rubber bonding in them can give way, thats no fun either, i checked and found mine ok ,but still have the new pulley.


http://www.aclassinfo.co.uk/page.1.169.htm

Thank you for your reply. Very helpful! I will definately replace all 3 of them then. I was wondering; I just called my own garage and the guy told me it is advised to change the whole tensioner kit itself at once, because it is usually the tensioner itself that is getting worn out, which results in the tensioner pully going bad which on itself results in a worn out or broken v-belt.

So is it a good idea to replace the tensioner kit itself? And if so; how on earth am I going to reach that thing?

You won't need to remove the a/c gas from the air conditioning system to just replace a V belt ... the a/c compressor will stay where it is when the V belt is removed. Like wise the dynamo (actually it's an alternator ;))
I don't know specifically about your engine, but the generally, when the tension is off the V belt you will just be able to remove the belt from the engine

Thanks for your reply. The v-belt replacement was easy without removing those parts indeed. But now one of the pullies broke down, so I was wondering if you should remove those parts when u need to replace those pullies.
 
OP
M

MBAK.

Member
Joined
Jun 24, 2019
Messages
10
Reaction score
6
Your Mercedes
A140 W168 elegance
  • Thread Starter
  • Thread starter
  • #8
And with the whole kit I mean this one:

multiriem-set-vkma-38010-skf.jpg


By the way; what are the correct (and complete) English technical terms for the belt itself, the pullies and the kit as a whole?

This image shows the engine of the car;

Mercedes%20'A'%20Class%20engine.JPG
 

ajlsl600

Senior Member
Joined
Nov 18, 2013
Messages
9,070
Reaction score
6,055
Location
france
Your Mercedes
clk3202001,sl6002003 with everything regrettably sold ,A class 170cdi auto. NG/TF1800 ML250
you will have to lower the engine to change the "skate" bar/tensioner incl idlers , its a bit of a buxxer ,explained in the links i sent you ,the belt is refered to as "serpentine belt " and again the part numbers are in the links. ,basically AC version and non AC version. if yr going that far ,dump the water pump as well ,then everything in that area changed and should be drama free for a good number of yrs .
 

EmilysDad

Senior Member
Joined
May 8, 2012
Messages
12,157
Reaction score
5,718
Location
Bury Lancs
Your Mercedes
ML350
By the way; what are the correct (and complete) English technical terms for the belt itself, t.. .

Your belt is an 'auxiliary drive belt' or as above a serpentine belt' :) & is usually referred to as a Poly V belt .... https://www.google.com/search?q=pol...UcAKHcG3CbYQ_AUIESgC&biw=1536&bih=760#imgrc=_
instead of a V belt ... https://www.indiamart.com/proddetail/v-belt-fenner-make-dunlop-make-power-king-make-12641540948.html

I'd just call the pullies as you have ie a pulley kit
 
OP
M

MBAK.

Member
Joined
Jun 24, 2019
Messages
10
Reaction score
6
Your Mercedes
A140 W168 elegance
  • Thread Starter
  • Thread starter
  • #11
Guys, thanks a lot for all the information, you’ve been very helpfull :D

I just went to the garage and the mechanic explained to me that it is indeed recommended if not absolutely necessary to change the whole kit at once. He explained that the malfunctioning tensioner will eventually result in bad pullies once again so the same problem will occur in the next few weeks.

So I will, indeed, drop the engine to fix it.

Luckly, there is a trick to do it the easy way, he explained me. He told me you can drop the engine, by remove the right steering-wheel and its inner cover. At that point you’ll be able to loose the bolt that holds the engine at that place. The idea is to put a jack under that side of the engine, loosen the bolt, and slowly drop the engine by turning the jack down. At some point there is +/- 4cm space, just enough to squeeze the right tool in to replace the kit.

On top of that; changes are 1 on a milion, but they had EXACTLY the same engine in their garage at that time that had to be fixed. So he was able to show me exactly where I could find the parts and what tools I should use.

I guess it just had to be. I am 100% confident now that I’ll be able to fix this.

Next weekend I’ll start, and I will make step-by-step pictures and post it here. Maybe it will help others with the same problem in the future!
 
OP
M

MBAK.

Member
Joined
Jun 24, 2019
Messages
10
Reaction score
6
Your Mercedes
A140 W168 elegance
  • Thread Starter
  • Thread starter
  • #12
Goodmorning guys! I have one additional question. Does someone know where I can find some kind of “workshop manual” for this particular car?

I’ve tried to find it myself, but I can’t find the right one.
 
Last edited:

mattkh

Senior Member
Joined
Aug 2, 2006
Messages
3,165
Reaction score
354
Location
England
Your Mercedes
A160 W168 1999 1.6
Goodmorning guys! I have one additional question. Does someone know where I can find some kind of “workshop manual” for this particular car?I’ve tried to find it myself, but I can’t find the right one.
What year and mileage on your car ?
Where are you?
Haynes Publishing have a manual.
I find www.aclassinfo.co.uk much better with pictures in color.
 
OP
M

MBAK.

Member
Joined
Jun 24, 2019
Messages
10
Reaction score
6
Your Mercedes
A140 W168 elegance
  • Thread Starter
  • Thread starter
  • #14
What year and mileage on your car ?
Where are you?
Haynes Publishing have a manual.
I find www.aclassinfo.co.uk much better with pictures in color.

Thanks for your reply. I’ll check your link when I’m done at work.

The car is a A140 W168 with AC and from the year 1999.
 

ajlsl600

Senior Member
Joined
Nov 18, 2013
Messages
9,070
Reaction score
6,055
Location
france
Your Mercedes
clk3202001,sl6002003 with everything regrettably sold ,A class 170cdi auto. NG/TF1800 ML250
i have that haynes manual ,it aint that great with some explanations in some cases its better explained in those links i gave you.
 
Last edited:
OP
M

MBAK.

Member
Joined
Jun 24, 2019
Messages
10
Reaction score
6
Your Mercedes
A140 W168 elegance
  • Thread Starter
  • Thread starter
  • #16
Hi guys,

I promised to give you an update with pictures. Unfortunately I didn't had room to make a detailed how-to with pictures, due the frustration and time spend on the process was already too much for me. Nevertheless I would like to type out what I did to fix the problem. Because I indeed manage to replace the whole set with a new one! :D :D

As the mechanic explained to me, it is indeed possible to lower the engine with help of a simple jack. So here follows a step-by-step guide about how I managed to fix it.

1. Lift your car somehow. You'll need the extra space (depending on the size of your belly :p ) to reach all the parts from beneath your car. I used ramps to do this.
2. Remove both your front wheels. The mechanic told me you could just remove the right one, but I experienced that I had too less space to work around, so I had to remove the left one as well. When you removed your wheels, you need to place a large piece of wood or something to place on the ramp. You can lower your car on this. I used a piece of a wooden sleeper (from a train track) to do this.
3. Behind your wheel there is a small plastic cab with a round knob to protect your engine attachment. Remove it.

Now you can see the bolt where your engine is mounted to your chassis.


4. Place a jack under your engine and put just the right amount of tension on it, so it will rest immediately when you remove the bolt. Do this at both sides (so you need 2 jacks).
5. Remove the bolts at both sides.
6. Lower your engine by turning the jacks. You should start at the right side (where your multi-kit is attached). When laying on the ground, you will see a small pin sticking out of the engine, which will follow a gab of the engine mount (which is made from some kind of rubber, idk). At some point, the pin will get stuck (and lay down) on the chassis). Use a flat screw driver to stick it in between en to make room so it will go pass the chassis so you can drop it an extra 10-15mm. At some point, the engine will stop lowering. At that point, you need to lower the other side.
7. To lower the other side, you need to do the exact same thing, but you should stop when the pin rests on the chassis. In my experience, there is no need to lower it any further.

Now that the engine has been lowered, you can start to loose the plastic cap protecting the multi-kit and its belt, the AC (if present) and the dynamo. But first;

8. Remove the + pole of your battery.
9. Remove the plastic cap (cover) which is mounted right underneath your multi-kit and stuff.
10. Now you need to remove the belt. You can do this by release the tension of the tensioner. I used a socket wrench size 15 to do this. Now the tension is released, you can remove the belt.
11. Loose the AC. This is held by 4 bolts and some kind of small frame. To make enough room, you should release this small frame to. You should just loose it and keep the hozes attached. So it will just hang a bit. It's just meant so you can created some extra room.
12. Remove the alternator as a whole, so loose the wires too. In my case it was necessary to remove the bottom pully of the tensioner-kit, because one bolt of the alternator is right behind it. To make room you need to do this anyway, so you might as well do it before removing the alternator.
13. Remove the bottom pully and the tensioner pully to make room.

When u reached this point, you are ready to remove the last 3 top-bolts of the tensioner-kit. This is really ****ing hard since there is very very little room to do this. It took me 1 hour to remove 2 bolts. It's a pain in the ass, but it is possible!

14. You need a torch tool to do this; size 12. It's this set:

8718475865544_a_en_r458.jpg


The tool you're using may not me higher then 35mm, otherwise you can't reach the bolts. What I did is turn my tool 90 degrees, move it in position, and as the end of my tool reaches the whole, turn it 90 degrees so it would just fit. When you lose it, you stop right away as it comes loose, otherwise if you loosen it to much, the bolt will be too high for you to get your tool out again. This means you should stop, get your tool out, and do the rest by hand. You should do this with all 3 bolts.

15. When you removed all bolts, you can remove the old kit. Before placing the new one, remember to remove those 2 pullies first in order to have enough space to work around. With those pullies on you won't.

16. Now, just do the exact same steps, but in opposite direction. One note; with the new tensioner-kit, it will be much harder to get your belt back on. What I did, is put it all on except the pully of your AC, and then loosen tension and twist the belt on your AC the same way you but back on your chain of your bike. Just by put the right amount of tension on it in combination of turning the wheel (/pully) at the same time. It will work.

Don't forget to; Place back your engine the right way, and at just the right place so the bolt goes in smooth. If not; either you lifted the engine too high or too low.
Don't forget to; Mount the plastic caps behind your wheel and underneath your tensioner-kit.
Don't forget to; Place back the + pole of your battery

Little sidenote; When we started the car, there where some lights on the dashboard flashing (BAS, ABS and something else), but after driving 100 meter those where gone already. So this might happen, shouldn't be something to worry about.

I hope this will help someone in the future encountering the same problem! It will take you around 4 hours and a lot of swearing, but it is do-able!
 

mattkh

Senior Member
Joined
Aug 2, 2006
Messages
3,165
Reaction score
354
Location
England
Your Mercedes
A160 W168 1999 1.6
Thank you very much.
Please put up a video of the sound of the pulleys with the engine running.
 
OP
M

MBAK.

Member
Joined
Jun 24, 2019
Messages
10
Reaction score
6
Your Mercedes
A140 W168 elegance
  • Thread Starter
  • Thread starter
  • #18
Thank you very much.
Please put up a video of the sound of the pulleys with the engine running.

Uh yeh no problem, but to be honest it’s no use really because you don’t really hear anything.

The only thing you hear is the engine and maybe a littlebit of sound from the belt running, but I think you won’t hear that because of the noise of the engine.

But I’ll to it anyway
 

Exp21

Senior Member
Joined
Dec 17, 2018
Messages
347
Reaction score
88
Location
Italy
Your Mercedes
s204 C200 CDI Blue Efficiency MY2012, w245 B200 CDI Facelift
https://streamable.com/7b26c
Just made a video of the old tensioner kit. I can make a video of the car running later next weekend.
Hi MBAK :) I'm about to plan this job on my w245 CDI. I have only two questions: when lowering the rear part of the engine of these (let's say about) 8-10 cm, will I have to detach also DPF and exhaust pipes? I'm also in doubt for the hydraulic valve located on the gearbox (very fragile) and I have doubts also about the U-joint of the steering rack. I don't know if moving the engine will damage these parts.
Can you help me? Thank you


GAD was founded in 2009 where we developed bespoke ECU Remapping software for motorsport clients, moving forward, we have extended to road vehicles for both performance and economy,
contact GAD Tuninghttp://www.GADTuning.co.ukto discuss your requirements.
Top Bottom