- Joined
- Mar 7, 2013
- Messages
- 348
- Reaction score
- 305
- Location
- Stamford
- Your Mercedes
- CLK 200 Kompressor
I know its not strictly Mercedes content, but though some may be interested in some alternative German machinery just the same...
I don’t often get to detail my cars but this one has come out of storage and had to be prepared for a photoshoot yesterday with 911 & Porsche World, for an upcoming big feature on the 944.
It was bare metal resprayed and put into Concours in about 2008, but remained my daily driver until 4 years ago. It has been driven enthusiastically, including a camping trip to Brittany, and is an effortless cruiser, but with sufficient power and tremendous balance for the twisties.
I used mainly Race Glaze products for the detail.
First up was a wash (Aqua Bathe – nice and foamy, ph neutral and concentrated) with one of our sheepskin wash mitts. Didnt dry it as I have a 14L Water Filter at home.
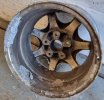
I sent the rear alloys off to alloytechrefurbedrims.co.uk in Peterborough for powder coating, they came back factory fresh for a coat of Nano Wheel Sealant (spray, buff – lasts ages). Fronts will go later. With the wheels off, I dry brushed then brushed after a liberal coating of APC to get the road crud and mud off, and dressed with Kenotek Vinyl & Leather Conditioner. I just knew this would show up under the scrutiny of the camera ! Calipers got a good scrub and coat of Rimwax (remember that?) but I decided against a repaint, though fine sandpaper brought up the PORSCHE logo lettering as bright metal on the ones where paint had disappeared.


I’d gradually attended to the bodywork – its quite daunting as so many panels and details, but a clay bar all over and G3 with a medium pad on my DAS-6 brought up the shine and removed accumulated swirls. I’m very careful but they are sadly just inevitable. Then a wipe down with our Signature Pre-Wax Cleaner – the pink, non-abrasive one, and a coat of new RG Graphene Wax to finish off. On and off like a dream, and judge the results for yourself.
Then onto my pal Andys ramp to clean up underneath – many of the heavy components are aluminium – coffin arms, gearbox, sump so AluBright followed by JetLaq to preserve them did the trick. Only tar remained, but that was just a step too far as its very hard work with your arms above your head all day. The rest was wire brushed/wire wooled, and with copious brake cleaner, tidied up with BH Dynax S-50. The exhaust responded well to wire wool after AluBright – a neat way to dissolve carbon deposits rather than metal polish.


Then a melee of internal trim repairs, hoovering and carpet cleaning (Kenotek Interior Cleaner and a soft bristle brush brought the yellowish colour back to cream) with the seats out. Porsche leather is thick so they have aged well, a wipe over then condition with Zymol Treat (especially for older leather) and they felt much softer. I also spray painted the runners which has rusted a little. My last interior task was a general clean out with different brushes from our Five Brush Set, an unused toothbrush for the seal around the sunroof, and lots of cloths.
The engine bay seemed to take ages. I only belatedly thought of blasting air at it, but hoovering was satisfying, but unlike modern engines, its all there to see, and Porsche really did have to squeeze a lot in. I lacerated my hands doing this, poking with cloths, brushes, APC and AluBright (followed of course by JetLaq). I decided not to dress the rubber – the air intake was new anyway, though did remove and spray some rusted components. The servo had to be done in situ. An old oil leak had left a nice protective film on the o/s which revealed a shiny heat shield I never know about when cleaned off ! The underside of the bonnet was Waterless Washed with No H2O and later QD’d. I almost forgot the pop up lights – bit of crusty insect residue to clear, then Colour Enhance on the plastic and they looked spot on. I had also treated every bit of black plastic and rubber on the exterior with Colour Enhance, I love this product as it brings the natural colour back and beads beautifully.

The little fillers around the driving lights took 3 days in soak to come apart, but again they were worth it, though one wouldn’t fix back on and I awoke at 4am remembering that this would be dead obvious in the photoshoot. Damn !
Finally, check the fluids and tyres, blast the dust off the exterior and with several really fleecy towels, a coat of Kenotek Showroom Shine, which really brings up a bling shine, though only lasts 2-3 washes. Clean the glass inside and out with Crystal Clear, and cover up ! That was Sunday about 8:30pm, after finishing on Saturday night at 9:30pm – pretty close to the wire, as the shoot was 11am Monday ! Then placed my new set of custom mats that we made to finish the job off.
I left the CTEK 5.0 on it and she of course started first time.
It stayed mostly dry for the static shots, a short shower and we did the drive bys and then the exciting bit – which was new to me – Dan was harnessed into the back of his estate car while his Dad drove, and my instructions were to be about 6-8 feet behind – at 40mph this took some nerve ! It does give the blurred scenery look though, and holding a line in the other lane gave the side angle.


I’ll post up when its published, there should be 15-20 pictures as it’s a big feature. I can’t wait !

I don’t often get to detail my cars but this one has come out of storage and had to be prepared for a photoshoot yesterday with 911 & Porsche World, for an upcoming big feature on the 944.
It was bare metal resprayed and put into Concours in about 2008, but remained my daily driver until 4 years ago. It has been driven enthusiastically, including a camping trip to Brittany, and is an effortless cruiser, but with sufficient power and tremendous balance for the twisties.
I used mainly Race Glaze products for the detail.
First up was a wash (Aqua Bathe – nice and foamy, ph neutral and concentrated) with one of our sheepskin wash mitts. Didnt dry it as I have a 14L Water Filter at home.
I sent the rear alloys off to alloytechrefurbedrims.co.uk in Peterborough for powder coating, they came back factory fresh for a coat of Nano Wheel Sealant (spray, buff – lasts ages). Fronts will go later. With the wheels off, I dry brushed then brushed after a liberal coating of APC to get the road crud and mud off, and dressed with Kenotek Vinyl & Leather Conditioner. I just knew this would show up under the scrutiny of the camera ! Calipers got a good scrub and coat of Rimwax (remember that?) but I decided against a repaint, though fine sandpaper brought up the PORSCHE logo lettering as bright metal on the ones where paint had disappeared.


I’d gradually attended to the bodywork – its quite daunting as so many panels and details, but a clay bar all over and G3 with a medium pad on my DAS-6 brought up the shine and removed accumulated swirls. I’m very careful but they are sadly just inevitable. Then a wipe down with our Signature Pre-Wax Cleaner – the pink, non-abrasive one, and a coat of new RG Graphene Wax to finish off. On and off like a dream, and judge the results for yourself.
Then onto my pal Andys ramp to clean up underneath – many of the heavy components are aluminium – coffin arms, gearbox, sump so AluBright followed by JetLaq to preserve them did the trick. Only tar remained, but that was just a step too far as its very hard work with your arms above your head all day. The rest was wire brushed/wire wooled, and with copious brake cleaner, tidied up with BH Dynax S-50. The exhaust responded well to wire wool after AluBright – a neat way to dissolve carbon deposits rather than metal polish.


Then a melee of internal trim repairs, hoovering and carpet cleaning (Kenotek Interior Cleaner and a soft bristle brush brought the yellowish colour back to cream) with the seats out. Porsche leather is thick so they have aged well, a wipe over then condition with Zymol Treat (especially for older leather) and they felt much softer. I also spray painted the runners which has rusted a little. My last interior task was a general clean out with different brushes from our Five Brush Set, an unused toothbrush for the seal around the sunroof, and lots of cloths.
The engine bay seemed to take ages. I only belatedly thought of blasting air at it, but hoovering was satisfying, but unlike modern engines, its all there to see, and Porsche really did have to squeeze a lot in. I lacerated my hands doing this, poking with cloths, brushes, APC and AluBright (followed of course by JetLaq). I decided not to dress the rubber – the air intake was new anyway, though did remove and spray some rusted components. The servo had to be done in situ. An old oil leak had left a nice protective film on the o/s which revealed a shiny heat shield I never know about when cleaned off ! The underside of the bonnet was Waterless Washed with No H2O and later QD’d. I almost forgot the pop up lights – bit of crusty insect residue to clear, then Colour Enhance on the plastic and they looked spot on. I had also treated every bit of black plastic and rubber on the exterior with Colour Enhance, I love this product as it brings the natural colour back and beads beautifully.

The little fillers around the driving lights took 3 days in soak to come apart, but again they were worth it, though one wouldn’t fix back on and I awoke at 4am remembering that this would be dead obvious in the photoshoot. Damn !
Finally, check the fluids and tyres, blast the dust off the exterior and with several really fleecy towels, a coat of Kenotek Showroom Shine, which really brings up a bling shine, though only lasts 2-3 washes. Clean the glass inside and out with Crystal Clear, and cover up ! That was Sunday about 8:30pm, after finishing on Saturday night at 9:30pm – pretty close to the wire, as the shoot was 11am Monday ! Then placed my new set of custom mats that we made to finish the job off.
I left the CTEK 5.0 on it and she of course started first time.
It stayed mostly dry for the static shots, a short shower and we did the drive bys and then the exciting bit – which was new to me – Dan was harnessed into the back of his estate car while his Dad drove, and my instructions were to be about 6-8 feet behind – at 40mph this took some nerve ! It does give the blurred scenery look though, and holding a line in the other lane gave the side angle.


I’ll post up when its published, there should be 15-20 pictures as it’s a big feature. I can’t wait !


