DIY Garage Building

47p2

Senior Member
Joined
May 3, 2006
Messages
3,583
Reaction score
5
Location
Scotland
Your Mercedes
W638, W140, W220, W639 All gone but not forgotten
DIY Garage Building (Picture Heavy)

From start to finish this project was a huge learning curve for me as I had never tackled anything on this scale before, so I thought I would share my story with you and show what a mammoth task I started and eventually finished some 21 months later.


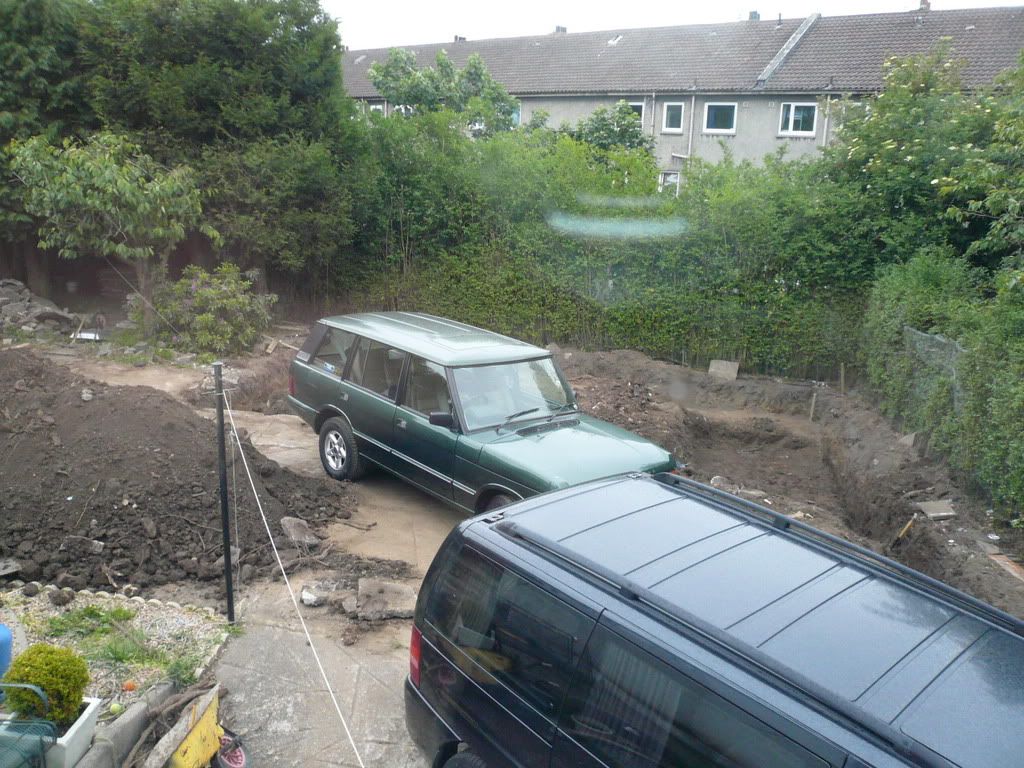
This is the plot of land where the garage will be sited. I have already cut down the trees, all 10 of them. They were over 85 feet tall and it was not a pleasant or easy job cutting them down.

garage1.jpg


garage2.jpg


garage3.jpg


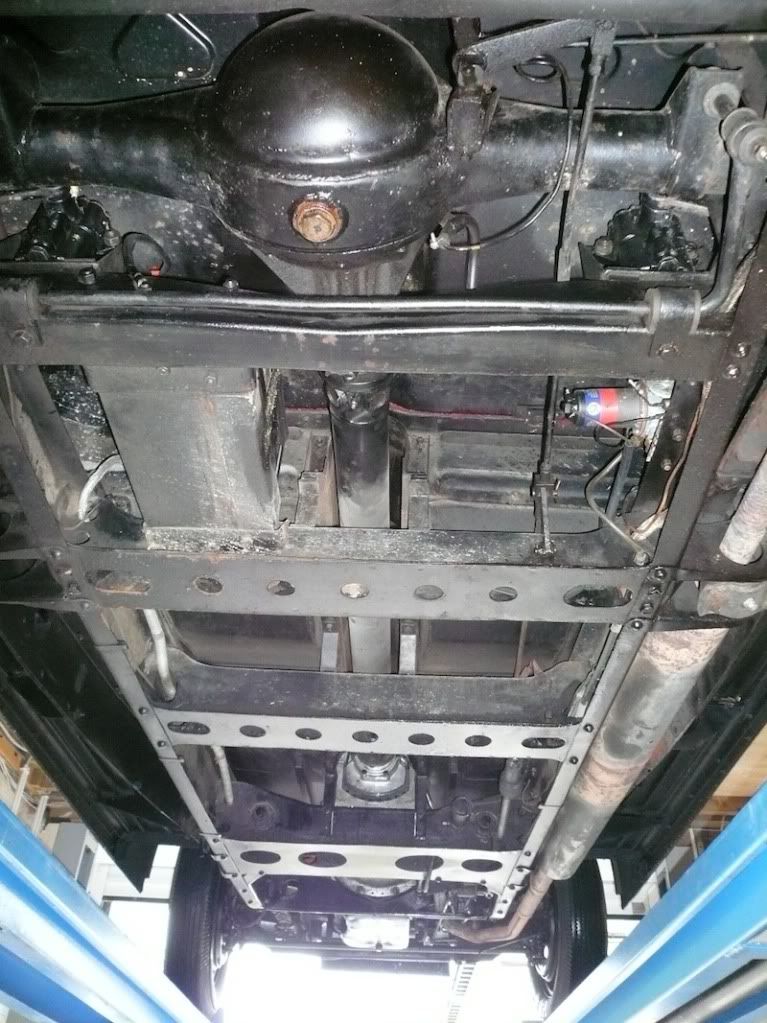
This is the Plan of the garage floor. It will be almost 33.5 feet by 22 feet and will have a pit at one side
img028-1.jpg


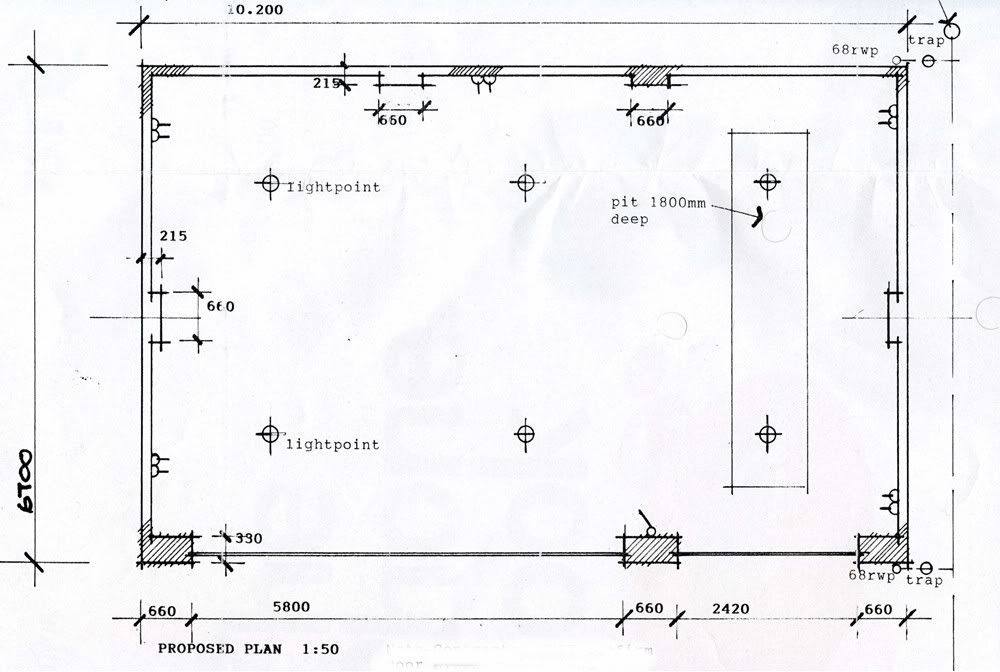
This is the Front Elevation. A double door to the left and a single to the right. The door clearance height is 7.8 feet
img027-1.jpg
.

Let the work commence......

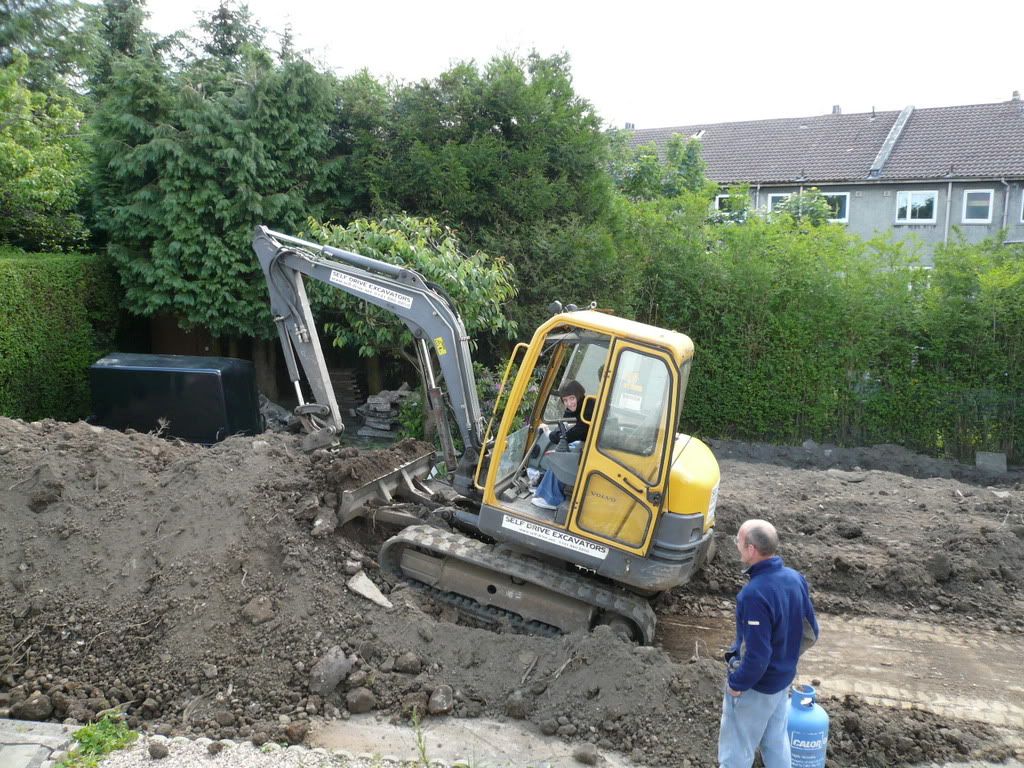
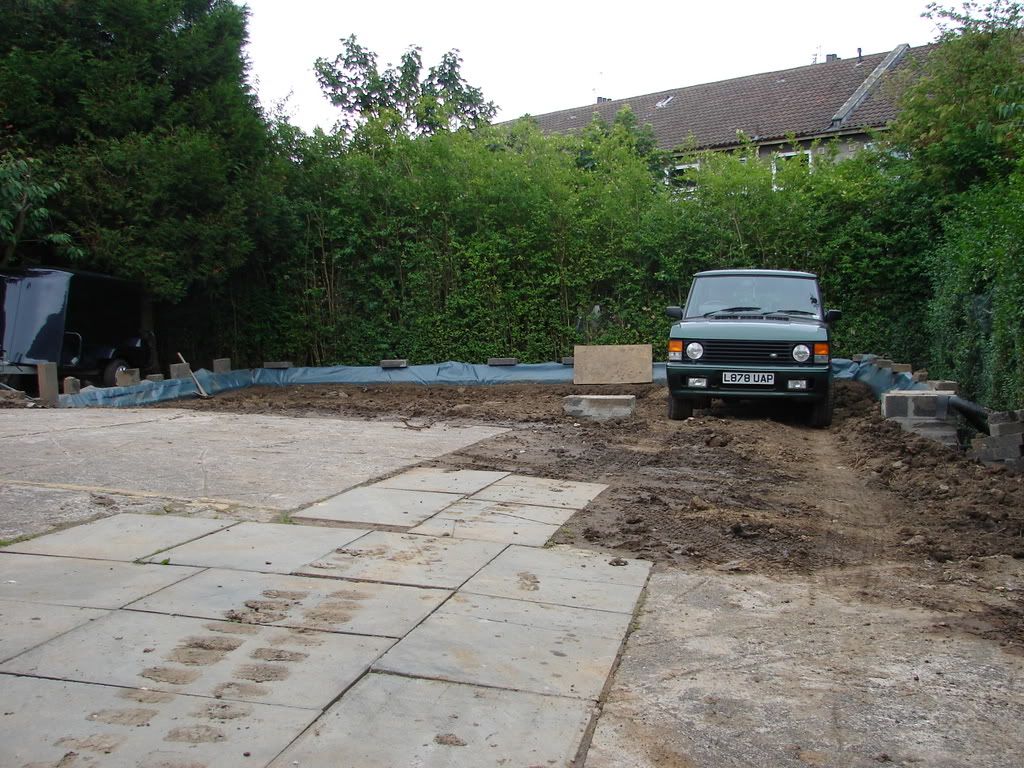
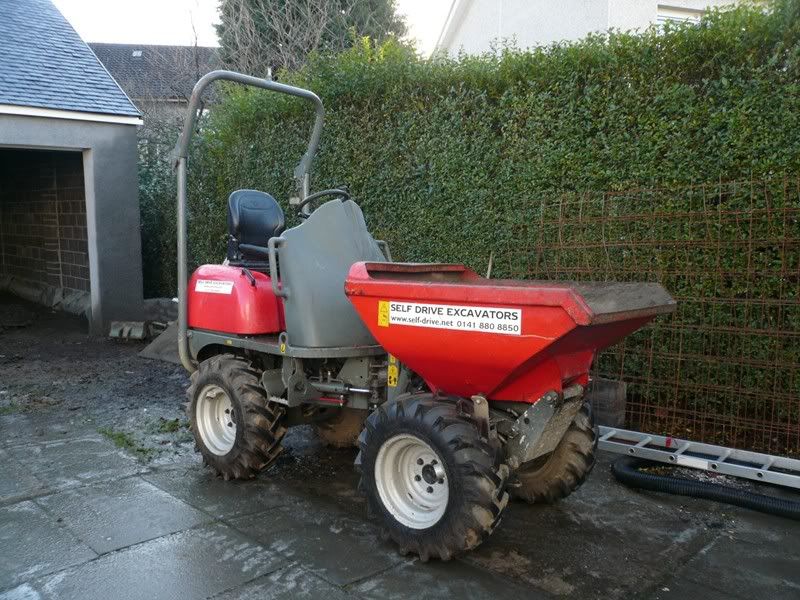
What a day....All the treee stumps have been removed and digging of the foundations has started. This was not without problems as one of the tracks came off the excavator and I had to call the company to find out how to release the tension to refit the track.....
All very easy if you are Charles Atlas, but we did get it back on after a bit of huffing and puffing.....

P1020324.jpg


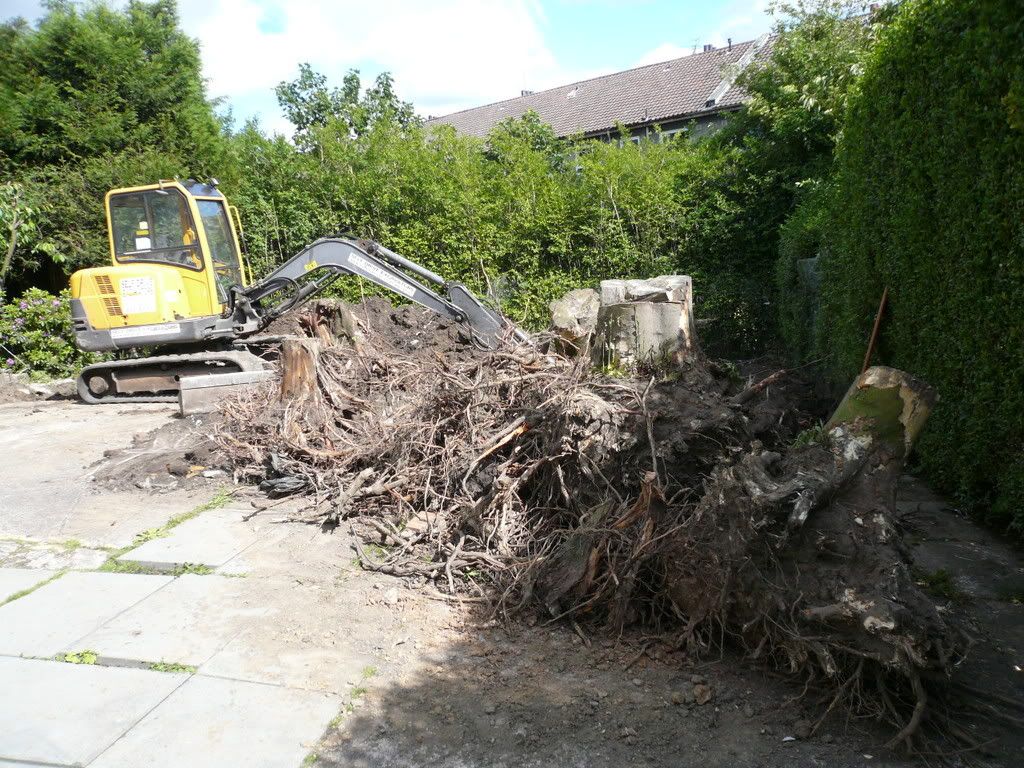
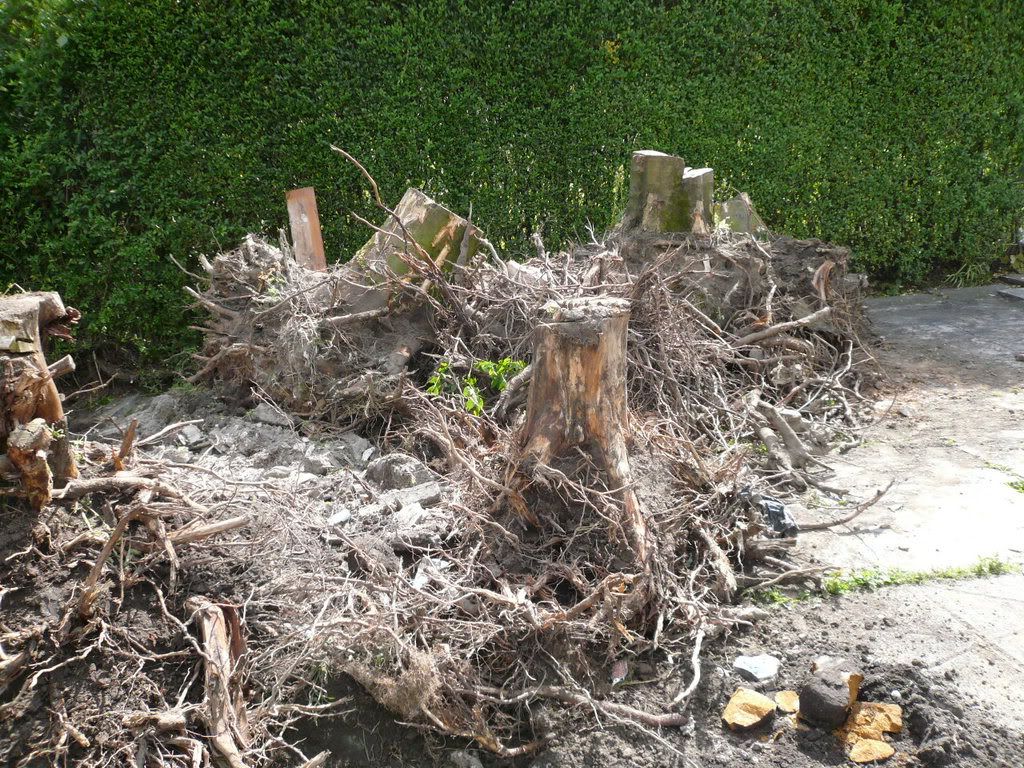
These pictures do not show the true size of the stumps as the largest is oner 4 foot tall
P1020326.jpg
.
 
Last edited:
OP
47p2

47p2

Senior Member
Joined
May 3, 2006
Messages
3,583
Reaction score
5
Location
Scotland
Your Mercedes
W638, W140, W220, W639 All gone but not forgotten
  • Thread Starter
  • Thread starter
  • #2
After 3 days work we now have the foundations dug out.
Because I wanted a pit in the garage the soil has had to be removed from all the right hand side because the tree rootes had broken up the earth making it impossible to remove just the pit area :duh:

P1020332.jpg


Daughter stayed over last night and decided this morning that she wanted a go of the excavator
P1020330.jpg


Things are coming along nicely with the foundations in and below ground brickwork in progress at the moment.

This was meant to be the pit, but because it was below the water table level I have decided to abandon the idea. 10 tree stumps were removed from this area which meant disturbing the ground more than I had hoped, plus the pit was going here and I ended up with this massive hole so that I had a solid footing for the base.The yellow line is where the founds have still to be built up to bring them level with the ground at the front of the garage.
P1020343.jpg


This is the overall size,. It looks small at the moment but once the ground has been backfilled and levelled it will start to take shape
P1020341.jpg


Looking at the plans I have to now start thinking about doors. The single is about 2700mm wide and the double is about 5800 wide so no off the shelf doors for this project.


After a weekend of back filling the foundations I managed to get all the soil back into the base of the garage, quite amazing as I was sure that I have to hire a few skips. Now it looks like I may well be short of a few spadefulls....never a happy medium

DSC00668.jpg


DSC00670.jpg


The Range Rover was first to try out the garage and it looks like I should have enough space to keep me happy. I have decided that the single door may be a bit of a tight squeeze for a MKX Jaguar so the post will have to be moved over by about 1 foot

DSC00671.jpg
 
OP
47p2

47p2

Senior Member
Joined
May 3, 2006
Messages
3,583
Reaction score
5
Location
Scotland
Your Mercedes
W638, W140, W220, W639 All gone but not forgotten
  • Thread Starter
  • Thread starter
  • #3
DSC00672.jpg


More work done this weekend and things are starting to take shape.

The blue plastic is floor level so there is a lot of back filling to do yet, and I thought there would be too much soil

DSC00673.jpg


DSC00674.jpg


At the end of play today we at last are getting somewhere....

This is the height to the bottom of the roof trusses
P1020392.jpg


P1020393.jpg


With one truss in place to use as a template for the builders everything is moving along.....including neighbours I never knew I had......

I received a call today from Building Control regarding the scaffolding being unsafe (someone complained) by email. I explained to the officer that the builders were on top of it on Saturday and it now has a truss tied to it and it looks safe enough to me.....(see picture below)
Next the door bell rang and it was someone complaining that their garden was flooded at the weekend......As if it was my fault....

How come when you contact each and every neighbour regarding planning permission for a garage, none of them complain......until the actual build work starts.......

P1020394.jpg


At long last phase 1 is completed.
Next is the roof trusses to fit and the roof to do, so if any of you have a head for heights and would like a week in Bonny Scotland send me a pm

P1020396.jpg
 
OP
47p2

47p2

Senior Member
Joined
May 3, 2006
Messages
3,583
Reaction score
5
Location
Scotland
Your Mercedes
W638, W140, W220, W639 All gone but not forgotten
  • Thread Starter
  • Thread starter
  • #4
P1020397.jpg


End of a tough week, and the garage has been a major problem. Because I am not allowed to work after 7.00pm week days, 1.00pm Saturday, not at all Sundays and what with the wet weather it has been slow progress.

Tuesday when the trusses collapsed I had to do something temporary and quickly to ensure they never got damaged. I pinned half in place with temporary bracing and hoped for the best that they would stay up until I had a chance to fix them properly. Not my cleverest idea as I have worried about it since. Thankfully everything stayed put and today I had the chance to set the trusses level and nail some permanent diagonals and laterals on, all before my 1.00pm deadline.
Once the diagonals and laterals are in place that is what holds it all together... I'm not looking forward to Monday as I should be at the stage of removing my clamps and all temporary bracing....fingers crossed.


My handywork, this is the almost finished side with most of the bracing complete
P1020399.jpg


This is the damaged gable end, It's not as bad as it looks
P1020400.jpg


Finally this is the rain running down the road last week
P1020395.jpg


Busy day today and I now have my roof trusses up An early night for me tonight I think


Today at 7.00am I took the dog for a walk and it was beautiful sunshine, by 8.30 it was pouring down so I postponed starting until about 10.30ish. I finished bracing the first side and moved over to the second half. I have one more diagonal to fit and then I can remove the temporary bracing.......I hope. The clamps have been removed from the gable end and I just hope the wind stays away until I have the chance to fot the wall to top plate brackets

P1020402.jpg


P1020403.jpg


P1020404.jpg


Another tiring day working on the garage roof. I have managed to hammer in more than 700 nails and have about a third of my sarking board on. Each and every board has to be cut which seems to take up a lot of time, also the cuts on one row cannot be in the same place in the next row. The gaps are left in the sarking to allow the wood to expand and contract
 
OP
47p2

47p2

Senior Member
Joined
May 3, 2006
Messages
3,583
Reaction score
5
Location
Scotland
Your Mercedes
W638, W140, W220, W639 All gone but not forgotten
  • Thread Starter
  • Thread starter
  • #5
P1020405.jpg


P1020406.jpg


This is the rear of the garage roof, it doesn't look like I did very much but when you see the next picture it is actually more than this picture looks
P1020407.jpg


P1020408.jpg


Front has been taken up a little more, but cannot go too far to the left to allow the brickie access to repair the mess I made to the gable end.
P1020409.jpg


With the gable end rebuilt there's no stopping me now
I managed to buy a date brick yesterday so it is now official that the garage was built in 2008
P1020411.jpg


At long last I have manages to nail all the sarking board to the trusses and started trimmimg the edges. I was hoping to have the felt on to make it waterproof but I ran out of time. It's not until you start a project as big as this that you realise just how much work is involved, especially when you are doing it all on your own......I'm ready for a sleep.

P1020412.jpg
 
OP
47p2

47p2

Senior Member
Joined
May 3, 2006
Messages
3,583
Reaction score
5
Location
Scotland
Your Mercedes
W638, W140, W220, W639 All gone but not forgotten
  • Thread Starter
  • Thread starter
  • #6
P1020413.jpg


This is the centre section. I can stand up in here with room to spare so I guess flooring will be going down and storage space created
P1020414.jpg


This side area will also make good storage
P1020416.jpg


I have now secured all the straps holding the roof to the walls, finished all the truss bracing, built up the top of the door posts ready for the door and am feeling confident enough to put a vehicle in the garage. :

The Range Rover looks rather lost in there all alone. The door will be a couple of inches lower than the wooden baton and the floor will be higher than it is at the moment
P1020421.jpg


P1020423.jpg


The roughcast was completed on Saturday morning and now will have to weather a bit before painting
P1020464.jpg


Cracked ribs and a knackered back has held things up a little but we are getting there slowly but surely.

I now have the slate almost completed, it should be finished early next week

The small door is fitted but I don't relish the thought of fitting the large door.
DSC00676.jpg


The bottom of the door is the height of the floor so a lot of hardcore will be required to bring up the levels.
 
OP
47p2

47p2

Senior Member
Joined
May 3, 2006
Messages
3,583
Reaction score
5
Location
Scotland
Your Mercedes
W638, W140, W220, W639 All gone but not forgotten
  • Thread Starter
  • Thread starter
  • #7
Set everything up ready to lift the curtain over the roller of the large door. It really is massive and we were not looking forward to the task in hand. With the scaffold at either side of the opening we placed the curtain on top of the scaffold and unrolled it, feeding it gently down the guides to rest on timbers at the bottom. Next task was to drill the roller and top of the curtain every 20cm and pop rivet the two together. After setting the motor limits and plugging in the controller it was test time. Everything is working very smooth. When my mate left I fitted the controller to the wall and fitted the infra red safety device and checked that it was working as it should. What a relief that part is over.
Tomorrow we will fit the box cover.

P1020589.jpg


P1020590.jpg


The work goes on and today I have hired some new transport for my mate when he arrives tomorrow
P1020605.jpg


I might however decide that he will be the machine man....depends how good he is
P1020606.jpg


All this hardcore at my age is fair doing me in, I'm knackered..........

I managed to level the hardcore today and my 20 tonne load is a little short of what I needed. I dont think I will be ordering any more though as it will allow me to put an 8" concrete floor down.
P1020610.jpg


For the very first time I can now get all 3 motors in the garage, but it was a little dark to get a decent picture.
With the 3 vehicles in I have loads of space to open doors without bumping anything, which was my main objective......I really am pleased

P1020614.jpg


Having to work back from the existing drain so that I can find my levels. The run in the pipes are supposed to be minimum 1" in every 88" which means I should have around 1.5" for every 3 metre length. I have increased this run slightly just to make things easier at the garage end as I can sit my trap on top of the wall and secure it there

Looking at the first picture the run seems a lot more but I have discovered that the person who built the wall has built it running down to the left which makes the run look worse. I may try to lower this end a little more, but it all depends on where I can site the trap
P1020623.jpg
 
OP
47p2

47p2

Senior Member
Joined
May 3, 2006
Messages
3,583
Reaction score
5
Location
Scotland
Your Mercedes
W638, W140, W220, W639 All gone but not forgotten
  • Thread Starter
  • Thread starter
  • #8
Looking along the length of the pipe I don't think it is too far from being straight.
P1020624.jpg


Finally the connection to the main drain. The pipe has to be laid in a bed of pea gravel
P1020622.jpg


Last night I spoke with a neighbour who is an electrician. I have 3 phase coming into the house and only single phase 240 volts used. He is going to wire the garage to be 3 phase for a 4 post ramp which will save me buying a 240v motor for it.

Today I managed to get my drain pipe lower and I should get away with a single block on top of the existing wall to hide the pipe

In this picture I have placed a single course of block (red stars) and with a bed of mortar it will give me enough height to hide the pipe behind. I am unsure what to do with the top (yellow stars) but am thinking along the line of making a wooden cover, or possibly UPVC to go along here. I did think about a coping stone but as it will only be attached at one side it would not stay in place. The rone pipe instead of going straight down has to return round to the side of the garage to connect up to the drain. Ground level is the course of bricks below the red stars
P1020627.jpg


The pipe to join the front and back rone should also be underground, but as the ground at this side of the garage drops away I have had to run a pipe along the wall....Hope building control are ok with it. I did call them out a couple of weeks ago and he seemed to agree it was all I could do.
Once the garage has been painted white the pipe will not be so obvious
P1020630.jpg


This is looking towards the rear but to see this you really do need to stand extreemly close to the hedge
P1020628.jpg


This is my design for the drains looking from the rear. This can only be seen if you are round the side of the garage and so should not normally be in view.
P1020629.jpg


Getting on with the interior at the moment and have been busy fitting the electrical bits & bobs. They have still to be wired so I think that is what this week will consist of. The lights are up and the two that are lit (temporarly with an extention cable) in the picture below will be connected to the remote controller for the double door. This will be ample for getting in and out the garage when it is dark. The 4 over the single bay will be connected to one circuit and the other 4 will be split into two separate circuits. The sockets, 6 doubles in total are fitted to the four reinforcing posts around the garage another one will be mounted high up on the door centre post for the door controllers, with another below

P1020632.jpg
 
OP
47p2

47p2

Senior Member
Joined
May 3, 2006
Messages
3,583
Reaction score
5
Location
Scotland
Your Mercedes
W638, W140, W220, W639 All gone but not forgotten
  • Thread Starter
  • Thread starter
  • #9
P1020631.jpg


It's been a tough week, or maybe I'm getting too old for this building malarkey. I started off by wiring the lights, then moved on to wiring the sockets. Next was the distribution board (consumer unit 3 phase terminology). I wanted to keep the board away from the wall, what with 400 volts going through it I don't fancy any nasty surprises. I used two 3" x 2" timbers and screwed them to the wall, then a sheet of marine ply which I covered with a piece of UPVC rather than paint it and have fitted a 3 phase socket too. I must say I am pleased with the maintenance free results. The electrician should be along in the next week or so to connect to the mains

P1000004.jpg


It was once these tasks were out of the way that the worst job ever I have done was tackled.....Painting concrete breeze block. I started with a brush which was extremely slow, then I tried a roller, but the paint was too thick to go into the small holes of the block. I read that you can use airless spray equipment, so out with an old Burgess spray gun, the paint was watered so much to go through the gun that I would have been better off spraying the walls with water. Back to plan A. the paint brush and after 52 litres of paint and 3 full days I have managed to get a single coat on all walls. The results are not bad but it really could do with a second coat, which will be for another time.

P1000001.jpg


When I look at the pictures before with the grey walls and how dark it was I have to say that although it was hard going it was worth the effort
P1000005.jpg


P1000002.jpg


The electrician came round today and I now have 3 phase electricity in the garage.
P1020641.jpg


P1020643.jpg
 
OP
47p2

47p2

Senior Member
Joined
May 3, 2006
Messages
3,583
Reaction score
5
Location
Scotland
Your Mercedes
W638, W140, W220, W639 All gone but not forgotten
  • Thread Starter
  • Thread starter
  • #10
P1020644.jpg


Well things don't get much better than today....

The exterior of the garage is finally completed. I went to B&Q last night and bought special sealant for around the roofline and todays job was sealing everything in sight........

Still to do is the concrete floor and the wall for the rainwater pipe then start on the paving

Halle-******-lujah
P1020752.jpg


P1020756.jpg


....and for the first time ever the sun shone inside the garage this afternoon, bit I was too late taking the picture
P1020758.jpg


Another 16 tons (already had 20 tons) of type 1 (hardcore) was delivered this morning and hoody and I set about shifting it from the front where it was unloaded round to the garage.

There were a couple of reasons for the extra hardcore, firstly the hardcore that was put down has sunk a bit, which I expected it would and secondly I have decided to raise the level of the hardcore in the area of the big door because of the price of concrete. The plans say I have to have 150mm of concrete but the single bay requires 200mm for the ramp specifications.

I had originally left the whole floor area 200mm but working out the cost and by the time the concrete delivery guys ram it up my posterior by telling me "You've already had your quota, do you want us to keep going and pay cash for the 'extra' at a reduced price of course" I thought I would try and cut the cost by adding the extra type 1.


Now by the time I have paid for the type 1, and excavator & dumper to move it all I won't have saved very much, until I take into consideration the fact that I will not be paying the delivery guys for 'extras'

I worked all day moving hardcore around and levelling it off. The inside is a lot higher and therefore not so much concrete required

The outside has been raised at the right hand side to make it a little easier for access. This is a temporary measure until I decide what to do about the paving

P1020789.jpg


I had to let the hardcore settle down so that sinkage problems did not arise at a later date.

I shifted 3 tonnes of sharp sand into the garage to act as a barrier for the DPC membrane, this should stop any sharp pieces of hardcore from damaging the membrane and allowing the dampness to get to the garage

P1030032.jpg


Pushing on, I laid the DPC today and set the bays out. I'm going to start by laying the centre bay as it will allow us access from both ends.
The full length timbers running back to front in the garage is the level guide and the rest are there to support them whilst the concrete is being poured and setting

P1030158.jpg
 
OP
47p2

47p2

Senior Member
Joined
May 3, 2006
Messages
3,583
Reaction score
5
Location
Scotland
Your Mercedes
W638, W140, W220, W639 All gone but not forgotten
  • Thread Starter
  • Thread starter
  • #11
Almost time to start pouring concrete

Today has been spent setting out the flexible board and rebar. The flexible board is almost like a compressed old fashioned carpet felt and it will allow for any expansion of the concrete slab without damage to the walls. The rebar mesh is sitting on pedestals at a predetermined height. The blue sleeves are to allow movement between the 3 bays. The dowel in the sleeve will be set into concrete in one bay and the sleeve set in the adjacent bay which will allow movement without causing cracks.

I will have the first batch of concrete delivered tomorrow morning, once that has cured I will then move to the next bay, then the last bay.

P1030184.jpg


The first section is now in and smoothed out, I have to let it set now before I can try and get a reasonable finish on it

P1030185.jpg


Smoothed out the best I can
P1030190.jpg


I cleared up the aftermath ready for the next bay. One of the reasons I fitted the tie bars with sleeves was to make the removal of the timbers a simple task, I pulled out the tie rods and the timber came away much easier than I had expected. I will need to lay more DPC as some of it has punctures with us walking over it. The concrete slab is now covered and will stay like that for a few days until it cures. Once cured I will then slip the tie bars back into their sleeves

P1030191.jpg


Today was spent getting the other two bays ready for the concrete. I decided to screw a small wooden fillets to the wall at concrete finish and this will let me get my levels. All the rebar is fitted but the far away bay has still to be tied together. The fibreboard is all in place underneath the fillets and when I remove the fillets once the concrete has set I can fill in the gap with the appropriate mastic.

P1030195.jpg


The garage floor is now in but not without problems.

Yesterday the concrete truck arrived and we had 4.5 cube delivered for the left hand bay, unfortunately I had to go to Edinburgh with a regular client and by the time I got back the floor had set too hard to finish off. I tried using the float with some water but it was too late so I have put some polythene over it for a few days until it cures then after about 6 weeks I will hire a grinder to repair the damage.

Today I had almost 6 cube delivered for the final bay and although I was there all day working at it the surface is not as good as I would have wanted. I never had any fibres in the concrete yesterday or today and I do wonder of this is a factor in why the finish was not as good as the first bay.

The good news is the 'Easy Screed' machine I hired worked a treat taking the back ache out of levelling and compacting the concrete, I would highly recommend it to anyone who is doing a larger area. I know if I hadn't used the 'Easy Screed' I could never have managed to lay two bays in two days.

The damage to the bay that we did yesterday is surface only so although it is a pain in the butt, it's not really a big deal...

It is good to know that the garage is almost finished as the build started just over a year ago, I have a wall to build outside for the drain pipe and once that is done I can call Building Control and have them inspect it.


P1030197.jpg


It wasn't all bad news this week. The garage is finished, yes it's truely finished. I handed the paperwork into the Building Control today so hopefully it will be inspected shortly and a Building Warrant given to me.

The floor didn't turn out quite as I would have liked, the heat of the past couple of weeks was drying it out too quick and I had to cover it with polythene before the top dried out completely. It isn't a major problem, but it does mean that I will have to hire a floor grinder to give it a smooth finish, so the snagging jobs are about to start although I don't expect there will be many.

The drain which I had to have above ground level needed a wall built and I tackled this on Tuesday and I finished it off on Thursday. I am pleased with the results as this is the first time I have tried any blockwork.
Today was spent fitting the alarm contacts and finalising the alarm settings so now we are all secure.

The cars can't go into the garage yet because the floor is a different level to the ground outside, so work on the exterior will start very soon

It's difficult to grasp the size of the garage from the pictures as it looks smaller than what it really is.
P1030263.jpg
 
OP
47p2

47p2

Senior Member
Joined
May 3, 2006
Messages
3,583
Reaction score
5
Location
Scotland
Your Mercedes
W638, W140, W220, W639 All gone but not forgotten
  • Thread Starter
  • Thread starter
  • #12
Plenty of storage space
P1030268.jpg


P1030270.jpg


My first attempt at blockwork. I will eventually get around to roughcasting the wall and put some sort of coping on top
P1030271.jpg


P1030272.jpg


With a little bit of thought I managed to cut some timber and make temporary ramps so that I could get the cars in the garage. There is loads of space between the cars and at the rear so I won't need to worry about squeezing into a tight space


Before

P1020643.jpg


After
P1030274.jpg


P1030276.jpg
 
OP
47p2

47p2

Senior Member
Joined
May 3, 2006
Messages
3,583
Reaction score
5
Location
Scotland
Your Mercedes
W638, W140, W220, W639 All gone but not forgotten
  • Thread Starter
  • Thread starter
  • #13
P1030278.jpg


Those who have been reading from the beginning will remember that I was supposed to have a pit in the garage, sadly that plan never worked so plan B was brought into play which involved a 4 post ramp....

Well yesterday (Tuesday) was a bit of a disappointment as the ramp was supposed to be fitted. I received a phonecall on Monday evening to say the fitters were held up on another job but would be with me by lunch time. A call on Tuesday at 1:30pm to say they would be out in around an hour and at 4:30pm I called and asked what was happening only to be told they would be out on Wednesday.

They arrived this morning and surprise surprise, it was like something out of a comedy scene. To fill you in a bit on the story, the ramp had a few items missing when I bought it. I contacted the auction house who contacted the person who stripped it down but he claims everything was there. I contacted my local RAV supplier who sent a fitter out to take a note of what was missing and order the items from Italy. These have been in the country since February.

Back to today.....

First there was a clamp missing to hold the hydraulic piston in place, so I made one. Next there were meant to be two large metal pins which hold the pullies in place and take the weight of the ramp, they had the wrong pins claiming RAV must have made a mistake. The pins are both different sizes and they had the larger one in their store, so that was sorted. Plan 'B' was to go to an engineering shop and get them to make a pin so off went one of the fitters. The other went for his breakfast so hoody and I had a look at the pins that were sent. It turned out that with a slight modification it was a perfect fit and I called the fitter who went to the engineering shop to let him know. By this time it was almost 12:00 and not a lot had been done. They eventually sorted out the wiring, air lines cables etc. and connected the mains, pressed the button and up the lift went.

I had been recommended by the fitter in February to fit new safety valves (not the correct name) and their purpose is to lift the safety locks when letting the ramp down. All four new valves were fitted, connected up, button pressed..............and not one of them worked, which means getting another four from Italy which could take weeks as it is the holiday period.
When the fitters left I decided to get to the bottom of the problem and stripped a new valve down, took the brass pin which has a seal on it from the old valve and place it in the new casing, and yes you guessed right it worked perfectly. I changed all the new pins for old ones and tried the ramp and it now works.

The engineers decided to leave the final adjustments until they came back with the new valves which means the ramp could not be used, so hoody and I made a few adjustments of the cables and safety lock ladders and put Olly on, pushed the button and up he went

P1030299.jpg


P1030301.jpg


I still have to cut the roof space so that will be done soon. I have a jacking beam ordered and it should be with me on Friday all going well.....

Tried the cars on the ramp today, the V-Class is the heaviest at 2700kgs, and the ramp went up as far as I dare try without any problems. The S-Class comes in at 2400kgs and the Range Rover is a lightweight at 2100kgs

vcl.jpg


scl.jpg


mott.jpg


mot.jpg
 
OP
47p2

47p2

Senior Member
Joined
May 3, 2006
Messages
3,583
Reaction score
5
Location
Scotland
Your Mercedes
W638, W140, W220, W639 All gone but not forgotten
  • Thread Starter
  • Thread starter
  • #14
Jacking beam arrived today. It is a second hand Majorlift 1.5 ton air operated job and as can be seen in the picture lifted the Range Rover no problem. The V-Class will be the test as it is the heaviest vehicle I have.

P1030302.jpg


P1030303.jpg


A busy week in the garage sorting out the storage up above. 60sqm of pine tongue & grove has been used and a Ramsay Loft Ladder...All I need now are a couple of Saab 9000 CSE front seats

P1030321.jpg


P1030322.jpg


I made a wall from some of the timber to stop anyone falling over the edge
P1030324.jpg


Plenty of spaces were left to allow access to the eaves area
P1030325.jpg


On Sunday I started shoring up the roof of the garage so that I could make use of the roof space and get full use of the ramp.

The architect had sketched me some drawings of what I should be doing to ensure that the roof didn't land on my head when I removed the trusses. "It's dead easy" he said, "we do it all the time for loft conversions". Well that was ok for him, but I never fancied the idea of the roof or worse the garage collapsing about me.

On Sunday I made a start and bolted 7 of 6"x2" timbers and then screwed 3 of 8"x2"x132" timbers above the door. Monday I did the same at the other end of the trusses. Yesterday was spent bolting 6 of 6"x2"x149" timbers above the ramp and things were starting to take shape.

My mate arrived today to give me some moral support and assist with the removal of the trusses. What he didn't tell me until he was on top of the ramp at 6' above ground level was that he was scared of heights. Now when I heard this I was already worried about cutting the trusses and this piece of news just made me feel all the better.

After fitting a few more supports to the roof we were ready to cut the trusses out.......Talk about s*itting myself, my heart was pounding as I started to cut the first truss away, my mate was not his usual self, and even he admitted that it was a tense time. One at a time we cut the timbers and removed the 4 trusses that had to come out and when we looked up at what was once my roof space it looked like a vast cavern.

The good news is that the roof is still up although I will be concerned until we get our first gale to confirm everything is ok.

Tonight I stuck Range Rover on the ramp and raised it to check how the space around was and I can confirm that there is more than enough space for a LWB Range Rover. The Viano is the vehicle that might be just a shade too big. I will try it later this week.

Hard wired the ramp today and trimmed a few ends of timber.

Then I decided that the 1946 Humber Sports Bike could be on display
P1030554.jpg
 
OP
47p2

47p2

Senior Member
Joined
May 3, 2006
Messages
3,583
Reaction score
5
Location
Scotland
Your Mercedes
W638, W140, W220, W639 All gone but not forgotten
  • Thread Starter
  • Thread starter
  • #15
I now need to paint the wall behind the bike
P1030555.jpg


P1030556.jpg


The picture doesn't really show how much has been removed but I have raised the rafter height by over 1 metre
P1030557.jpg


This was before
P1030299.jpg


This is after and there is still plenty space above
P1030558.jpg


I decided to try the other vehicles on the ramp today and check if I had made the correct calculations.

The S-Class is slightly longer than the Viano but because the height of the S-Class is lower I wasn't too concerned. It took a little rolling back and forward on the ramp to get the best position before lifting the car. I'm pleased to say the S-Class is a good fit length wise and more than enough space above.

P1030560.jpg


The Viano was my biggest concern being almost as long as the S-Class but a lot taller. The slope of the roof was going to be the bugbear as it restricts the height and I had my doubts as to whether the Viano could be raised high enough to work under. With the front wheels at the far end of the ramp I slowly raised the ramp, stopping every few inches to check when I thought it was getting close to the roof. What a relief it was when I could eventually stand under the vehicle and still had space to raise it another 6 inches.

P1030564.jpg
 
OP
47p2

47p2

Senior Member
Joined
May 3, 2006
Messages
3,583
Reaction score
5
Location
Scotland
Your Mercedes
W638, W140, W220, W639 All gone but not forgotten
  • Thread Starter
  • Thread starter
  • #16
This is the space at the front
P1030566.jpg


and the rear
P1030567.jpg


Finally there is still another 6" or so that I could lift the Viano
P1030568.jpg


So my hard work and calculations paid off. It would have been easier if I had stuck to the original plan and had a pit built, but that has another load of problems and I think I made the right choice.

The Rover came out today for the first time this year. The last time the engine was started was last September and on the first turn of the key she started.

A wash and up on the ramp for a quick look
P1030570.jpg


P1030573.jpg


Underneath a 63 year old Rover
P1030574.jpg


P1030575.jpg
 
OP
47p2

47p2

Senior Member
Joined
May 3, 2006
Messages
3,583
Reaction score
5
Location
Scotland
Your Mercedes
W638, W140, W220, W639 All gone but not forgotten
  • Thread Starter
  • Thread starter
  • #17
The time has come to sort out the garage floor. Tomorrow I have a floor grinder coming to smooth out any rough bits before I use either an epoxy coating or hardener to prevent the dust.

Those who remember me laying the floor will recall that the centre section (1st to be done) turned out almost perfect, then the weather got warmer for the second section (below the ramp) and an ok but not great finish was achieved. The third section was a total waste of time as what was supposed to be a cool day turned out to be one of the warmest we had last year, therefore not good conditions for laying concrete. The surface dried out too quick and when I was able to lay polythene on top it marked the surface, so now this will have to be rectified.

The machine I am hiring is a 110v carborundum grinder. I did try to hire a diamond cutter but apparently there were none available. I haven't a clue what or how it will turn out, so fingers crossed that it all goes according to plan.

There's not really a great deal to see, that's why I never posted any pictures. It's a bit like watching paint drying really.
Here are a few I've just taken

P1030583.jpg


I knew the ramp would come in handy :wicked:
P1030584.jpg


This is the aggregate showing through.
I'm not sure but I think once it has all the dust washed off it will be quite dark
P1030580.jpg


and outside is like this tonight :duh:
P1030585.jpg


I called a few companied who do concrete floors and was quoted £1500-£3000 for the work, depending on what was involved and I will hazard a guess it would be nearer £3k.
Doing it myself for the cost of hiring the equipment and the 2 pack epoxy undercoat and top coats it will cost me less than £600, so quite a saving.

I've done all I'm going to do as far as grinding the floor is concerned. Edges and corners tidied up and the floor hosed down to remove the dust. Now I need to wait on it drying out and also for some slightly warmer weather before applying the epoxy coating

P1030586.jpg


I've just been out to the garage this morning and the floor is drying out nicely. I really do fancy the clear coat finish if anyone can recommend the 'right' product

Here is the floor today
P1030588.jpg


P1030589.jpg


The walls are looking much better now. They really need another coat of paint but that can wait until another day.
 
OP
47p2

47p2

Senior Member
Joined
May 3, 2006
Messages
3,583
Reaction score
5
Location
Scotland
Your Mercedes
W638, W140, W220, W639 All gone but not forgotten
  • Thread Starter
  • Thread starter
  • #18
The floor is drying out nicely and should be ready for the sealer to go on by Thursday or Friday
P1030590.jpg


P1030591.jpg


I've spent the last few days finishing off the garage, mostly giving the ramp a lick of paint to make it look a bit tidier.

The ramp has a plastic coating and with it lying outdoors for 10 months the water had got under the plastic where there were nicks in it. I tried to burn the plastic off using my high powered blow torch but it wouldn't look at it, so it was a case of remove as much damaged plastic and repaint.

P1030594.jpg


P1030595.jpg


I suspect that the paint won't be as durable as the plastic, but at least I can freshen it up whenever I want
P1030603.jpg


P1030597.jpg


P1030598.jpg
 
OP
47p2

47p2

Senior Member
Joined
May 3, 2006
Messages
3,583
Reaction score
5
Location
Scotland
Your Mercedes
W638, W140, W220, W639 All gone but not forgotten
  • Thread Starter
  • Thread starter
  • #19
The floor is now sealed and I shouldn't have any more dust problems
P1030599.jpg


P1030596.jpg


More than enough space for 2 large vehicles side by side
P1030600.jpg


P1030602.jpg


Now I'm off to tan that bottle of single malt

I finished painting the gable ends and sorting out the display of bikes. It's amazing just how much light it seems to create :whoop:

From this
P1030554.jpg


to this
P1030705.jpg
 
OP
47p2

47p2

Senior Member
Joined
May 3, 2006
Messages
3,583
Reaction score
5
Location
Scotland
Your Mercedes
W638, W140, W220, W639 All gone but not forgotten
  • Thread Starter
  • Thread starter
  • #20
and this
P1030322.jpg


to this
P1030706.jpg


So you're still reading, I hope you're enjoying the write-up.

It's now a couple of months since the garage was finished and when I look back I have to read the thread where this was originally posted to remind me of all the tough times with cracked ribs and slipped discs etc. You need to be focused to take on a project of this scale, I never expected it to take so long to complete and had I known the time scale I possibly would never have started it.

Tilly is kept in the other garage, to which I have been doing a bit of tidying up and fitted a new door last week. The roof will be replaced with plastic coated corrugated metal later this week if it arrives in time


The door on the small garage was in need of renewal so I ordered one a couple of weeks ago.
The door that was fitted I suspect was original to when the garage was built about 70 years ago as every nut and bolt was a whitworth size. The new door arrived in kit form which was like a giant meccano jigsaw set so I decided to make a start. It's really a two man job but I plodded away and finished at 12.30 the next morning.

Before
P1030736.jpg


After
P1030739.jpg


P1030738.jpg


Hopefully this will keep the garage warmer in the winter for Tilly
 

Avantgarde Automotive, Mercedes-Benz and SLR McLaren specialists. Service, repairs, diagnosis and motorsport preparation.
Unit 14 Hither Green Trading Estate, Clevedon, Somerset, BS21 6XU Tel: 01275 217270 Email:steve@avantgarde-automotive.co.uk
www.avantgarde-automotive.co.uk
Top Bottom