Droverunner
Senior Member
- Joined
- Aug 2, 2017
- Messages
- 1,018
- Reaction score
- 768
- Location
- West Cambridgeshire
- Your Mercedes
- 2007 CLK 220 CDi Sport. 2014 S-Max 2.0TDCi.
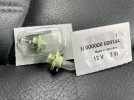
First time I used my Viano in the dark I noticed there was no illumination to the buttons immediately below the climate display making any change to aircon or heater at night a bit chancy. Both getting the button/display unit out and locating the bulb is worthy of a thread in case it helps someone who searches for help.
The row of buttons either side of the hazards button worked OK, as did the backlight to the climate LED display... it was just those for temp change and fan speed etc that stayed dark.
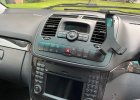
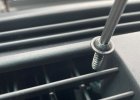
To start getting access first the two two torx screws under the rear edge of the dash top cubby (under rubber buttons) come out and the cubby can be pulled rearwards and set aside with (if fitted) the parktronic display cable still connected. There is one more central screw at the top of the vent assy then four screws reached through the air vents. To avoid losing the screws I put a blob of blutak on the end of the torx driver. Once these are all out the whole air vent assy pulls forwards and upwards from the top. The lead to the lower buttons can be removed and the assy placed aside.
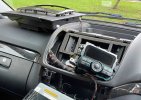
Note I'd taken the Command unit out but this turned out not to be needed.
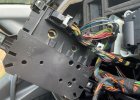
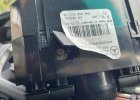
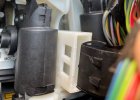
Once the vent assy was out the climate control panel is still held to the dash by what was a puzzling fixing. It is loose but won't come away. Finally found a hard to see clip on the back that needs releasing from a socket on the dash as shown in the image below.
The row of buttons either side of the hazards button worked OK, as did the backlight to the climate LED display... it was just those for temp change and fan speed etc that stayed dark.

To start getting access first the two two torx screws under the rear edge of the dash top cubby (under rubber buttons) come out and the cubby can be pulled rearwards and set aside with (if fitted) the parktronic display cable still connected. There is one more central screw at the top of the vent assy then four screws reached through the air vents. To avoid losing the screws I put a blob of blutak on the end of the torx driver. Once these are all out the whole air vent assy pulls forwards and upwards from the top. The lead to the lower buttons can be removed and the assy placed aside.


Note I'd taken the Command unit out but this turned out not to be needed.
Once the vent assy was out the climate control panel is still held to the dash by what was a puzzling fixing. It is loose but won't come away. Finally found a hard to see clip on the back that needs releasing from a socket on the dash as shown in the image below.


