dbanbery
Senior Member
- Joined
- Nov 11, 2008
- Messages
- 1,206
- Reaction score
- 76
- Location
- Huddersfield
- Your Mercedes
- 1995 R129 SL500
This was done on my '96 W202 saloon, but should be ok for most other models of a similar age.
Right,
So i have finally got round to doing the DIY for my job last weekend
After having a lot of snow, and a lot of spinny wheels etc a few weeks ago, my car started to make a grinding noise under freewheeling and deceleration. The noise was very prominent when the car has been sitting for an evening and when at speeds from crawing to about 50mph, after that it was a lot quieter. After some deliberation over brake discs, and other possibilities, i finally got under the car and waggled propshaft. It seemed to be shot.
Time it took me: 3-4 hours start to finish [hard to calculate as i did other jobs to it and my dads 203 on the day. It was a MB fixing club!]
Parts/tools needed:
[some models actually have a kit for this, but in addition you will need the housing if it isn’t included]
Propshaft centre bearing
Propshaft bearing housing
2 new M8 bolts for the exhaust + spring washers and matching nuts
New rubber boot for propshaft
A blunt wide blade chisel
A pointed blunt chisel
Lump hammer
Standard socket set with large ½ inch sockets and extensions
Angle grinder [see new bolts above]
Moly grease
Bearing grease [i used the Mercedes stuff]
Standard trolley jack
Axle stand
Ramps
If there is anything else i’ve forgotten, sorry.
Method:
Before you start, buy the parts, and stick the bearing in the freezer and leave the housing on the radiator. Then when the bearing has been in the freezer for a good few hours [3 ish] you can simply tap the new bearing into the housing. Do it quickly but be careful not to damage the new bearing. The rubber is meant to be soft like that so make sure you rest it on something firm, not relying on the rubber. It says that you have the exposed bearing surfaces to the rear of the car, but mine was entirely sealed so no worries.
I think they key to making these jobs under the car easier are in how you get the car off the ground, safely. I drove the front of the car onto my ramps, then chocked the passenger side rear wheel with the ramped wheels, then jacked up the driver’s side rear of the car so the wheel was off the ground. You need the car to be stable on flat ground, so you can leave it out of gear with the handbrake off. Make sure you use the correct jacking point with a block of wood, as you don’t want to damage any of the underside of the car. [Seen it before]
See Pic:
Anyways, once the car is off the ground, you will need to removed your under body tray. Mine didn’t have one, so i didn’t have to do it but it’s the one that covers the front part of the exhaust. Once that is off, you will need to try and loosen the two bolts on the main exhaust section. Try these first and if you snap the first one then can’t get the second one out, its grindy time. The harder to access of the two is accessible with a bit of fumbling with a grinder [unscrew the handle so it’s smaller] you should be able to grind the head of the nut without chopping into any heat shields and under body, just keep checking where the disc touches with the power off. Once both bolts are off, any studs remaining you should either be able to bend them back and forth until the other side detaches from the clamp. Mine were snapped off into the hole so i used a small chisel to bend them one way then the other. It might be better to mess with those when the exhaust is on the floor.. Next, after those bolts are off, you need to remove the rubber exhaust bushing which is about where the diff is. Mine didn’t have the bar on the exhaust, so i don’t know whether it’s better to do this before or after the next part: remove the two 13mm [i think] nuts off the exhaust bracket which is off the gearbox [or near i cant remember] you’ll see it. The studs are on a plate that is pushed through the mounting on the exhaust. Once this is all off, lower the exhaust. Mine was heavy. Be careful. Once this is on the floor you should be able to pivot it on the back box bushing out of the way. Thats the messing about bit done.
Next, remove the two cross bracings that are between the exhaust. The big u shaped one is 16mm nuts and the smaller one is 13/14mm bolts. You will need to take the big one off, but i didn’t bother fully removing the other as you only need to loosen both bolts and remove one so to swivel the bracket out of the way.
Next, the propshaft itself.
Remove the two 13mm bolts for the centre bearing, and then move towards the back. You only need to take off 3 of the 6 bolts for the cush drive.
See Pic:

If you think you need another you will need to do all 6 which isn’t a massive problem to do. You will need a 16mm socket for the bolt end and 17mm spanner for the nut end. They are metal locking nuts, so will not be finger loose until they are about out come off. They are really fine shallow angle thread so they will take a while, just keep going. Make sure you take off the 3 that are through the tripod bit of the prop shaft, as they are the only ones you need to remove. After that, get your bolster chisel, and knock carefully at the gap between the cush drive washer and the prop tripod, you need to split them as they don’t just pop out. I did this last after removing everything else but it’s your choice. After that move to the front coupling. This is a bit more interesting as access is a minor issue. Its simple though once you get the hang of where to look. Looking forward from the back you will see a triangular hole with a bolt it in it. They are the same bolts as on the back so put your extended socket in there, and then move round to the driver’s side of the gearbox. You will find that there is a gap for your spanner there, if you put your head just in front of the box and look rearward up to it. I’m sure I’m going into too much detail but you will see how to get at it. Then from there you will need to rotate the prop for each bolt, and you might need someone to disengage the brake/take out of gear. Make sure you have made sure that the car doesn’t move when its free wheel. I didn’t have a problem but I don’t want someone to hurt themselves. Anyway, once they are off, you should be able to pop the shaft off the gearbox nicely. Then take the shaft out from the back first.
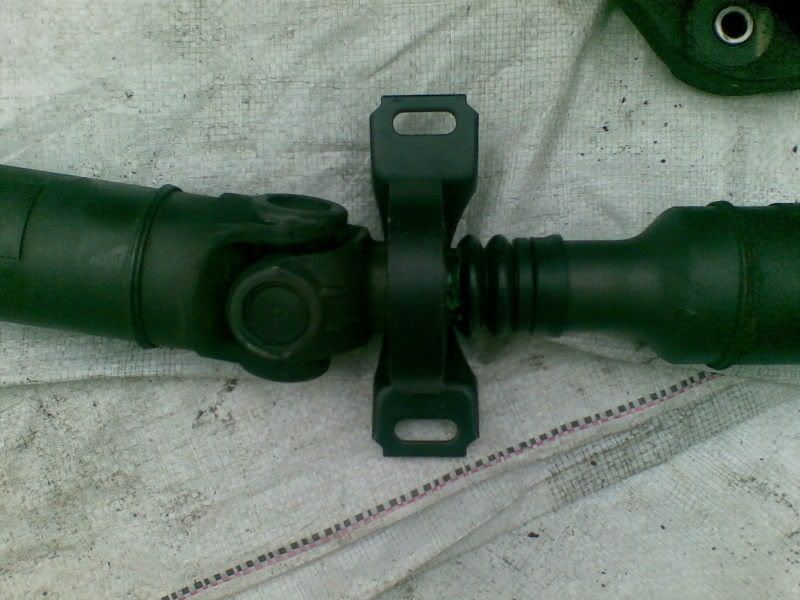
See Pic:
Get it on your workshop/workbench/kitchen table if you have your own house and no Mrs. LOL! You should be able to pull the two parts of the shaft apart from each other by hand, easily. If yours is a pre 1996 model, then there is a big nut to undo [to be fair my testicles are aching at the thought of doing that]
But anyway, once that’s apart, you can replace the offending part.
Get the rear portion of the shaft, with the CV joint and the exposed splines and rest it on a firm, but not rock hard surface. Wood is perfect. You will need to get your bolster chisel and knock the old bearing off the tapered shaft.
Old one: Shot.
Be careful to not damage the prop, cv-joint or tapered shaft. Once the old one is off the tight spot, take note of the orientation of the housing. Its handed. Then take the old one off fully then wire wool the surface and tap the new one back on carefully. I didn’t need a lot of force to do this, so don’t “bray the hell out o’ it” as they say in Yorkshire. Once that’s back together, you will need to replace the boot on the other section, and clean and grease the splines on the back section and re assemble, being careful to re-align the one arrow with the two on the prop shaft. You will get it when you see it. Just look at it before you take it off. Then its “refitting is the reversal of removal” from here on, being careful to make sure you put the washers on the prop coupling bolts on correctly. It’s on the bolt side. Once it’s all back together, check you have no left over bolts and bits, and then it’s all good to go.
See Pic:
If you do your rear cush drive, just make sure you do the same method for taking off the other bolts as you did with the others.
Right,
So i have finally got round to doing the DIY for my job last weekend
After having a lot of snow, and a lot of spinny wheels etc a few weeks ago, my car started to make a grinding noise under freewheeling and deceleration. The noise was very prominent when the car has been sitting for an evening and when at speeds from crawing to about 50mph, after that it was a lot quieter. After some deliberation over brake discs, and other possibilities, i finally got under the car and waggled propshaft. It seemed to be shot.
Time it took me: 3-4 hours start to finish [hard to calculate as i did other jobs to it and my dads 203 on the day. It was a MB fixing club!]
Parts/tools needed:
[some models actually have a kit for this, but in addition you will need the housing if it isn’t included]
Propshaft centre bearing
Propshaft bearing housing
2 new M8 bolts for the exhaust + spring washers and matching nuts
New rubber boot for propshaft
A blunt wide blade chisel
A pointed blunt chisel
Lump hammer
Standard socket set with large ½ inch sockets and extensions
Angle grinder [see new bolts above]
Moly grease
Bearing grease [i used the Mercedes stuff]
Standard trolley jack
Axle stand
Ramps
If there is anything else i’ve forgotten, sorry.
Method:
Before you start, buy the parts, and stick the bearing in the freezer and leave the housing on the radiator. Then when the bearing has been in the freezer for a good few hours [3 ish] you can simply tap the new bearing into the housing. Do it quickly but be careful not to damage the new bearing. The rubber is meant to be soft like that so make sure you rest it on something firm, not relying on the rubber. It says that you have the exposed bearing surfaces to the rear of the car, but mine was entirely sealed so no worries.
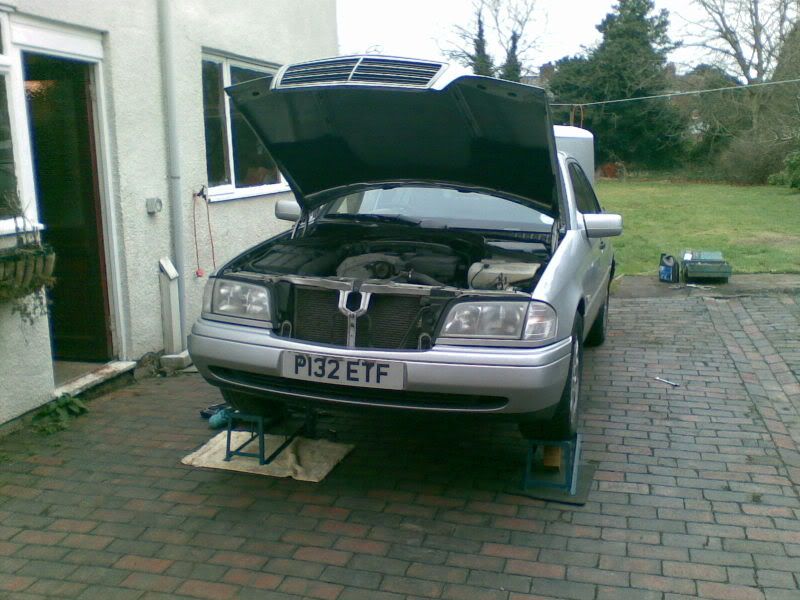
I think they key to making these jobs under the car easier are in how you get the car off the ground, safely. I drove the front of the car onto my ramps, then chocked the passenger side rear wheel with the ramped wheels, then jacked up the driver’s side rear of the car so the wheel was off the ground. You need the car to be stable on flat ground, so you can leave it out of gear with the handbrake off. Make sure you use the correct jacking point with a block of wood, as you don’t want to damage any of the underside of the car. [Seen it before]
See Pic:
Anyways, once the car is off the ground, you will need to removed your under body tray. Mine didn’t have one, so i didn’t have to do it but it’s the one that covers the front part of the exhaust. Once that is off, you will need to try and loosen the two bolts on the main exhaust section. Try these first and if you snap the first one then can’t get the second one out, its grindy time. The harder to access of the two is accessible with a bit of fumbling with a grinder [unscrew the handle so it’s smaller] you should be able to grind the head of the nut without chopping into any heat shields and under body, just keep checking where the disc touches with the power off. Once both bolts are off, any studs remaining you should either be able to bend them back and forth until the other side detaches from the clamp. Mine were snapped off into the hole so i used a small chisel to bend them one way then the other. It might be better to mess with those when the exhaust is on the floor.. Next, after those bolts are off, you need to remove the rubber exhaust bushing which is about where the diff is. Mine didn’t have the bar on the exhaust, so i don’t know whether it’s better to do this before or after the next part: remove the two 13mm [i think] nuts off the exhaust bracket which is off the gearbox [or near i cant remember] you’ll see it. The studs are on a plate that is pushed through the mounting on the exhaust. Once this is all off, lower the exhaust. Mine was heavy. Be careful. Once this is on the floor you should be able to pivot it on the back box bushing out of the way. Thats the messing about bit done.
Next, remove the two cross bracings that are between the exhaust. The big u shaped one is 16mm nuts and the smaller one is 13/14mm bolts. You will need to take the big one off, but i didn’t bother fully removing the other as you only need to loosen both bolts and remove one so to swivel the bracket out of the way.
Next, the propshaft itself.
Remove the two 13mm bolts for the centre bearing, and then move towards the back. You only need to take off 3 of the 6 bolts for the cush drive.
See Pic:
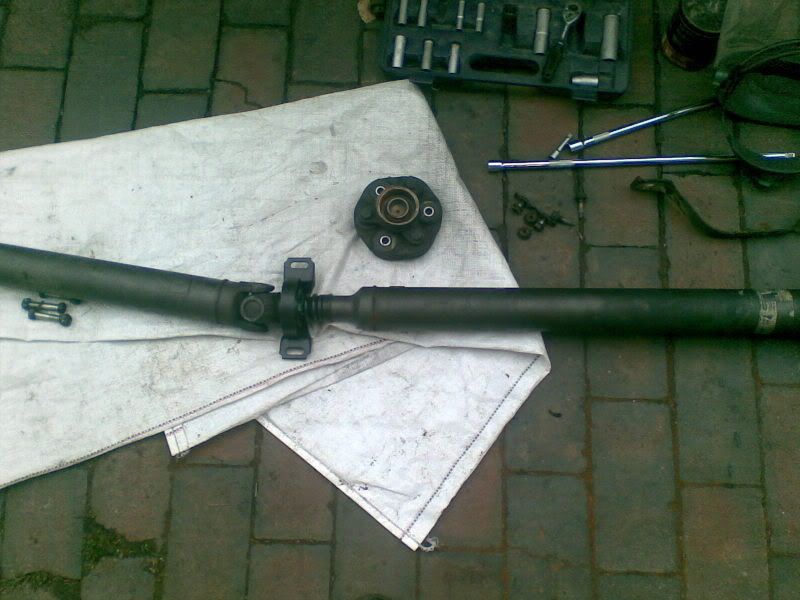
If you think you need another you will need to do all 6 which isn’t a massive problem to do. You will need a 16mm socket for the bolt end and 17mm spanner for the nut end. They are metal locking nuts, so will not be finger loose until they are about out come off. They are really fine shallow angle thread so they will take a while, just keep going. Make sure you take off the 3 that are through the tripod bit of the prop shaft, as they are the only ones you need to remove. After that, get your bolster chisel, and knock carefully at the gap between the cush drive washer and the prop tripod, you need to split them as they don’t just pop out. I did this last after removing everything else but it’s your choice. After that move to the front coupling. This is a bit more interesting as access is a minor issue. Its simple though once you get the hang of where to look. Looking forward from the back you will see a triangular hole with a bolt it in it. They are the same bolts as on the back so put your extended socket in there, and then move round to the driver’s side of the gearbox. You will find that there is a gap for your spanner there, if you put your head just in front of the box and look rearward up to it. I’m sure I’m going into too much detail but you will see how to get at it. Then from there you will need to rotate the prop for each bolt, and you might need someone to disengage the brake/take out of gear. Make sure you have made sure that the car doesn’t move when its free wheel. I didn’t have a problem but I don’t want someone to hurt themselves. Anyway, once they are off, you should be able to pop the shaft off the gearbox nicely. Then take the shaft out from the back first.
See Pic:
Get it on your workshop/workbench/kitchen table if you have your own house and no Mrs. LOL! You should be able to pull the two parts of the shaft apart from each other by hand, easily. If yours is a pre 1996 model, then there is a big nut to undo [to be fair my testicles are aching at the thought of doing that]
But anyway, once that’s apart, you can replace the offending part.
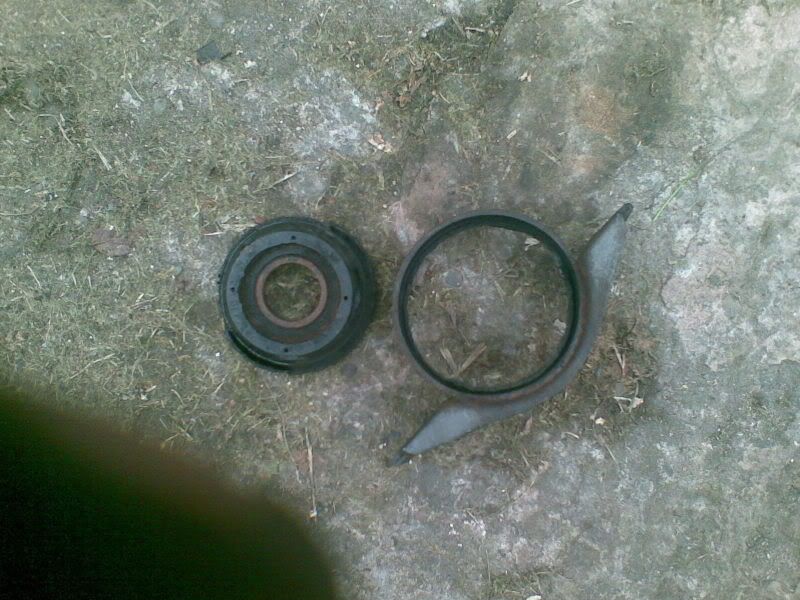
Get the rear portion of the shaft, with the CV joint and the exposed splines and rest it on a firm, but not rock hard surface. Wood is perfect. You will need to get your bolster chisel and knock the old bearing off the tapered shaft.
Old one: Shot.
Be careful to not damage the prop, cv-joint or tapered shaft. Once the old one is off the tight spot, take note of the orientation of the housing. Its handed. Then take the old one off fully then wire wool the surface and tap the new one back on carefully. I didn’t need a lot of force to do this, so don’t “bray the hell out o’ it” as they say in Yorkshire. Once that’s back together, you will need to replace the boot on the other section, and clean and grease the splines on the back section and re assemble, being careful to re-align the one arrow with the two on the prop shaft. You will get it when you see it. Just look at it before you take it off. Then its “refitting is the reversal of removal” from here on, being careful to make sure you put the washers on the prop coupling bolts on correctly. It’s on the bolt side. Once it’s all back together, check you have no left over bolts and bits, and then it’s all good to go.
See Pic:
If you do your rear cush drive, just make sure you do the same method for taking off the other bolts as you did with the others.
