Not_Anumber
Senior Member
- Joined
- Jan 23, 2022
- Messages
- 104
- Reaction score
- 63
- Your Mercedes
- S212 E350cdi prefaclift
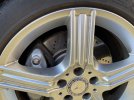
This may be useful to anyone thinking of changing their own front brake discs but werent sure what tools they would need or how to go about it. There is no need to shy away from brakes as long as you treat them with care and dont cut corners.
I was going to post this into the DIY section but for some odd reason posting in that area is restricted to moderators and deities only, so here it is instead.
You will need;
Size T30 Torx bit (the solid type not the weaker security type with the hollow centre)
13mm socket
17mm socket
18mm socket
short extension bar for the sockets
T bar for the sockets
Torque wrench
small crow bar (or strong pry bar.)
G clamp. ( Medium sized woodworking type does nicely)
New brake pads
New brake discs (if fitting them)
brake cleaner fluid (or other suitable cleaning fluid)
Copper grease, you only need a small amount
Brake fluid (probably not required but have some just in case it needs topping up )
Chris
I was going to post this into the DIY section but for some odd reason posting in that area is restricted to moderators and deities only, so here it is instead.
You will need;
Size T30 Torx bit (the solid type not the weaker security type with the hollow centre)
13mm socket
17mm socket
18mm socket
short extension bar for the sockets
T bar for the sockets
Torque wrench
small crow bar (or strong pry bar.)
G clamp. ( Medium sized woodworking type does nicely)
New brake pads
New brake discs (if fitting them)
brake cleaner fluid (or other suitable cleaning fluid)
Copper grease, you only need a small amount
Brake fluid (probably not required but have some just in case it needs topping up )
- Open the bonnet and loosen the top of the brake fluid reservoir. If the level is very high place some damp rags around the reservoir in case a small amount of brake fluid overflows.
- Using the wheel brace or a 17mm socket with extension and T bar, loosen the wheel bolts of the wheel you will be working on. Use the locking wheel nut key on one of the wheel bolts where this is required.
- Using a jack, lift the relevant corner of the car. Ideally using a trolley jack if available rather than the service jack.
- Use an axle stand to support the weight of the car rather than relying on the jack. (Depending on where you locate the axle stand this may need to wait until the wheel has been removed.)
- Undo and remove the wheel bolts (which should now be sufficiently loosened) and lift the wheel clear.
- Clean the brake calliper to remove some of the road grime.
- Carefully ease out the flat plate at the front of the calliper. (This may still have Mercedes Benz printed in large letters on it) the plate has 2 lugs that fit into the front of the calliper. I said carefully as these lugs are held in by cylindrical springs that are not very strong but are easy to lose. Keep them safely.
- With this plate removed you will be able to ease out the spring steel retainer this reveals. Put this to one side.
- Loosen and remove the 2x 13mm bolts at the back of the caliper which secure the caliper to it's mounting bracket.
- Firmly but carefully ease the caliper out of it's bracket (it goes sideways).
- Support the calliper. I tend to balance it carefully on the top of the brake disc, making sure it is secure and wont fall. (It is generally thought to be bad practice to let the weight of the calliper just dangle on it's flexible hose.)
- Holding the calliper with one hand use the other hand to pull out the old brake pad that is nearest you (that is the one that would be nearest the wheel when in use).
- Now remove the other old brake pad. This will take slightly more effort to ease out as it has a spring metal retainer that fits inside the piston at that side of the calliper.
- At this stage it would be worth spending a few minutes giving everything a decent clean whilst it is accessible.
- The brake piston now needs to be pushed slightly back into its recess. This is because the new brake pads will be thicker than the old ones so would otherwise foul if you tried to refit the calliper without doing this.
- This can be achieved by using the G clamp, gently winding it in to make the piston retract. [It can also be done with just hand pressure if you open the bleed valve on the calliper but only do it that way if you are comfortable with brake hydraulics, otherwise borrow a G clamp]
- Fit the new brake pad at the back of the calliper first. This is the trickier one as the bits of it's metal clip have to go into the piston- do it properly, don’t miss one of the prongs so it goes outside the piston and fouls against the rubber seal. If you have some copper grease smear a small amount onto the rear of the brake pad whilst you are fitting it (this minimises the chances of an annoying brake squeal noise).
- Now fit the near most brake pad. Again smear a small amount of copper grease, if you have some, onto the rear of the brake pad whilst fitting.
- With the calliper out of the way you will need to remove the calliper carrier. This requires removal of 2x 18mm bolts from the rear
- Lift the bracket away. It would be sensible to clean it thoroughly whilst it is accessible.
- Remove the single Torx headed bolt that holds the brake disk onto it’s hub and lift the disc away. Be careful of your toes it weighs a bit.
- Clean the hub and put a bit of copper grease on the face of the hub where the wisc will mount to it. Makes it much easier for next time.
- Offer up the new brake disc and rotate it against the hub so the holes line up and you can fit the retaining screw. Use a T30 torx bit to tighten this to about 10 Nm, don’t overtighten.
- Refit the calliper carrier to the hub with the 2x 18mm bolts from the back. These should be tightened to around 110 Nm- but best double check this.
- Slide the brake calliper into place onto the calliper carrier and fit the 2x 13mm securing bolts from the back of the calliper. Use new bolts if they happen to be some packed in with the new brake pad, otherwise it’s normally accepted as ok to reuse the existing ones so long as they are in good shape, no stripped threads etc. Tighten these to around 34Nm [again double check against my memory on this]
- Refit the vertical section of spring steel . This is best thought of as a flattened letter W on it’s side. The centre presses into a recess in the front of the calliper and the top and bottom ends rest against the inner edge of the calliper carrier at top and bottom. This will take a few tries. You will need to apply some pressure to this in the middle to get the middle bit engaged but then you can gently tap the top and bottom into place.
- Refit the blanking plate in the middle of the calliper. Take care as the 2 little fittings that locate the lugs into the holes in the calliper are fragile. [Frankly the blank plate is cosmetic and non essential so if you need to leave this off whilst new fittings are obtained it’s fine, just looks a bit scruffy]
- Give it all a final clean to remove any oily fingerprints etc
- Refit the wheel.
- Carry out the same process for the other side.
- Apply gentle pressure to the brake pedal a few times before you try to move or drive the car. This is so the brake pistons, that you retracted earlier, can move back to their operational position.
- Check the brake fluid level in the reservoir, top up if it is low.
- Tighten the brake fluid reservoir cap and if you had put any rags or paper towels around the reservoir to soak up possible spills remove and dispose of these. In the event of any spillage it’s recommended to wash away with soapy warm water.
- Try the brakes before driving the car on the road.
- Drive the car.
Chris