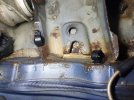
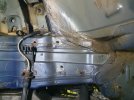
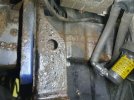
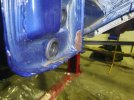
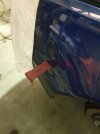
Underside tidy up - R230 edition

Conor

Senior Member
Joined
Jan 22, 2019
Messages
2,544
Reaction score
1,637
Location
London, UK
Your Mercedes
2010 S212 350 CGI // 2004 R230 500
Morning all,

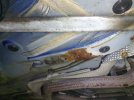
Some of you might have seen my ABC Suspension overhaul thread, here. While working on the ABC I noticed bits of rust here and there, and decided I would remove (along with the front) the rear bumper and side skirts as well as all body panel and perform a thorough inspection.

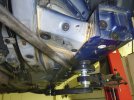
While I would really like to crack on with the ABC work, I think it will be a lot easier to do this job without any pipes and struts up front where there is a lot of patchy corrosion.

I wasn't horrified, and a lot of people would dismiss the rust as just being surface. While it only surface rust, structural rust issues don't appear out of thin air and i've yet to see rust get better on its own, so here we are.

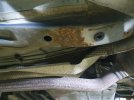
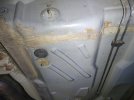
The biggest areas of concern are the rear boot and a few areas where the seam sealer is starting to fail.

I seem to have accumulated quite a few body shop products since working on my Clio 172 Cup track car. My aim is to use up what I have hoarded on this job as opposed to buying new products.

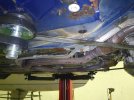
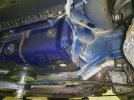
The primary objective of this job is to tidy up the underside and "reset" any corrosion. It won't be a concours job by any means but I will use the OEM Jasper Blue to keep things reasonable looking underneath.

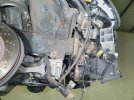
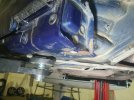
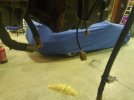
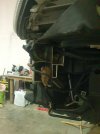
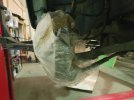
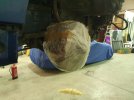
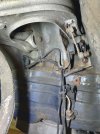
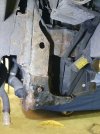
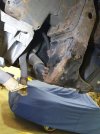
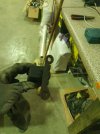
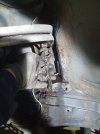
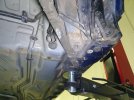
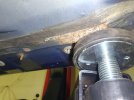
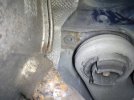
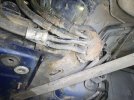
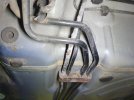
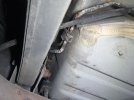
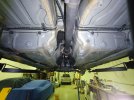
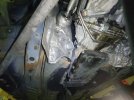
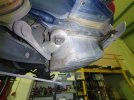
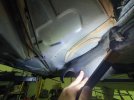
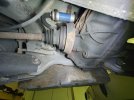
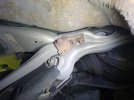
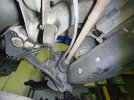
Here comes a bit of a photo dump with some commentary as I go.

I hope you enjoy this - I know I love these types of threads anyway.
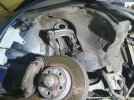
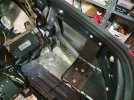
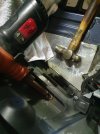
20231114_091432.jpg

20231114_091448.jpg 20231114_091513.jpg 20231114_091523.jpg
20231114_125801.jpg 20231114_130043.jpg 20231114_130739.jpg 20231114_130744.jpg 20231114_131012.jpg 20231114_131145.jpg
 

Wighty

Senior Member
Joined
Aug 4, 2016
Messages
13,492
Reaction score
12,552
Location
Sunny Essex
Your Mercedes
W211/E320cdi/2009 and CLK200k 2009
Jesus Connor , you really don’t do things by halves do you ! Impressive stuff .
 
OP
Conor

Conor

Senior Member
Joined
Jan 22, 2019
Messages
2,544
Reaction score
1,637
Location
London, UK
Your Mercedes
2010 S212 350 CGI // 2004 R230 500
  • Thread Starter
  • Thread starter
  • #3
20231114_131147.jpg

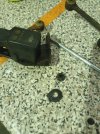
Here you can see the rear of one of the ABC level sensors. Quite rusty. For better or worse, i'm not a "leave well enough alone" kinda guy, so I removed both of these. I snapped 2 of the 4 studs holding them on. And one of the nuts was rounded off and I really couldn't manage it off given the tight space and obstacles.

Between this and the ABC work, the overarching goal is to make the car "reliable" (As much as an R230 can be) .. I don't want to do all this and then have the level sensor mount rust and snap while i'm hundreds of miles away and cause a red ABC error...

20231114_152549.jpg


My only real option was to sacrifice the mount for sensor by wiggling/snapping it off. When this was off, I was able to get a vise grip over the rusted nut and get it of. Bliss..

20231114_153246.jpg 20231114_153610.jpg

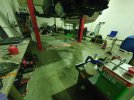
I then set about cleaning the car .. did I say I hoarded a few products!? I also had to put down some plastic sheeting to catch the mess. The floor is bare concrete and I hat the way it stains. I must run it by landlord that I will paint the rectangle under the lift to alleviate any big staining.


20231114_161731.jpg

Some post cleaning shots. It's enough for me to work without getting dirt, but when I run a white cloth around it, it still turns out black. I guess that's ok, for the kind of job I want to do. Once I have the rust cleaned up etc I will give another clean with degreaser before touching up, so it should be fine.

At least now it's nice and clean, and I can see what needs to be done.

20231114_172155.jpg

Rusty bolt for washer bottle there. While I don't plan on going over the bend. I might replace a few of these, or at least put them in the ultrasonic with vinegar and paint before re-adding. I know nobody will ever see them.. but it's nice to be nice to this car..

20231114_172200.jpg 20231114_172208.jpg

20231114_172214.jpg
20231114_172225.jpg
 
OP
Conor

Conor

Senior Member
Joined
Jan 22, 2019
Messages
2,544
Reaction score
1,637
Location
London, UK
Your Mercedes
2010 S212 350 CGI // 2004 R230 500
  • Thread Starter
  • Thread starter
  • #4
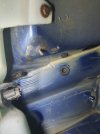
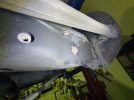
Here is one of the places the seam sealer has failed..
20231114_172247.jpg

Not sure why this point is rusty... i'm guessing it's the lowest point of chassis rail where all the water runs to.. :/

20231114_174709.jpg
20231114_174712.jpg 20231114_174714.jpg
20231114_174721.jpg
 
OP
Conor

Conor

Senior Member
Joined
Jan 22, 2019
Messages
2,544
Reaction score
1,637
Location
London, UK
Your Mercedes
2010 S212 350 CGI // 2004 R230 500
  • Thread Starter
  • Thread starter
  • #5
.. Then I moved onto the rear end.

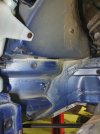
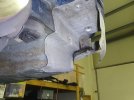
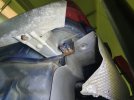
The boot area is probably the most advanced corrosion, there is one small section that seems to be advancing. If this was left another hand full of years you'd seeing some light steel that would need re-enforcement. A stitch in time and all that..

Here is a quick clip of the rust. I needed to remove the exhaust to remove the heatshields in order to make a full assessment and also get at 95% of the rust. There is still a bit that will be tough to get at, but I will do best efforts and spray with wax after anyway.
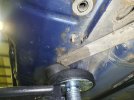

Then you have the rear areas around the jacking points (both sides) - various bits of corrosion etc. To do a decent job on this, that strut will need removing. I will also need to prop up that corner with something and temporarily remove that vehicle lift arm.

I think the only tool for the job is this, which I don't have. I do have a hydraulic transmission jack, but can't rely on hydraulics. I'll probably borrow one because i'm not working at the moment.... and for the first time in my life i'm (trying to) exercising financial restraint..

20231114_175109.jpg

It's worth pointing out at this point that I have been examining the brake lines. They aren't bad, but I will tidy up any light corrosion and cover with wax.

I did notice one of the fuel lines was a bit more advanced, rust wise than the brakes. I need to tread carefully there. I might treat and wax also. What's the deal with replacing these? I've not seen that done before.

Another failed seam at the rear jacking point, offside.

20231114_175112.jpg
20231114_175122.jpg 20231114_175126.jpg

Here is the near side rear where all the ABC plumbing is .. a bit rough, eh!?

I've decided that this time around I am not replacing the rear plumbing, as it's honestly not too bad (that I have seen). I do need to rebuild the valve block though. So I will probably dismantle this area a little bit and get at that rust.

20231114_175133.jpg

Nearside rear jack point.

20231114_175151.jpg

Fuel line vs two ABC lines.


20231114_175235.jpg

Fuel line again I believe. I'd be happy to take opinions and advice on what you would do with this fuel line. Needless to say that rust bracket will come off and get the same treatment as all other ABC pipe mounts.

20231114_175242.jpg

Sheet worked well.. I basically picked up all the corners and directed the liquid into the middle where I placed a load of cat litter and saw dust. That cat litter has soaked up countless oil spills and now all this. Definitely time to renew it.

20231114_175333.jpg

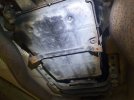
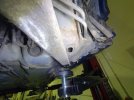
Transmission sump looking a bit sorry up there.. I have some black hammerite i'll use to touch it up after the rust is cleaned up.

20231115_120219.jpg
 
OP
Conor

Conor

Senior Member
Joined
Jan 22, 2019
Messages
2,544
Reaction score
1,637
Location
London, UK
Your Mercedes
2010 S212 350 CGI // 2004 R230 500
  • Thread Starter
  • Thread starter
  • #6
A few other pics I took towards the end of day..

I'll see what I can do with these heatshields. Most of the mounting points are corroded. I would like to buy new and they aren't that expensive.. but I really don't want to be spending money at the moment, if it can be avoided. I am conflicted.. because this car deserves to be treated well.. I do have some over size one way type washer fitting things .. they should suffice for now.

20231115_151626.jpg 20231115_151633.jpg

Exhaust came out a lot easier than the E class.. and no, the boat isn't mine. It might transpire that I was practising some level of financial constraint afterall.. I think boats are another level.

20231115_151636.jpg

20231115_151643.jpg

Propshaft bearing is fine .. that said. While I am this far in, I will be replacing the two couplers (guibo) as it will be easier, they are a bit perished and the car has a lot of torque. Big patch of grease there is the handbrake mechanism which looks in good order.

Is there ever a case to be made to clean off all the old lubricant and apply fresh stuff, or is that fine? I'm inclined to think the latter, but as a novice, just checking :)

20231115_153413.jpg

And yes, the engine has a bit of a leak .. I'm inclined to think it's rocker covers as they are common on the M113, I believe. That will be done before this sees the road.

20231115_153420.jpg

20231115_153500.jpg 20231115_153448.jpg

20231115_153512.jpg


This ugly duckling looks ripe for a clean up.

20231115_153522.jpg
 
OP
Conor

Conor

Senior Member
Joined
Jan 22, 2019
Messages
2,544
Reaction score
1,637
Location
London, UK
Your Mercedes
2010 S212 350 CGI // 2004 R230 500
  • Thread Starter
  • Thread starter
  • #7
While i'm in there, I might replace these nuts too.

It's hard to draw the line.. The reality is that I have a lift now.. and a lot of these little tasks can be postponed until later. I mean to replace and tidy up these nick nacks is a mornings work another time.

That said. I will be using this car for a while when I overhaul my E class so I don't want things getting worse.

20231115_153544.jpg 20231115_153533.jpg

20231115_153550.jpg

One final thing that I forgot. A number of those rubber plugs have failed and I will renew them, after spraying the cavities with Bilt Hamber Dynax cavity wax.

Believe it or not folks... you have made it to the end of my initial photo dump.. I hope you enjoyed it.

I will probably post another update after the weekend.
 
OP
Conor

Conor

Senior Member
Joined
Jan 22, 2019
Messages
2,544
Reaction score
1,637
Location
London, UK
Your Mercedes
2010 S212 350 CGI // 2004 R230 500
  • Thread Starter
  • Thread starter
  • #8
Jesus Connor , you really don’t do things by halves do you ! Impressive stuff .

I don't ... sometimes I wish I did lol..

Thank you - Hope you are keeping well :)
 
OP
Conor

Conor

Senior Member
Joined
Jan 22, 2019
Messages
2,544
Reaction score
1,637
Location
London, UK
Your Mercedes
2010 S212 350 CGI // 2004 R230 500
  • Thread Starter
  • Thread starter
  • #9
I really wish I had the wherewithal to video document this and start up on YouTube.

But between faffing around with cameras and lighting... not to mention editing. I think the overhead would be too much.

It's really annoying in this workshop. The sodium lights make for a green tinge in my photos.
 

s5tuart

Senior Member
Joined
Jan 25, 2012
Messages
2,963
Reaction score
2,684
Your Mercedes
2003 R230 SL350
Good luck Conor.
I can get all my engineering fix just following your threads.
 

Mark Q

Senior Member
Joined
Oct 30, 2013
Messages
636
Reaction score
327
Location
Warrington
Your Mercedes
R 230 SL 500 2004 & Nissan Navara, Jag F-Pace, BMW Z4
Wow, once more you have really gone to town. You've also given me more things to concern me about the R230, I'll be lying in bed now wondering how much rust is growing in the never seen places. Fantastic job, you should work for Car SOS or similar.
Also I'm in awe of what else is in the garage, really impressive. :D
 
OP
Conor

Conor

Senior Member
Joined
Jan 22, 2019
Messages
2,544
Reaction score
1,637
Location
London, UK
Your Mercedes
2010 S212 350 CGI // 2004 R230 500
  • Thread Starter
  • Thread starter
  • #15
Wow, once more you have really gone to town. You've also given me more things to concern me about the R230, I'll be lying in bed now wondering how much rust is growing in the never seen places. Fantastic job, you should work for Car SOS or similar.
Also I'm in awe of what else is in the garage, really impressive. :D

Thanks Mark.. some very kind words there.. but maybe let's wait to see if the job gets finished LMAO..
 
OP
Conor

Conor

Senior Member
Joined
Jan 22, 2019
Messages
2,544
Reaction score
1,637
Location
London, UK
Your Mercedes
2010 S212 350 CGI // 2004 R230 500
  • Thread Starter
  • Thread starter
  • #16
I wanted to call out a particular issue I had in removing the rear bumper.. and incidentally, how storing a car outside over a single damp winter can wreak havoc.

In June 2020 I did some work on the rear arches. At that time, I was easily able to remove the 4 bolts (2 x each side) that screw into speed nuts. All good.

Fast forward to August 2023 (after a cold damp winter outside in Ireland, or two actually)... those same bolts are now spinning in the speed nuts and I have a bit of a headache on my hands.

Note: At 16 years the fasteners opened just fine.. then 3 years on they are rusted and spinning!!

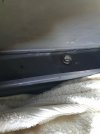
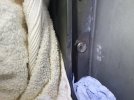
The bolt in question, is the rusted looking one in the centre of the picture, which is just on the inside of the rear quarter. It was spinning on the speednut on the other side, which was totally inaccessible.

20230923_130349.jpg

I have the unenviable task of trying to figure this out. Luckily I had just the tool.. My Black and Decker power file/finger sander. Armed with a fresh belt, I went to work.

20230923_165420.jpg


20230923_170300.jpg

As you can see, minor damage to the quarter.. where you need to be very careful, really. And I wish I didn't mark it at all. In any case, I will just give it a quick lick of paint and it will be fine.
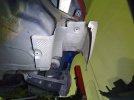
Also note the towel, which was used to prevent metal filings from entering unwanted areas.

At this stage you can see we have remove the bolt head and you can see the round profile of the round screw part of the bolt - perfect. I proceeded to give a few light taps with hammer and punch to issue some persuasion for the next step.

20230923_170704.jpg

From the outside, I then used a trim removal tool, plastic, to avoid marring my lovely Jasper Blue paint job.. The trim tool acted as a lever to pry the bumper away from the quarter and we were in business.

Funnily enough it was only the foremost bolts (1 each side) that had this problem.. the rears came out just fine.

Needless to say i'll be using some copper grease when it all goes back together.

It was a decent solution for me, but I wonder what alternatives people might use had they not got a power file on hand.

20230923_165415.jpg
 

Blobcat

Moderator
Joined
Feb 8, 2006
Messages
39,025
Reaction score
27,850
Location
Grange Moor
Your Mercedes
R171 SLK280, Smart R451, Land Rover 110 County SW, 997 C2S, R1250 GSA TE 40th, CBR600FP
I wanted to call out a particular issue I had in removing the rear bumper.. and incidentally, how storing a car outside over a single damp winter can wreak havoc.

In June 2020 I did some work on the rear arches. At that time, I was easily able to remove the 4 bolts (2 x each side) that screw into speed nuts. All good.

Fast forward to August 2023 (after a cold damp winter outside in Ireland, or two actually)... those same bolts are now spinning in the speed nuts and I have a bit of a headache on my hands.

Note: At 16 years the fasteners opened just fine.. then 3 years on they are rusted and spinning!!

The bolt in question, is the rusted looking one in the centre of the picture, which is just on the inside of the rear quarter. It was spinning on the speednut on the other side, which was totally inaccessible.

View attachment 87144

I have the unenviable task of trying to figure this out. Luckily I had just the tool.. My Black and Decker power file/finger sander. Armed with a fresh belt, I went to work.

View attachment 87145


View attachment 87146

As you can see, minor damage to the quarter.. where you need to be very careful, really. And I wish I didn't mark it at all. In any case, I will just give it a quick lick of paint and it will be fine.

Also note the towel, which was used to prevent metal filings from entering unwanted areas.

At this stage you can see we have remove the bolt head and you can see the round profile of the round screw part of the bolt - perfect. I proceeded to give a few light taps with hammer and punch to issue some persuasion for the next step.

View attachment 87147

From the outside, I then used a trim removal tool, plastic, to avoid marring my lovely Jasper Blue paint job.. The trim tool acted as a lever to pry the bumper away from the quarter and we were in business.

Funnily enough it was only the foremost bolts (1 each side) that had this problem.. the rears came out just fine.

Needless to say i'll be using some copper grease when it all goes back together.

It was a decent solution for me, but I wonder what alternatives people might use had they not got a power file on hand.

View attachment 87148
I’d use my dremel and cut off discs for that
 

00slk

Senior Member
Joined
Dec 1, 2012
Messages
9,687
Reaction score
9,410
Location
Cambridgeshire UK
Your Mercedes
2002 SL55 AMG, 2005 E320 CDi, 2014 SLK250 CDi, 2003 SLK200
Conor, I had the same issue with one formost bolt on the right. What I did (as I was painting the 1/4 anyway) was slide a plastic trim remover in, forcing the bumper down and undoing the bolt at the same time. The more weight applied forcing the bumper down the tighter the caged nut fought. It put up a good fight, but with the weight applied the bolt started to unwind and the caged nut nut finally gave up the fight and relented. No paint work was harmed in anyway :D
I replaced the speed clip.
I always copper slip any bolts, suspension, bumper and any small outer trim screws. It works a treat.
 
OP
Conor

Conor

Senior Member
Joined
Jan 22, 2019
Messages
2,544
Reaction score
1,637
Location
London, UK
Your Mercedes
2010 S212 350 CGI // 2004 R230 500
  • Thread Starter
  • Thread starter
  • #20
Evening all.. did a few more bits on Wednesday mainly on the rear end.

While I gather enough steam to make that upload, please see the repair of my friends blasting pot (that I broke) in preparation for blasting a few bits on the car which I want cleaned but hard to get at with my usual bits.


ALL MBO Club members qualify for 15% discount on second hand parts.Please see MBO Members’ Area for discount codewww.dronsfields.com
Top Bottom