I thought I'd do a quick write-up on the removal, repair and refitting of my R230 SL500 front shock absorber. Some of the tips will apply equally should you wish to remove a rear strut.
It's actually very straightforward - there's a lot of mystique surrounding ABC and I'm glad I personally have ousted this particular demon.
I needed to get my shock off as I had the dreaded worn out lower strut balljoint - take your car to a garage and it'll be a new shock required; over a thousand pounds.
Happily there is a specialist repairer in Liverpool (he offers a courier service) who can refurbish the balljoints - http://www.4wheelalignment.co.uk/ is the place to go. A very helpful chap called Phil was quite happy to spend a bit of time explaining the process to me.
There is a helpful PDF on the Arnott Industries site on ABC strut removal, it's for the S class W220 but is still very useful.
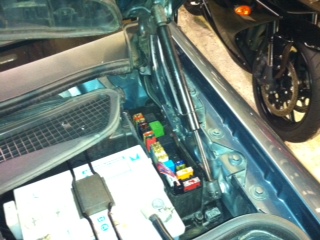
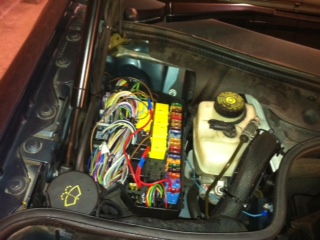
- remove, in the case of the R230, fuses 13 and 46 - they're in the engine bay boxes, one on either side.
Passenger (for RHD cars) side...
Drivers side...
- jack up car and remove relevant wheel (you only need to do the one wheel - the car does not need all four wheels off the ground or anything. It will not "sink".
- prop car for safety
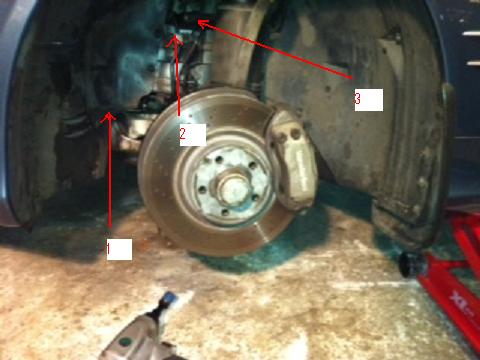
Note the bleed nut [1]
the pipe clamp [2]
and the ABC fluid quick release connector [3]
- remove/loosen the clamps that hold the ABC pipe to the bodywork
- clean the area around the ABC hose coupling as thouroughly as possible. This is important.
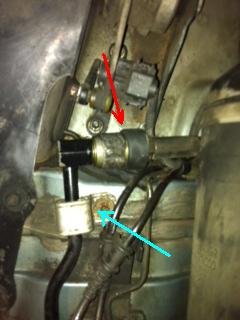
Clamp arrowed in blue, connector arrowed in red...
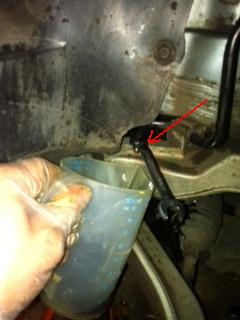
- remove the bleed nipple cover, place a receptacle under the nipple and loosen it off with an 11mm spanner - not much fluid will drain out, about half a mugful.
You'll need an 11mm spanner for this - you can see how little fluid drains out from this picture...
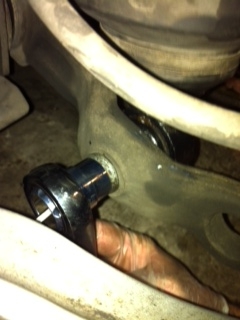
- pull back the collar on the QD connector (this is uber fiddly, or it was for me) and pull the pipes apart. It's like a high pressure BSP airline fitting, but stiffer and (obviously) more heavy duty.
- remove the balljoint lower bolt - you may or may not need to secure the inner shaft with an allen key.
- you may or may not need to be creative in getting the balljoint fee from the control arm. Whatever you do do no damage the balljoint or threads.
- when this is free then carefully unplug the connector on top of the suspension leg. Be careful - these look delicate. A flat screwdriver will help.
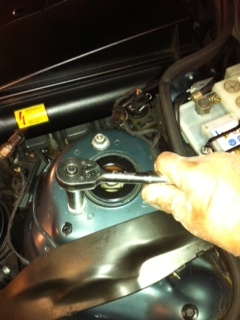
- undo the 3 bolts on top and (you may or may not need an assistant) pull the strut away from the car.
Be aware that you don't need to disconnect the battery - just remove fuses 13 and 46.
This is all really straightforward - if you can change a set of brake pads then you can do this job. This took me about 20 minutes, and half of that was getting the joint separated from the control arm. (The second time I did this it took less than ten minutes - it's very easy).
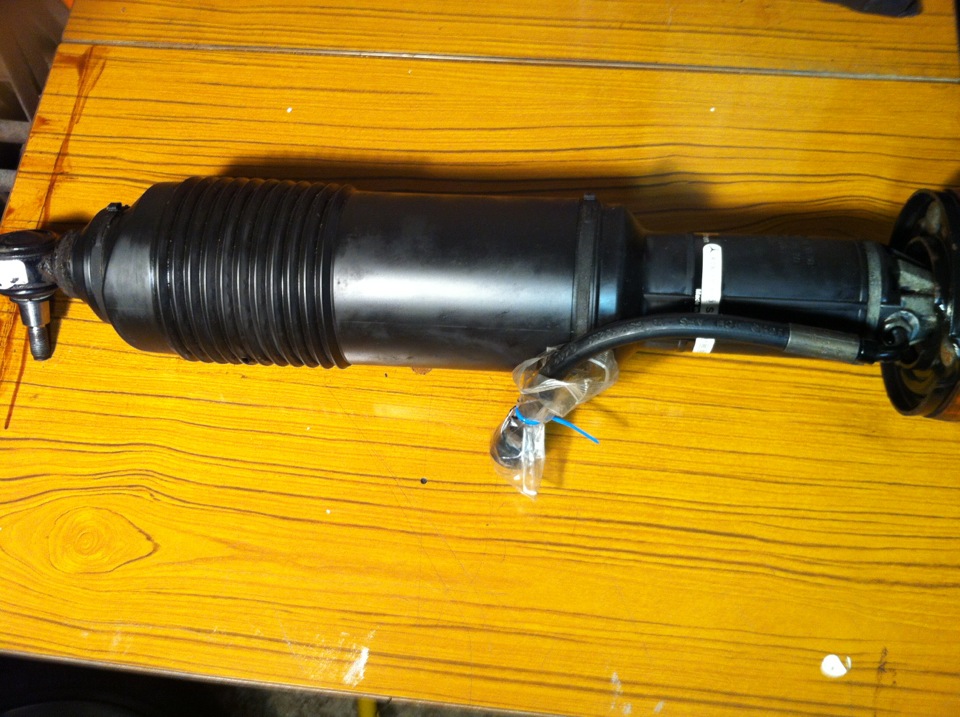
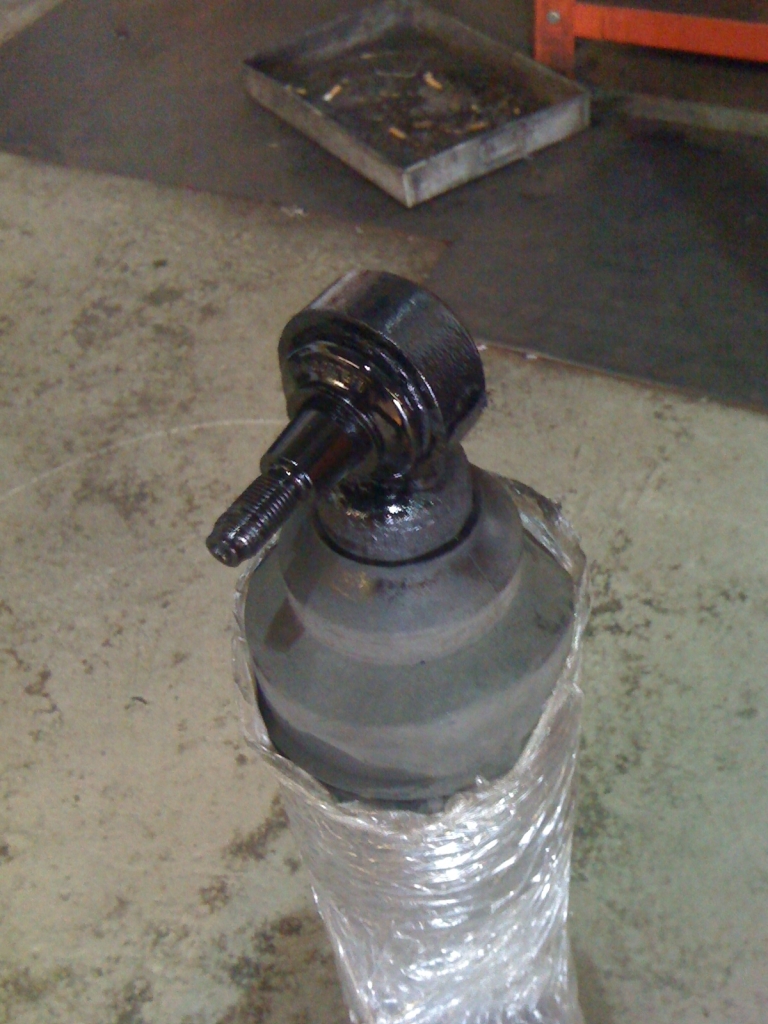
It's probably worth giving the leg (and the surrounding areas on the car) a really good degrease and clean. You will then end up with something like this.......
I'd suggest wrapping something round the coupling to keep it clean - dirt (like poor people) is the enemy of ABC.
I then went off and got the ball joint refurbed.
Refitting is, basically the reverse of removal. What I did was to measure how much fluid I had removed when I bled it down and put the same amount of new fluid back into the reservoir before testing.
Be aware that the quick release coupling might be a bit of a bugger to reconnect - when you restart the vehicle you might want to have an assistant on hand to scream hysterically if you haven't got the connection made properly. Refit the fuses and then start the car then check the connection is secure.
Tip: to make it easier to connect the pipes pull the rubber cover back over the flexible pipe - pull it back into position once you are sure it's connected properly. The rubber cover also serves as a good indicator as to whether you've got them connected as the discolouration of the uncovered bit of connector gives a sort of "tide mark" - if this makes sense.
There's no need to do any bleeding or whatever - when you put the wheels back on the ground it may be low on that corner - simply raise and lower the front suspension a few times and all should be well.
Check the ABC fluid level.
That's it - it really is that easy. Throughout all this I got no ABC warnings etc and the car rides beautifully - better than ever.
Ball Joint Refurbishment
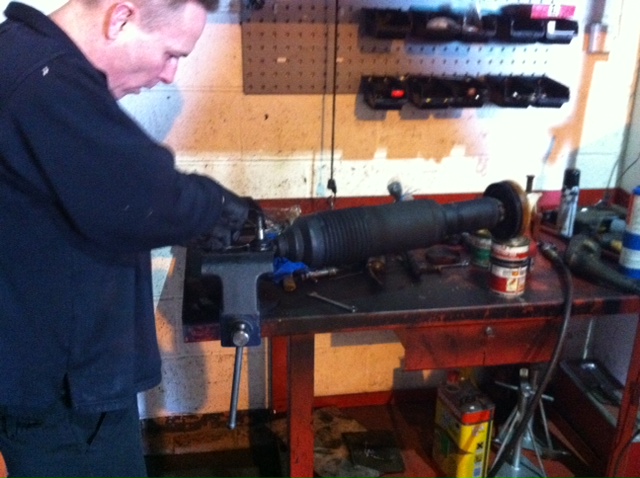
I then loaded up the shock into my trusty Citroen C1 and took it along to Phil at the ball joint restorers in Liverpool, got there at 9am and was greeted with a cup of coffee. They've got all the top line Hunter machines there, and judging by the premises they seem pretty clued up in matters suspension related.
The process is this....
(some of these photos are mine and some are from (with permission) "Gouki" from Pistonheads.com)
- a hole is drilled and tapped into the back of the balljoint
- mucho heat is applied to melt out any grease and any old bits of the socket
- it's all cleaned up
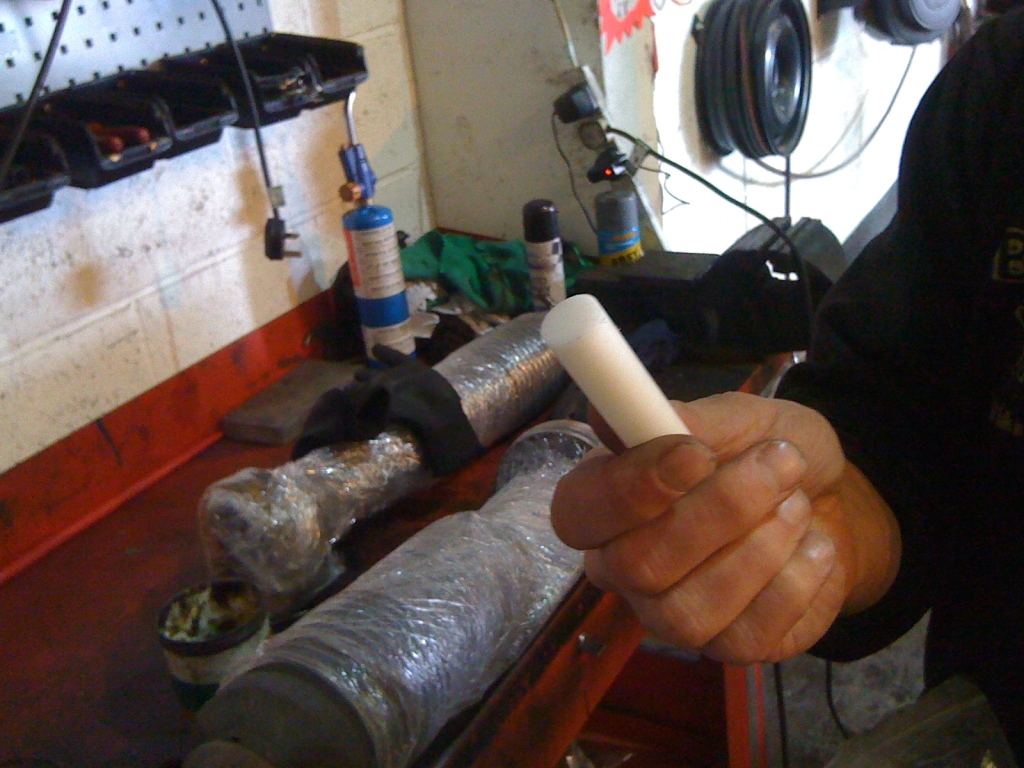
- new heated polymer is injected at 80 bar into the socket with a special injector that is threaded into the aforementioned hole
- this is the polymer....
... and this is the polymer being injected into the socket....
- machine removed, hole drilled through polymer to ball
- grease nipple fitted (this I like)
- left to cool off
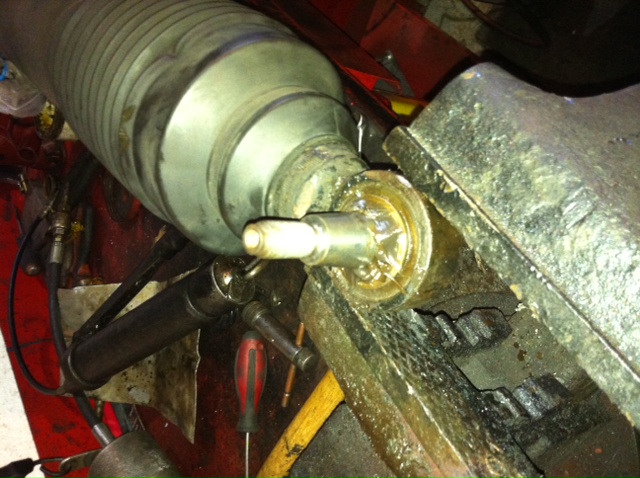
- new balljoint greased via nipple
- here's mine with the new grease splurging out
- (new) boot fitted
- swift lick of paint
- job done. About £1000 + vat saved. Job is warrantied for a year and he reckons they're better than when they were new.
GAD was founded in 2009 where we developed bespoke ECU Remapping software for motorsport clients, moving forward, we have extended to road vehicles for both performance and economy, contact GAD Tuninghttp://www.GADTuning.co.ukto discuss your requirements.
This site uses cookies to help personalise content, tailor your experience and to keep you logged in if you register.
By continuing to use this site, you are consenting to our use of cookies.