My other car (Warning: Ford Content)

OP
daveenty

daveenty

Senior Member
Joined
Jun 21, 2005
Messages
3,549
Reaction score
2,671
Location
The Frozen North :(
Your Mercedes
2019 AMG S Class Coupe
  • Thread Starter
  • Thread starter
  • #61
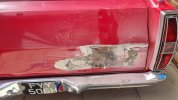
I'm really pleased with how the rot repairs on the rear arches turned out. Yes, there was a bit of a paint matching problem initially but that has now been resolved by a quick rub down and a blow over with the correct colour and it all looks fine. The tailgate is currently with my bodyshop person for a total refurb. I stripped it when I first got the truck which took ages but it has had so many different repairs done to it over the years, what it needed was way beyond my capabilities. There was nearly an inch of filler on it in places which was covering some very dodgy metalwork up. In fact, when I removed the original vinyl stripe which was across it, a large piece of filler just fell off. I ended up just giving it a light skim over to cover the worst of it and putting a bit of colour on it as a temporary fix but it deserves something better, hence the reason it's now been left in the bodyshop for him to work on in it at his own pace.

This is what I was up against, some of the removed filler and what was underneath it: -

Tailgate filler removed.jpg
Tailgate filler.jpg

While I'm on the bodywork thing, the bonnet is also letting it down a bit as the paint which I put on it ages ago proved to be a bit unstable and there have been a few problems with it reacting. I've rubbed it all right back but not painted it again yet, in fact it may be another job I sub out when I've managed to sort the hood scoop out. This is cracking along it's mounting points, so needs a stronger method of fixing it, which will possibly involve lots of rivets and copious quantities of J B Weld. The bonnet has always flexed a lot when opening or closing, which is certainly not helping with this problem, though has gone a bit easier since I literally soaked the hinges in oil. I don't suppose it's being helped by having a 16" circular hole cut in it to accommodate the air cleaner though the internal bracing still looks to be intact. This again is something to be done in the future as a non essential item.

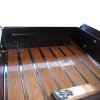
I keep looking at the actual pick up bed but can't decide if to spray it with a dedicated liner, which would be a matt black textured finish, or just leave it alone to show it's age. I've cleaned all the seams out and loaded them with fresh mastic to seal them, so there's no particular rush for this one, though there is a fair amount of bare metal exposed so it's going to need something at some stage. It's just a case of making a decision, which I'm not very good at currently. I've even been thinking of just clear coating it though it would have to be with a matt lacquer as I don't think that gloss would suit it. I just don't want it looking too new.

Pickup bed currently: -
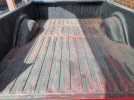
Pickup Bed.jpg

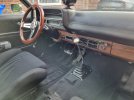
I was thinking of changing the seats from the currently fitted Recaro ones, which are looking decidedly shabby, to a set from another car though no idea what marque as yet. I did have the option of getting mine recovered but was somewhat put off by a quote of nearly £1,000, this by a guy I've known for many years. I know he's good but that's way over the budget I've set for the interior. In the meantime I decided to see if I could improve the looks of the ones I have so, armed with a few sockets, got them out of the car so I could get a proper look at them. A lot of the bagginess seemed to be caused by a couple of disconnected fasteners on the covers, so I manged to stretch and refit them and, so far, they seem to be a lot better and a tighter fit. There were also a couple of small tears in the drivers side bolster, this being the area where most of the wear is to be expected I suppose. I actually got a needle and cotton out and roughly darned the fabric back together again. Not perfect by any means but a lot better than it was. Finally, I decided that swapping sides may help, so the outside left is now inside right etc, not a massive thing on it's own but as the driver's seat had a lot more wear than the passenger one, it's made a nice improvement to my comfort if nothing else. It also looks a lot better than it did so these seats will now be staying for a while.

Seats looking a bit better after my messing around: -
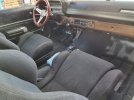
Interior swapped 03.jpg

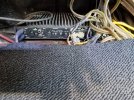
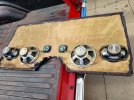
At the back of the seats there is a plywood panel which I've managed to ignore up to now. It's basically the rear panel which covers a storage area and was held in by double sided tape and a mastic type stuff so I attacked it all with a couple of screwdrivers and a sharp knife. It eventually gave up the fight and surprised me by revealing half a dozen speakers screwed into the panel and an old Alpine amplifer which was screwed and glued (with a massive lump of a mastic type substance) into the space. The wiring was amazing, all different types and styles, soldered and clipped together to make them reach whatever they were supposed to. This wiring went down the passenger side sill to the front of the cab behind the kick panel where it finished so, knowing that there was nothing live there, I ripped the lot out, along with the speakers and the amp. All are now in my bin as I've no idea of the condition so don't really want to chance selling them on.

Back panel and what it was hiding: -
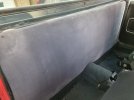
Back Panel.jpg
Amp.jpg
Speakers 01 All.jpg

I'll be attempting to put some new fabric onto the back panel as it's pretty shabby and is now letting things down a bit in my now clean(ish) cab. Having said that, whilst browsing I came across a rather nice flag and, for under £8.00 couldn't resist it as a stop-gap. Picture when it arrives and is fitted. :)
 
OP
daveenty

daveenty

Senior Member
Joined
Jun 21, 2005
Messages
3,549
Reaction score
2,671
Location
The Frozen North :(
Your Mercedes
2019 AMG S Class Coupe
  • Thread Starter
  • Thread starter
  • #62
I'll be attempting to put some new fabric onto the back panel as it's pretty shabby and is now letting things down a bit in my now clean(ish) cab. Having said that, whilst browsing I came across a rather nice flag and, for under £8.00 couldn't resist it as a stop-gap. Picture when it arrives and is fitted. :)

I know it's not really the done thing to quote yourself but I'm just following up on the promise I made in bold above.

Earlier picture in post above.

Back Panel flag 03.jpg

I think it looks better anyway. :D

Incidentally, this won't be the finished item. I have something a lot more subtle, along with a new piece of MDF now cut to shape and some foam to cover it. Just got a few other issues to deal with at the moment.
 
OP
daveenty

daveenty

Senior Member
Joined
Jun 21, 2005
Messages
3,549
Reaction score
2,671
Location
The Frozen North :(
Your Mercedes
2019 AMG S Class Coupe
  • Thread Starter
  • Thread starter
  • #64
I've had a few wiring issues recently, in that the truck was draining the battery pretty quickly. As an example, if I used it on a Monday it was flat on Thursday, taking nearly 24 hours to charge so there was obviously something amiss somewhere. I ended up checking it out with a multi meter and it seemed to be using around 300 m/A with everything off, so a definite issue. I did find what I thought was a redundant switch on the dash which once turned it off, reduced the flow to around 140 - 160 mA so better, though still enough to drain the battery after a few days of low/no usage. I popped in to see a local auto spark when it was charged again to book an appointment with him and, whilst not having time to look at it there and then, he had a quick poke around and gave me a couple of suggestions for things to check until I got it to him. The first was the alternator though this was quickly eliminated as the draw is the same even with it disconnected. I did however find out that the rev counter seemed to be live even with the ignition off so obviously a suspect. There was also a digital clock with a similar issue, constantly on and not fading when the ignition was off. These have now been sorted out by the electrician and a burnt out wire from the solenoid to the alternator has also been replaced and had an in-line fuse fitted as a precaution. I've never been happy with the wiring as it seems to have been added to and chopped and changed over the years, though at least now it's had an expert on it, hopefully making it safer to use. There is still a bit more to be done, mainly the ignition system, though this is currently stable and can wait till a bit later on. He's also suggested a new fuse box which I'm happy to have fitted.

I've managed to acquire a new oil pan for the transmission (sump) to replace the dented one which had a slight weep, along with a new gauze filter and several seals which will hopefully eliminate a few other minor leaks on the box. Most of the seals are now fitted and, so far at least, it seems to be pretty dry. I was also going to connect the kickdown lever while I had the pan down as it's never worked since I've owned the truck. Upon inspection however, it seems that the lever inside the transmission which connects it to the valve block is physically broken with part of it residing in the sump. Lucky escape there possibly, so I made a decision to blank the kickdown function off. I'm sure that the truck will cope without me having to drop a gear and, if I ever have to, I can still do it manually. I'll be fitting another shift lever soon as the one I'm currently using is very hit or miss due to the amount of play in it. It's currently bolted to the top of the transmission tunnel which in itself is a bit flexible, couple this with rubber engine and gearbox mounts and a long selector rod and everything is moving a lot more than it should be making gear selection a bit of a challenge. I've just ordered one which bolts directly to the transmission tail so hopefully this will tighten everything up and improve matters. Unfortunately it has a 5 week lead time so I'll just have to carry on for now. The new one will come with a built in neutral safety/inhibitor switch so that should be another thing taken off my long list of "bits to do".

I've been to visit my tailgate a couple of times down at the bodyshop. Not much happening really as he's been working on it in between jobs, though the bottom 2 - 3" have now been cut out and replaced with fresh steel along the entire length. It's actually turned out to be the worst part of the entire truck body wise which surprised me a bit as it didn't look too bad on the surface. I've just had an update on this and it's now in primer so there could be a possibility it'll be ready in the foreseeable future. At least I'm still using the truck without it so it's not all bad.

A decision has still not been made on the finish of the pickup bed but I have managed to clear the blocked drain holes. It used to fill up with water when it was parked in the rain, especially when facing downhill, which made it rather embarrassing when moving off and inconvenient to say the least for anyone behind it.
 
OP
daveenty

daveenty

Senior Member
Joined
Jun 21, 2005
Messages
3,549
Reaction score
2,671
Location
The Frozen North :(
Your Mercedes
2019 AMG S Class Coupe
  • Thread Starter
  • Thread starter
  • #65
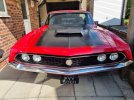
Incidentally, I forgot about this when I posted earlier but I managed to get it to a bit of a meet at Barton Aerodrome a couple of weeks ago. Nowhere near the best looking car there but it certainly didn't disgrace itself, even without the tailgate fitted. :)

Barton Yanks 01.jpg
 
OP
daveenty

daveenty

Senior Member
Joined
Jun 21, 2005
Messages
3,549
Reaction score
2,671
Location
The Frozen North :(
Your Mercedes
2019 AMG S Class Coupe
  • Thread Starter
  • Thread starter
  • #66
As I have several unfinished items on the truck, I decided to have a bit of a change from the heavy stuff and concentrate on the interior a bit, hopefully making it a more pleasant place to be. As mentioned in a previous posting, the seats have now been swapped L - R and vice versa to try to even the wear out a bit and I've tidied the covers up to the best of my limited ability. They're not perfect but are at least comfortable. While waiting for my new shift lever to arrive I decided that the sound system may benefit from a bit of an upgrade as it's the original AM radio fitted from new so very limited on channels. I could only get 2 or 3 stations on a good day, barely anything if travelling further afield, especially with only half an aerial which is all it's ever had in my tenure.

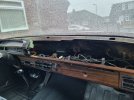
The logical and simplest way of getting to the radio is to strip the dash pad off to give access. This was a job I wasn't looking forward to as the majority of early 70's Fords have spring steel clips holding the top of the dash in place. These are notorious for breaking and I knew that mine was already missing one completely, with another one possibly damaged from the last time I removed it. This was also noticeable when looking through the windscreen at the heater vents and seeing that nothing was lined up as the dash was too far back. I decided to order new clips from the States before I started this job and they're now here so I've now stripped it. I'm also taking the opportunity to have a bit of a clean up behind the dash including tidying up a lot of wiring and giving it a quick coat of paint in any areas which are visible though inaccessible when it's back together.

Dash out showing added access: -

Dash out 2.jpg

The two holes at the top by the windscreen (there is a third above the cluster) are for the spring clip fittings which will hopefully lock it back into place.

After lots of research and checking fitting and sizes, I decided on a Retro Sound Laguna DAB radio which I got from a UK supplier. The deciding factor was that it would fit in the original dashboard cut outs, so no modification required thereby keeping a bit of originality. It's a really small unit with remotely mounted control knobs which are massively adjustable. It seemed fine after a trial fit though took a lot a fettling to get it how I wanted it. The original had black switches and chrome knobs but I'm happy with the look of this one. It's now fitted, secured and the wiring is mostly connected though the main harness is not yet plugged in to the radio as I'm still waiting for a few bits to finalise the install.

Radio fitted: -

New Radio in.jpg

I've also ordered a Scott Drake speaker. At 4" x 10", it's practically the same physical size as the original though with dual voice coils to give something like a stereo effect. Not perfect though an acceptable compromise. The original, which is slowly but surely disintegrating with bits of the cone turning to dust every day, was mounted at the top centre of the dash, making it easy to access while the dash is currently out.

There is a NOS genuine Ford aerial winging it's way over from a US supplier as well. I decided to go this way as it's an unusual fit on the wing, being specific to only a few model years, and apparently there are a lot of poor quality fakes around. Ideally I want it to just work straight out of the box. It's also a nightmare to fit with very limited access. I'll be trying a splitter type aerial for the DAB from the same supplier as the radio which will apparently work with this. I'm hoping it will as I don't particularly want one of those stick on screen ones.

All the old gear is now boxed up in my garage, to be eventually stored safely away.

Once this lot's sorted out and the interior is back together again I'll be starting on the floor area in readiness for the new gear selector. This should then theoretically be it for a while...
 
OP
daveenty

daveenty

Senior Member
Joined
Jun 21, 2005
Messages
3,549
Reaction score
2,671
Location
The Frozen North :(
Your Mercedes
2019 AMG S Class Coupe
  • Thread Starter
  • Thread starter
  • #67
Got let down with the speaker supply, Summit Racing tried to put it back another month so I had to cancel as they were also holding onto my new shifter as it formed part of the order and they wouldn't send one without the other. I ended up ordering an alternative item from the people who supplied the radio which I should have done in the first place really, negligible cost difference and one day delivery. Once the speaker arrived it was just a case of splicing the tails supplied with it into the harness which came with the radio. I then fitted the speaker to the dash, which was a breeze as everything just lined up straight away. It was then a case of throwing the dash back in the cab, plugging the speaker harness in and connecting the tacho which, annoyingly, is stuck on the top of the dash. I had to extend the wiring a bit here due to a lack of space to re-join the original wires as the auto spark had altered a lot of the old stuff for safety reasons. All now tested and everything seems to be working fine so far. I've no aerial as yet but I could test the unit and speaker using an old phone as an mp3 player. It's going to be nice to listen to music as opposed to listening out for every untoward mechanical noise of which there are many. The exhaust has quietened down a lot since I first fitted it, amazing what a bit of soot/carbon can do (must sort the mixture out soon :)). It's still loud but seems to have mellowed if that makes sense?

The dash didn't actually want to go back in at first, in fact it fought me all the way with the mounting clips not locating correctly or failing to latch in place. It turned out that I'd managed to bend one whilst struggling to get the dash in place. It should be a two man job really, not so much for weight, just for balance due to the length of the thing. After stripping it out again to replace the clip I damaged with a spare, I decided to remove the steering wheel to give me a bit more room. This worked and I was able to line everything up correctly before the final slam into place. It seems to be secure now and will hopefully not need to come out again for a good while.

Just a minor thing but the glove box has never had a lock which worked since I've owned the car. I initially had to break into it as the lock was seized solid so I just removed it. I tried some of those little magnets to stop the door from opening but they didn't really work and I just ended up chasing them around the door frame.
After several measurements, I figured that a filing cabinet lock may work. I had to remove the original chrome bezel from the door as it made the hole too narrow but once it was out of the way the lock slid in perfectly and locks/unlocks as required. £6.99 and another job sorted. I just wish I'd thought of this months ago. Not only that, it looks neat too. :)

Glove box 02.jpg
 
OP
daveenty

daveenty

Senior Member
Joined
Jun 21, 2005
Messages
3,549
Reaction score
2,671
Location
The Frozen North :(
Your Mercedes
2019 AMG S Class Coupe
  • Thread Starter
  • Thread starter
  • #68
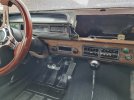
As the interior is now back together, it was now time to strip the bottom half of it, namely the carpets to allow access to the transmission tunnel to fit the new and hopefully improved gear selector. The carpet is split into front and a back sections which overlap just underneath the front seat bolts so these had to come out. I also loosened the rear ones just to make life easier. I've replaced all the bolts with new ones, again more for ease than anything else. Once the carpet was removed, I cut a small exploratory hole in the tunnel to see exactly where the new gear shifter will be living. I was a bit concerned that it could possibly be too close to the dashboard when fitted as the 12" gearstick which I ordered grows to nearly 16" when fitted on it's mountings. It does clear everything though, so my small test hole changed into a gaping chasm. The main problem is that the transmission I'm using is not from this vehicle and is a lot larger than the original. Consequently there's barely any room between the box and the tunnel, less than 5mm in places so not a lot of room to hide a big clumsy shift mechanism, hence the removal of the large section of tunnel. It actually took more time to reinstate the metal than to fit the shifter as the tunnel's now all been raised, up to 50mm in some parts. Having said that, everything seems to be working fine so far, even my new inhibitor switch is wired and functioning. :)

The sound deadening material had seen better days, particularly on the drivers side floor so I stripped it all out and put a few bits of relatively cheap new stuff in. The old crumbly stuff has gone back in over the top of it though this will all be a temporary measure as, while the floors seem solid enough, they do leave a lot to be desired aesthetically, with a few previous repairs looking a bit suspect. I'll also be re-making the tunnel when I get round to doing this as, whilst it's functional, I'm not happy with the general shape. I may or may not do these jobs myself, things are not getting any easier lately and I seem to get tired more than I used to do. I won't be doing anything immediately but hopefully it will start to come together over the winter, when I'll probably treat it to a new carpet as well as this one's been getting a bit of hammer.

How it started after cutting the fixing hole and with the old one still in: -

Tunnel Hole 01.jpg

The two visible bolts on the transmission tail are where the new shifter will bolt to.

New shifter in place. (The flap behind it in the carpet is where the old one used to live) : -

Tunnel Hole covered 08.jpg

I won't be doing anything else to it for a while now, want to stop spending on this one for a month or two and concentrate on the S63 for a while, mainly getting it out of the garage and giving it a few run arounds before the Beaulieu meet next month. :)
 

00slk

Senior Member
Joined
Dec 1, 2012
Messages
9,672
Reaction score
9,393
Location
Cambridgeshire UK
Your Mercedes
2002 SL55 AMG, 2005 E320 CDi, 2014 SLK250 CDi, 2003 SLK200
Coming on nicely Dave :cool:
 
OP
daveenty

daveenty

Senior Member
Joined
Jun 21, 2005
Messages
3,549
Reaction score
2,671
Location
The Frozen North :(
Your Mercedes
2019 AMG S Class Coupe
  • Thread Starter
  • Thread starter
  • #70
Coming on nicely Dave :cool:
Cheers Pete,
Just been out in it to pick some bits up. Probably tempting fate here but it's running really well at the moment, fingers crossed it stays that way for a while. I'm hoping to get the tailgate back on it in the next few days, that will be another milestone.

Loads of other bodywork to do but no real rush now, going to give the Merc a clean up over the rest of this week.
 

00slk

Senior Member
Joined
Dec 1, 2012
Messages
9,672
Reaction score
9,393
Location
Cambridgeshire UK
Your Mercedes
2002 SL55 AMG, 2005 E320 CDi, 2014 SLK250 CDi, 2003 SLK200
Cheers Pete,
Just been out in it to pick some bits up. Probably tempting fate here but it's running really well at the moment, fingers crossed it stays that way for a while. I'm hoping to get the tailgate back on it in the next few days, that will be another milestone.

Loads of other bodywork to do but no real rush now, going to give the Merc a clean up over the rest of this week.

I wish I could get, at least 1 car useable, have 7 off the road or running projects at the moment. The Missus says, 'I should get my act together' :rolleyes: Then I go and buy another car................:eek:
 
OP
daveenty

daveenty

Senior Member
Joined
Jun 21, 2005
Messages
3,549
Reaction score
2,671
Location
The Frozen North :(
Your Mercedes
2019 AMG S Class Coupe
  • Thread Starter
  • Thread starter
  • #72
Nothing major has been happening with the Ranchero but I have been getting on with a few of those niggly and annoying little jobs which tend to get put off. One of these was the heater fan which, whilst being on a three speed switch, was only ever either fully off or on, with nothing in between. The reason for this became apparent when I eventually found the resistor for it had been by-passed. A spade connector on the resistor had broken off so I cleaned the remains of it up and soldered another on. Cleaned all the rest of the connectors up, checked it for resistance, plugged it all back in and happy days. It takes a couple of "switch flicks" to change speed, which I'm hoping is just down to lack of use over the last few years.

Another minor thing but the indicators have never self cancelled since I've owned the car. Not too detrimental but annoying nonetheless. A lot of head scratching was involved here but I made use of an old bolt, a file and some glue and so far it seems to be functioning.

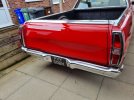
I finally managed to get the tailgate back from the painter. He's done a nice job with it, very well priced and to get it how he has from what he started with is pretty impressive. It was basically a twisted lump of rotting metal and now really tidies the back end of the truck up. Having said that, he did have it for 12 weeks. The colour match isn't perfect but trying to match red from the 1970s is a bit of a challenge, especially as most panels are different shades anyway. It currently needs a fair bit of adjustment as it's catching a bit on the base when fully opened. I'm not sure if this is due to the new metal possibly being slightly out of shape, or that it's been messed about with a lot over the years. Going by the state of the doors and bonnet fitting then I'd probably go with the latter. Nice to have it back on though. :)

Tailgate 17.jpg

Finally, I eventually plucked up the courage to start work on the bonnet itself. It's looking a bit sad, with the air intake/scoop cracking on one side and the paint is looking pretty dire, with cracks, micro blistering and loads of other faults. I've decided to take it down to bare metal and start again. This will take a few days as there are up to 14 coats on it in places so it's both time consuming and tiring. Once I've got it stripped and prepared, I'll put some primer on it and then decide if I'm going to paint it myself or get a pro to do it.
 

Blobcat

Moderator
Joined
Feb 8, 2006
Messages
38,974
Reaction score
27,731
Location
Grange Moor
Your Mercedes
R171 SLK280, Smart R451, Land Rover 110 County SW, 997 C2S, R1250 GSA TE 40th, CBR600FP
Once I've got it stripped and prepared, I'll put some primer on it and then decide if I'm going to paint it myself or get a pro to do it.
Looking good Dave :)

You’ll paint it yourself, not be 100% happy then get a pro to do it…;):cool::p:D
 

bladecrazy

Senior Member
Joined
Jun 2, 2020
Messages
453
Reaction score
400
Location
bolton
Your Mercedes
tesla model 3 performance /honda cd175/w123 300d gertrude.
looks good and the tail gate is spot on!.
 

s5tuart

Senior Member
Joined
Jan 25, 2012
Messages
2,961
Reaction score
2,683
Your Mercedes
2003 R230 SL350
I'd do this with the flatbed.

E81A6787-82E1-4AFA-8C46-B6E888D5CC72.jpeg


Last edited:
OP
daveenty

daveenty

Senior Member
Joined
Jun 21, 2005
Messages
3,549
Reaction score
2,671
Location
The Frozen North :(
Your Mercedes
2019 AMG S Class Coupe
  • Thread Starter
  • Thread starter
  • #76
Looking good Dave :)

You’ll paint it yourself, not be 100% happy then get a pro to do it…;):cool::p:D

Sounds familiar. :D If I do, it'll just be in a satin black without the red edges. I have satin black somewhere in my garage but the red has to be made up and custom paint's not cheap anymore. :(

I'd do this with the flatbed.
View attachment 85519

Much as I like wooden beds, I think that they're very dependant upon the type of truck/pickup bed. Something like an F100 or a C10 with a separate chassis and detachable bed lend themselves to this and it really suits them. However, and this is purely my opinion, on a unibody like the Ranchero or El Camino then they don't really look as good.

One of the reasons being is that, if you look at the picture up at the top of this page of the bed, you'll see a bolted down panel in between the wheel arches. This was originally the rear footwell from when the truck was actually a Torino, before it changed direction on the production line. It actually houses the top mountings for the rear shock absorbers so needs to be accessible, albeit on an occasional basis. Another thing is that at the rear of the bed floor is an section which is embossed "Do Not Drill Holes Inside Marked Area". The reason is that this is immediately over the fuel tank so again a bit awkward for fixing a wooden bed down.

Incidentally, I've still not decided what's happening to it though have acquired a couple of litres of clear lacquer in a matt finish. :)
 
OP
daveenty

daveenty

Senior Member
Joined
Jun 21, 2005
Messages
3,549
Reaction score
2,671
Location
The Frozen North :(
Your Mercedes
2019 AMG S Class Coupe
  • Thread Starter
  • Thread starter
  • #77
The tailgate is now something like a fit so it's going to get left alone for a while as it's no longer catching. I ended up with a mate of mine giving me a lift to adjust it, him forcing it in place whilst I tightened the adjustment bolts. Not perfect but a lot better than it was and probably as good as I'm going to get it.

The bonnet took a lot more time than anticipated, the stripping being a nightmare with all the layers which were previously on it. Some of these layers were filler, which hasn't exactly endeared me to the neighbours with clouds of dust going everywhere but it was eventually taken down to bare metal. The scoop is now glued back into place with JB Weld and a couple of rivets to squeeze it all together. A layer of fibreglass matting was then laid around it with resin, which will hopefully help in holding it down.

After a lot more rubbing down, a light skim of filler, then more sanding I eventually managed to get it in primer. It still needs a bit more work on the cosmetic side of things, with a few strange shapes and some pinholes, but basically I ran out of time so have given it a couple of coats of clear lacquer just to try to protect the primer from the weather. There were some pretty deep gouges in several places on the bonnet which I had to grind out, no idea what they were from but they were in the metal under all the original paint and seemed to be the source of the splits in the finish which were noticeable when I first acquired the truck.

I've decided that I'm not even going to attempt to paint it myself. I no longer have spray guns so it would have to be rattle cans and I know that I wouldn't get a decent finish on it. While aerosols were acceptable for the primer/clear coat, they're not going to work on the colour, so I'll have a chat with my painter when I get a chance and ask him to fit it in when he has a bit of time.

I ordered some rubber seals for where the window meets the roof, or roof rail seals as they're referred to apparently. As the doors are frameless these rubber seals are pretty critical in keeping the interior dry and the current ones have failed with this which apparently is a very common and known fault on these cabs. The new seals were not cheap though seem to be well made and, so far, seem to fit alright. I've also ordered a set of window felts, the scrapers between the door and glass, which proved particularly difficult to source. The main supplier in the States no longer exports to the UK so I had to do a lot of searching, eventually finding a supplier through a US based truck forum. There were some on the bay of dreams but I've bought cars for less than they're asking for them...

I still have to adjust the windows as there are a few gaps, though need the new felts fitting first to hold the glass steady.
 
OP
daveenty

daveenty

Senior Member
Joined
Jun 21, 2005
Messages
3,549
Reaction score
2,671
Location
The Frozen North :(
Your Mercedes
2019 AMG S Class Coupe
  • Thread Starter
  • Thread starter
  • #78
I've got the bonnet scoop about the best that I can personally get it now, basically just trying to get it to stop splitting on the edges where the fibreglass joins the steel. The problem is that there's very little material on the scoop to bond down to the bonnet. The right hand side wasn't too bad and I managed to get a couple of rivets in there but the left wasn't playing at all. I drilled a small pilot hole which just disintegrated so I filled it all using an epoxy glue which I'm hoping will hold up though somehow I doubt it and am resigned to the fact that it will probably crack again. The problem is that the bonnet moves an awful amount when driving, just due to general vibration. It also flexes a lot every time it's opened due to both the physical size of it and the fact there's a large round hole in the middle, hence the need for the scoop. The hole is to accommodate the air cleaner as the carb is on a hi-rise manifold, so there's not a lot I can do really. Ah well, these things are sent to try us. I ended up putting some paint on it as I was sick of looking at primer. It's now in red around the edges, with the centre section in satin black with a thin satin black stripe round it. Not the prettiest of jobs but not bad for an old bloke with a few rattle cans on a driveway. Incidentally, I know that I said I wasn't going to do this myself and was going to let the painter finish it after I'd done all the prep but he's no time and I've no money so it's worked out OK for both of us.

Paint Strip 12.jpg

The next main job will probably be to the sort the transmission tunnel out. When I put the last shifter in I just patched it by riveting a couple of plates in. This was only ever going to be a temporary fix. It's been messed about with over the years to accommodate the various parts it's had fitted so the best thing to do would be to make a new out of some fresh steel and try to simplify the current shape. While this is being done I'll also try to tidy all the previous floor and inner sill repairs. There is one poor job which will need replacing but the rest of it, while leaving a lot to be desired aesthetically seems to be functional. I'm currently trying to convince myself that it won't take much work to sort these repairs but I've been caught out that way before so won't comment until they're sorted. I've a feeling that this lot will take a substantial part of my winter months up. One problem with these jobs is that, whilst having a garage with a lift in it, the Mercedes has to be back in it every night for insurance purposes. This is both inconvenient and frustrating but it has to be done unfortunately.

Once the metalwork above is completed, I'll be going back to tidying up the interior. Lots to do here, including making it watertight. I'm been informed that the new window felts are now on their way from the US so I'll get them fitted as soon as they arrive just to try to seal it up a bit. I'll also be trying to tidy the door cards up while they're removed to fit the weatherstrip. I've been looking round for an alternative pair of seats to replace the currently fitted Recaro ones though nothing suitable has appeared yet. I'm not in a rush for these but don't really want to pay the best part of a grand to have the current ones recovered as I'm convinced that there will be some better and comfier ones knocking around. A new carpet may also be fitted as the current one has a few holes in it from the previous shifters. I could try to patch it up first but I doubt that I'll be happy with that, especially as I can get a brand new tailor made "luxury" one from the States for under £400. if I do decide on a new one, that will be the logical way as opposed from trying to fit domestic stuff which never really works for me. I'll also probably renew the insulation/sound deadening material whilst doing this but no decisions till nearer the time as there's going to be a lot of preliminary work first as mentioned earlier.

I probably won't be updating this thread for a while now as all the above will be taking a lot of my time up though if any other little bits get sorted, I'll try to jot them down .
 

Blobcat

Moderator
Joined
Feb 8, 2006
Messages
38,974
Reaction score
27,731
Location
Grange Moor
Your Mercedes
R171 SLK280, Smart R451, Land Rover 110 County SW, 997 C2S, R1250 GSA TE 40th, CBR600FP
Regarding the bonnet, could you fit some strengthening bracing on the underside at all to reduce the flexing?

There’s some great boding agents these days, so if there’s space you might be able to fabricate something.
 
OP
daveenty

daveenty

Senior Member
Joined
Jun 21, 2005
Messages
3,549
Reaction score
2,671
Location
The Frozen North :(
Your Mercedes
2019 AMG S Class Coupe
  • Thread Starter
  • Thread starter
  • #80
Regarding the bonnet, could you fit some strengthening bracing on the underside at all to reduce the flexing?

There’s some great boding agents these days, so if there’s space you might be able to fabricate something.

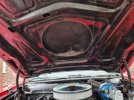
Appreciate the thought but unfortunately (or possibly fortunately?) all the original bracing is still in place. The hole for the air cleaner has been cut cleanly and managed to avoid any damage to anything of consequence.

It still flaps about like a mainsail though as it will have lost some rigidity due to the removal of the original material I suppose.

Pic to show design (not got round to painting under here yet, probably never will): -

Under Bonnet 05.jpg
 

You lost your key ? Or maybe you need a spare! Your vehicle imobilliser does not respond anymore? WE CAN FIX THEM ALL !! Mobile ! Save Time and Increase Profits With us !
Top Bottom