Blobcat
Moderator
- Joined
- Feb 8, 2006
- Messages
- 40,171
- Reaction score
- 29,820
- Location
- Grange Moor
- Your Mercedes
- R171 SLK280, Smart R451, Land Rover 110 County SW, 997 C2S, R1250 GSA TE 40th, CBR600FP
- Moderator
- #1
Further to my front suspension change:
 forums.mercedesclub.org.uk
Today I tackled the rears
Overall much easier than the front as no scary spring compressors required
First thing is to find the suspension top mount in the boot… there is a pre-formed cutout in the carpet (see red arrow below)
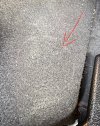
Just cut enough of the tabs around the circle so you can fold it back to access the top mount
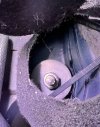
You then need a 17mm feed through socket and a 5x8mm “socket” to hold the centre.
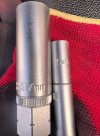
I then undid the 17mm nut, removed the large washer and rubber top mount
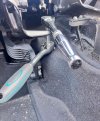
Next chock the front wheels, jack the car up, remove the road wheel, use a couple of axle stands as well as a trolley jack to keep safe.
A couple of 10mm nuts hold the plastic undertray to the lower suspension arm, you can then unclip it so you can access the lower nuts.
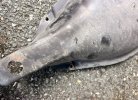
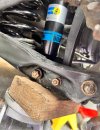
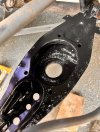
There are just 3 nuts to remove - 16mm on the shock, 13mm on the anti-roll bar and 21mm on the lower hub
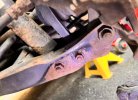
The 2 smaller bolts have E-Torx heads (E14 and E12) and the hub bolt is 22mm.
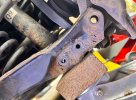
With a second jack and a block of wood you can lift the arm to take the tension off the bolts. The 2 small ones slide out easily enough. The hub bolt required a little persuasion…
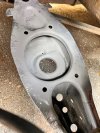
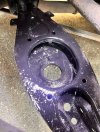
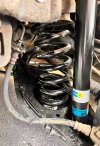
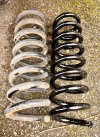
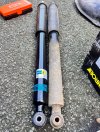
New v old
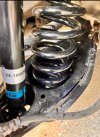
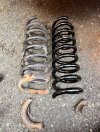
Surprise surprise drivers side rear spring broken at the bottom…
R171 Front suspension replacement
Front passenger side spring broke at the bottom (don’t they all…) :rolleyes: I've ordered the struts and springs - £301.31 all in for 2 x Bilstein B4 Shock absorbers and 2 x Febi Bilstein Coil Springs - although not here yet… Wanted to check if I need the top mounts as well and as Theo is...
Today I tackled the rears
Overall much easier than the front as no scary spring compressors required
First thing is to find the suspension top mount in the boot… there is a pre-formed cutout in the carpet (see red arrow below)

Just cut enough of the tabs around the circle so you can fold it back to access the top mount

You then need a 17mm feed through socket and a 5x8mm “socket” to hold the centre.

I then undid the 17mm nut, removed the large washer and rubber top mount

Next chock the front wheels, jack the car up, remove the road wheel, use a couple of axle stands as well as a trolley jack to keep safe.
A couple of 10mm nuts hold the plastic undertray to the lower suspension arm, you can then unclip it so you can access the lower nuts.

There are just 3 nuts to remove - 16mm on the shock, 13mm on the anti-roll bar and 21mm on the lower hub

The 2 smaller bolts have E-Torx heads (E14 and E12) and the hub bolt is 22mm.
With a second jack and a block of wood you can lift the arm to take the tension off the bolts. The 2 small ones slide out easily enough. The hub bolt required a little persuasion…

New v old

Surprise surprise drivers side rear spring broken at the bottom…


