You are using an out of date browser. It may not display this or other websites correctly.
You should upgrade or use an alternative browser.
You should upgrade or use an alternative browser.
How do you replace Self-Levelling Suspension on W210
- Thread starter RANA_1
- Start date
stuboy
Active Member
- Joined
- Jun 19, 2006
- Messages
- 26
- Reaction score
- 0
- Your Mercedes
- W210/2001/3.2 Petrol
What Now?
Ok Chaps got my Spheres installed today, however:-
1) When i had the bleed valve open on the actuator initally i got about 1/2 a litre out then it stopped. I then ran the engine expecting it to pump the rest out of the resevoir, however nothing happened!
2) Do I need to bleed the system now I have installed new spheres, if so how?
3) Could I have a blocked pipe and where do they run? Anyone got any pictures?
4) Where does my PAS pump live? I assume the fat pipe from the rersevoir connects to it then the pump feeds the power steering and a feed then goes to the back of the car?
Any help gratefully recieved
Stu
Frontstep
Senior Member
- Joined
- Apr 22, 2007
- Messages
- 9,229
- Reaction score
- 3,472
- Your Mercedes
- T210 320cdi
Have just finished that very job the system doesn't self bleed as some will tell you, you need to disconnect the level control arm (10mm nut) remove end attached to control without adjustment on linkage and with engine running push lever to top you should hear the fluid and see car rise (I thinks its that way round but does not matter) leave till car has risen then move lever down watch car sink on suspension then repeat a few times, if some one sits in the car running just above tickover speed is sufficient and with wheels supported ie not on wheel free ramp check fluid and hopefully height from tyre to wheelarch will be ok otherwise you have to adjust linkage.
stuboy
Active Member
- Joined
- Jun 19, 2006
- Messages
- 26
- Reaction score
- 0
- Your Mercedes
- W210/2001/3.2 Petrol
W210 SLS Rear Suspension Spheres and Adjustment
Thanks for the info Frontstep, I went out tonight put her on my ramps and crawled underneath, the adjuster was in the minimum position. I thought the end might have moved on the anti roll bar so I undid the nuts. Bugger the end of the Ubolt snapped so had to take it off and Mig a new thread from an M5 bolt back on so be careful. Any how I discovered a flat on the roll bar so there is no way the ubolt can slip, hope that helps someone!
I moved the adjuster after taking one of the nuts off and pushed it up ( towards the underside of the car) and hey presto up she went and pretty fast too, around 10 seconds for 20mm. I have left the adjuster in the maximum position and it is higher than it used to be but I think its not quite high enough, could I still have a problem?
Regards
Stuart
Frontstep
Senior Member
- Joined
- Apr 22, 2007
- Messages
- 9,229
- Reaction score
- 3,472
- Your Mercedes
- T210 320cdi
This doesn't quite add up, so here goes, to remove adjuster from linkage there is one 10mm nut with that removed and operating the lever by hand (engine running) the car should move up quite high to about 10 cm between top of tyre and wheelarch then move lever opposite way and car should descend and rest on springs do this a few times to bleed system and without measurement to hand ( someone may have correct setting? ) reattach lever and check measurement between tyre and wheelarch (that has been hopefully supplied) if incorrect use the other part of the linkage with the adjustment on it to set height.
stuboy
Active Member
- Joined
- Jun 19, 2006
- Messages
- 26
- Reaction score
- 0
- Your Mercedes
- W210/2001/3.2 Petrol
W210 SLS Adjuster Adjustment
Hi Frontstep, Indeed it doesn't quite add up! I did as you said last night took it way up down and up about 4 times then re attached to adjuster. The adjuster was pretty close to its minimum position, I now have it all the way out to its maximum position but the car is still a little low i think although measuring it the front and back are 668mm from the ground to the top of wheel arch. It was 664mm so its much better but its right on the end of the adjuster.
Possible causes:-
slightly faulty adjuster
bent anti roll bar
something wrong with the linkage
Spheres still not fully bled perhaps?
Regards
Stu
Frontstep
Senior Member
- Joined
- Apr 22, 2007
- Messages
- 9,229
- Reaction score
- 3,472
- Your Mercedes
- T210 320cdi
I assume it doesn't leak anywhere first ?
When driven does it ride well ie no air.
If all fine load back of car with some weight equivalent to a few large germans does car self level
Maybe a look at a blow up on the russian parts site would be helpfull ?
Your measurements the same b&F (on assuming level gound) implies the car sits level ? the suspension only self levels the back to adjust for loading
The elegance sits a bit higher.?
If so the fundamentals of the system are working and you are looking at the assembly of the linkage etc and anything else you have removed IF LEVEL WRONG.
Hi, i'm looking for the Merc tech bullitin for the rear sphere replacement. Do you still have it ?
Cheers
Neil 1234coops@googlemail.com
Cheers
Neil 1234coops@googlemail.com
tjamesbo
Senior Member
- Joined
- Dec 26, 2006
- Messages
- 1,464
- Reaction score
- 95
- Location
- Sutton Coldfield, West Midlands
- Your Mercedes
- 1999 CLK430, 2007 VITO 3.0V6 , W124's (1994 320TE , 1993 220TE ) , 07 2.5 X-Type
W210 Self levelling Pictures
Good Thread here I have decided to do mine as I appear to have the classic hard ride symptoms an crashing over bumps . Spheres £116 Total for 2 from ECP with the forum discount Merc Oil 2 litres not cheap at £28.30 Total
To assist anyone else here are some pictures of the Setup
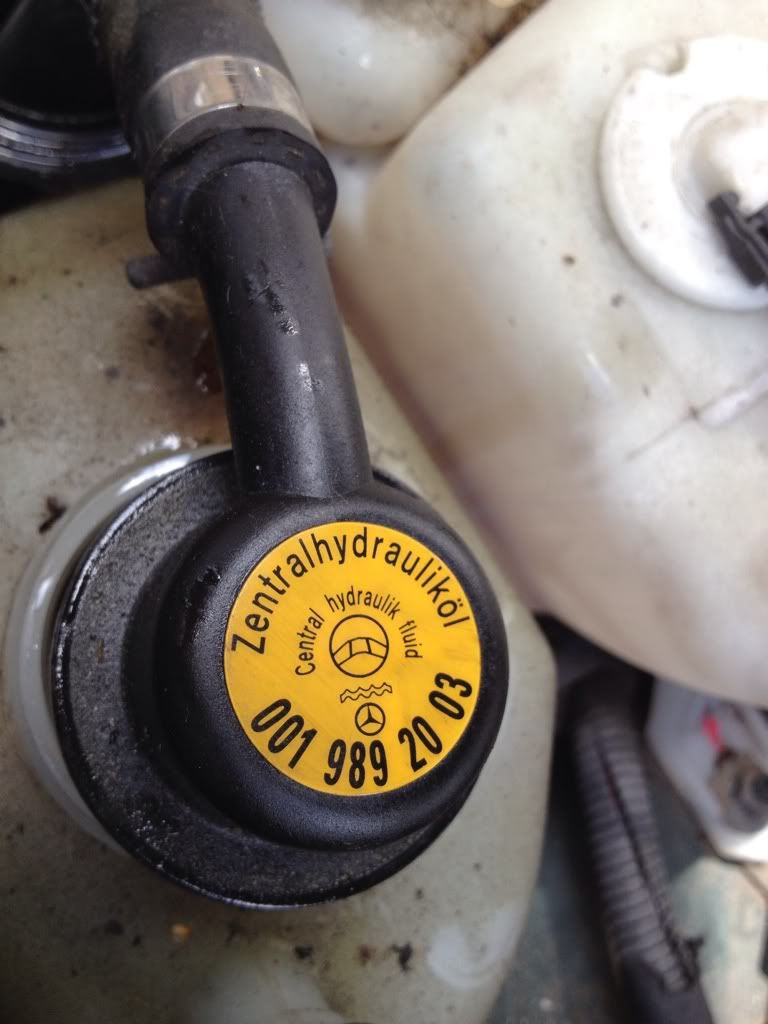
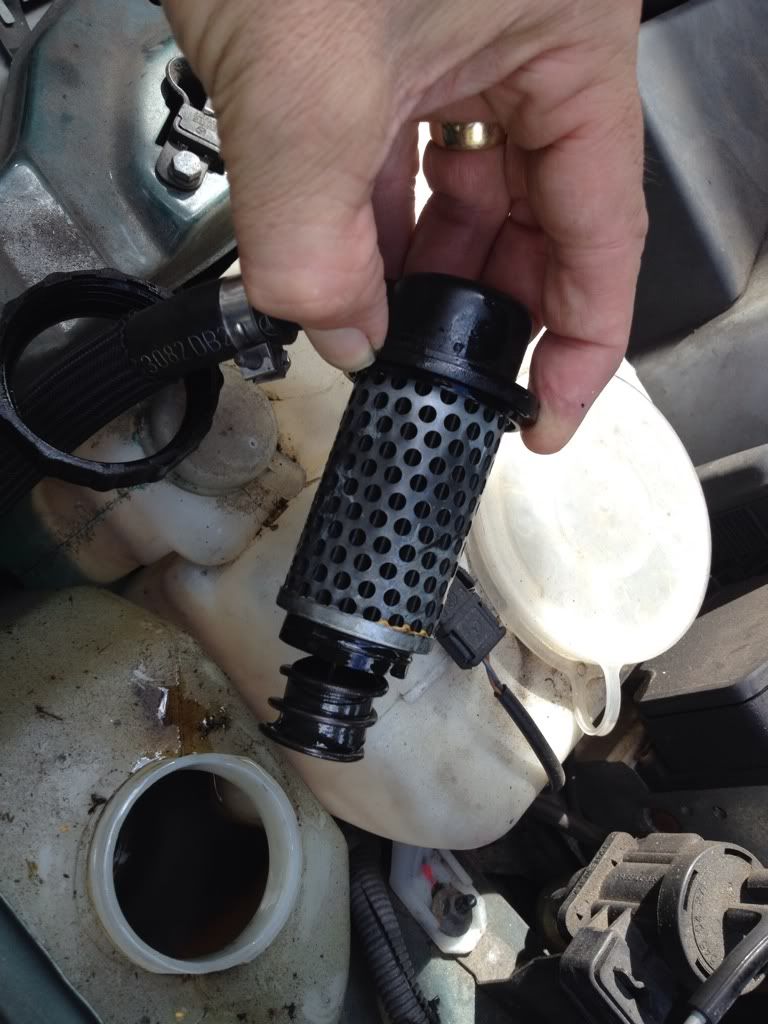
Firstly the Hydraulic Fluid Reservoir & Filter ( Does the Filter just come off )
I have everything now except a new filter .... just weighing up whether to proceed with existing or wait and get replacement before starting .
I took the precaution of obtaining all the correct size flare nut wrenches and cracking all the nuts off last weekend which is when I took the pictures There will be some more as I go anyway here they are so far :
See Next Post !
Good Thread here I have decided to do mine as I appear to have the classic hard ride symptoms an crashing over bumps . Spheres £116 Total for 2 from ECP with the forum discount
Merc Oil 2 litres not cheap at £28.30 Total To assist anyone else here are some pictures of the Setup
Firstly the Hydraulic Fluid Reservoir & Filter ( Does the Filter just come off )
I have everything now except a new filter .... just weighing up whether to proceed with existing or wait and get replacement before starting .
I took the precaution of obtaining all the correct size flare nut wrenches and cracking all the nuts off last weekend which is when I took the pictures There will be some more as I go anyway here they are so far :
See Next Post !
Last edited:
tjamesbo
Senior Member
- Joined
- Dec 26, 2006
- Messages
- 1,464
- Reaction score
- 95
- Location
- Sutton Coldfield, West Midlands
- Your Mercedes
- 1999 CLK430, 2007 VITO 3.0V6 , W124's (1994 320TE , 1993 220TE ) , 07 2.5 X-Type
Speratom
New Registration
- Joined
- Apr 26, 2015
- Messages
- 1
- Reaction score
- 0
- Location
- London - UK
- Your Mercedes
- E430 Estate Avantgarde 2001 4.3
Stiff Suspention in e430 Estate Avantgarde
Hi,
Sorry I am new to this forum, I bought an e430 that has this problem, stiff suspension at the back, bouncing above 70 mph. Way stiffer than the front.
1. Can I assume its the spheres? Would this mean both sphere went both at the same time? It's not really sagging actually I have 4 wheels in the back and its leaning only ever slightly. Actually doing better at load.
2, I heard a bout a lever to test if it goes up and down, with a lever apparently, where can I find this guy? But I am pretty sure the SLS spheres are shot, I have driven Mercedes before, and this one seems to extreme rigidity at the back suspension, so gas is gone.
2. Would anybody have the document/picture for the job?
3. I don;t know if I am up for the job/have the space, alternatively how long would it take to an indy to do that?
Thanks a lot to all for the comments that led to the diagnosis, => Please members feel free to confirm, or infirm. Tomorrow I change wheels I will inspect the system for fluid spillage. but I guess "shocks" are not leaking else the ride would be soft-bouncy and I would probably feel repercussions in the PAS?
tjamesbo
Senior Member
- Joined
- Dec 26, 2006
- Messages
- 1,464
- Reaction score
- 95
- Location
- Sutton Coldfield, West Midlands
- Your Mercedes
- 1999 CLK430, 2007 VITO 3.0V6 , W124's (1994 320TE , 1993 220TE ) , 07 2.5 X-Type
Its a really easy job and doesnt take long you can test the levelling by either putting a load in the back or getting a few friends or family to sit on the edge of the tailgate Then start up an use about 1500RPM and looking carefully in the mirror you should see it rise . Alternatively under the car you can undo the First 10mm bolt from the valve actuator to the axle linkage ( hard if you have big hands ) use a hex spanner or socket not a 12pt one, you do not want to round this baby off , as its difficult to access. With the nut undone pull the linkage assembly out of the hole you can then move the lever up and down independant of the axle and the car will raise and lower with the engine running ,chances are its working and its your spheres, use the proper flared spanners for the two hydraulic unions at the sphere (17mm and 11mm ) there are three 10mm nuts holding the spheres in place do these last as they have a habit of breaking when undoing . You will need about 2L of the MB Hyd Fluid from MB to top the system up Any questions just ask I have just done this for the second time
Boyd
Boyd
Niall O' Sullivan
New Registration
- Joined
- Aug 7, 2015
- Messages
- 1
- Reaction score
- 0
- Location
- Cork, Ireland
- Your Mercedes
- E 200 T Kompressor s210 estate (210.248)
RANA 1
As an amateur, my approach may be a bit un-orthodox, but I think it works. Please point me out if I did something incorrect.
In general, removing and installing self-levelling shock absorbers are not difficult.
The main features of self-levelling shock absorbers are that they are part of the hydraulic system, and they have a line connecting to hydraulic suspension spheres. The tricky bit of removing them, I would say, is to remove the nuts on the lines. Mine were seized. Use flare nut wrenches with penetrating oil to do the job. In that way, the risk of rounding the nuts is minimised. In addition, prepare for oil spillage (400ml hydraulic fluid was lost when I did mine; total required for the system is about 2L. I did not drain hydraulic system for changing shock absorbers (I did when I changed hydraulic spheres), but do wear protective clothes and have eye protection on.
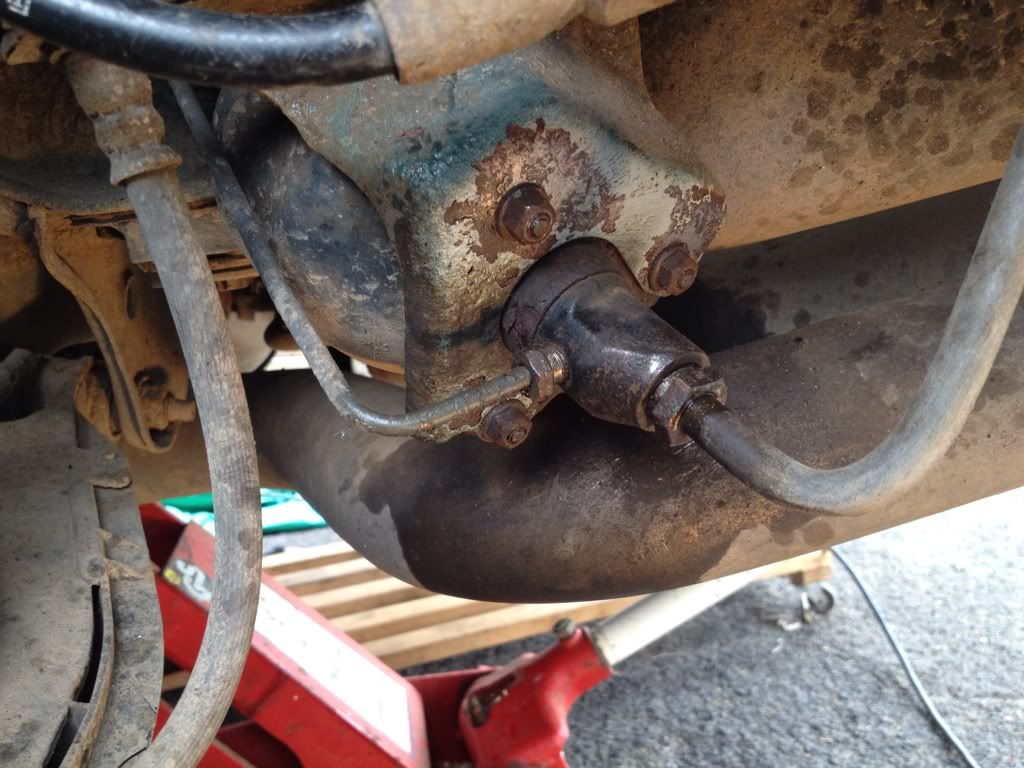
The 1st photo shows the new and the old absorbers, and the connection points highlighted in red circles. The 2nd photo shows the tricky connection point on the hydraulic lines.
My absorbers were bought from GSF costing about £350. MB dealer would charge a lot more. My car, which is a 1996 W210 E230 estate, was bought 5 years ago with a mileage of 137,000. I did not know when it was last time the previous owners changed them. But I changed mine 2.5 years later at 160,000 miles in April 2007 when they collapsed. Now my car's mileage is 192,000 and they are still in good working order.
The 3rd photo shows clearly about the product code. Hope this will give you a reference when you buy the parts.
In general, the steps are:
(1) Choke front wheels, begin from either rear side, lose rear wheel nuts.
(2) Jack your car up and place it securely on axle stand.
(3) Take the wheel nuts out and remove wheel.
(4) The first thing to remove old absorber is to slacken the nuts on the hydraulic lines. Again, use flare nut wrenches with lots of penetrating oil to do the job. Prepare for oil spillage.
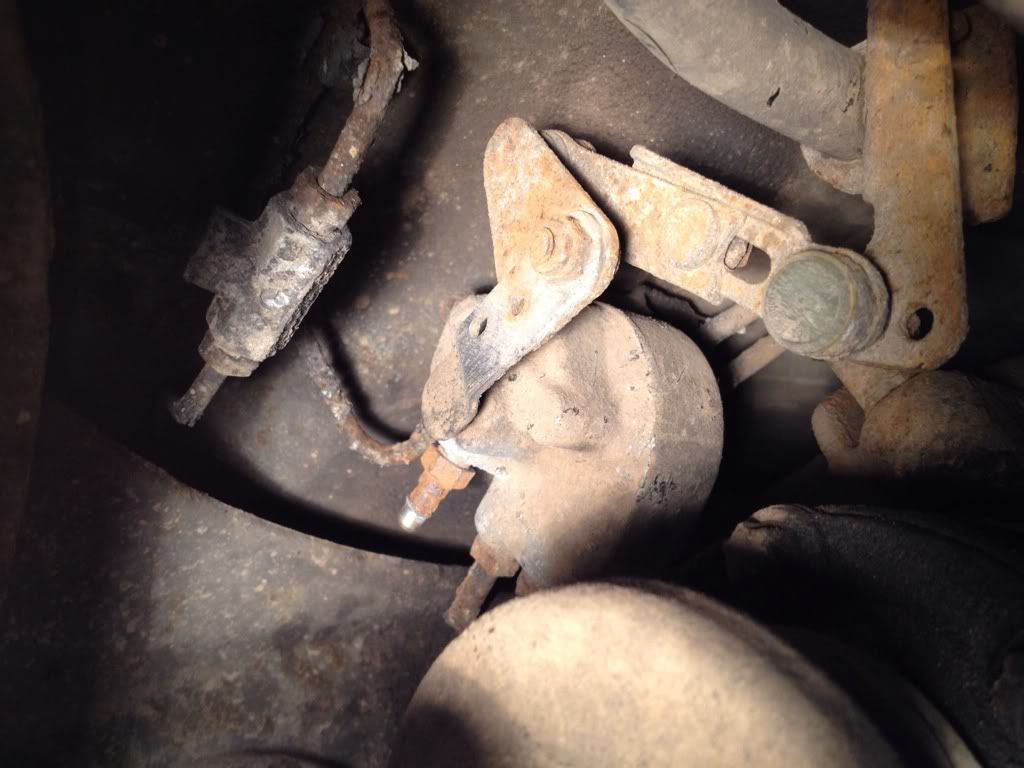
(5) Remove the rest of nuts and bolts of the shock absorbers. For the top nut, the 4th photo indicates where about it is hiding in my estate. I am not sure where about for a saloon. I think boot is a good starting point to check.
(6) If you manage to remove the old absorber, installing new absorber is the reversing order. The 5th photo shows the new absorber installed.
(7) Remove and install shock absorber of the other side.
(8) Once new shock absorbers are installed, refill any hydraulic fluid lost. If you lose 400ml, for example, refill 400ml.
(9) Presuming your car is a saloon, make sure your boot is unloaded (keep spare wheel and basic Mercedes tools in), switch engine on and let the hydraulic system work for a while and stop the engine. Check for any fluid leakage from the absorbers. Not only the rear wheel arches of both side should have an equal clearance (not collapsed), the hydraulic fluid in the reservoir (in engine bay) should then be on the normal unloading level. Measure the rear wheel arch clearance (mine is about 3 inches clear). Check any shortfall of fluid from the maximum level mark of hydraulic fluid reservoir. I would suggest you fill hydraulic fluid in to the maximum level mark. If in case the fluid level is over the maximum level mark, I would suggest you use a straw and remove any excessive fluid. What you do with a straw is: put the straw in, cover and seal the top end with your finger, take the captured fluid out, release your finger and drain the fluid into a container.
(10) Now, load something heavy in your boot and perhaps let somebody sit in rear (when I did mine, I put my 2nd set of 4 wheels in). Turn the engine on and let the hydraulic system work under a loading situation. The hydraulic fluid in the reservoir should then be on a loading level – lower than the maximum level - but the wheel arch clearance should be the same (as measured under procedure (9)). If it is, then the job is done.
Hope the above and the photoo will help. Any question, please ask.
Sean
Thank you for this, you may well have saved me a lot of money, time, hassle. I've had the bouncing suspension problem for about a year or so and I couldn't figure out what was wrong. More to the point, neither could 3 independent local mechanics I took it to, to check and investigate. All of them has said it was probably the shocks, and all of them tried to get me to switch to a conversion kit. Fortunately I came across this site when I did. I was able to print off your instructions and take the car to a 4th mechanic who immediately recognised the issues and procedures you outlined and is going to change out the spheres for me as soon as they arrive. I've ordered them myself online at a good price (e150 for both including delivery and VAT).
However, a week or two back, having been told repeatedly it was the shocks, I went ahead and bought those online at a cost of e518 for both hydraulic shocks too. Fortunately, after reading your post, I didn't open the shocks packaging. I bought them from German company on ebay.ie called atp spareparts. They have a returns policy of 90 days if goods are unopened. I looked at the currently fitted oem shocks themselves and there is no sign of leakage. I'm wholly inexperienced when it comes to cars btw.
If it turns out to be the spheres only, and not the shocks too, I can get my e518 back thanks to you.
What struck me was the fact 3 mechanics didn't know what the problem was. Nor did they seem enthusiastic about finding out what the problem was. Independent mechanics in Ireland seemingly have very little experience with SLS. Ireland, during the boom, had the highest rate of MB ownership per capita in the world. I would have thought this issue would have been known to one and all mechanics.
Oh, and before I forget, the back of the car is bouncing incredibly hard. Feels as if the car is only being sustained by the springs. If I do a shock test by pushing down on the back of the car and releasing, it will go up and down 4 or 5 times at least. Highly dangerous as the car could easily bounce off the road, especially Irish roads. And trying to brake when bouncing is also highly dangerous as it just won't stop. Resultantly, I've been sticking to roads I know like the back of my hand. The bouncing is so bad, I know every indent and ripple on the roads nearby.
Last edited:
R11PAK
Member
- Joined
- Jun 9, 2009
- Messages
- 11
- Reaction score
- 0
- Location
- colchester / london
- Your Mercedes
- E320 CDi Avantgarde Estate 2001
Hi guys,
It's that time again the spheres are gone and the rear is bumping. So I started to google the procedure as I had forgotten exactly how to do it, only to stumble upon this old gem. Got to love these forums. Thanks again Sean!
It's that time again the spheres are gone and the rear is bumping. So I started to google the procedure as I had forgotten exactly how to do it, only to stumble upon this old gem. Got to love these forums. Thanks again Sean!
Hi Rupak
In general, the job is not difficult. When you look at your newly bought spheres, you should be able to figure out what is necessary to remove for replacement.
I have a Mercedes technical note for hydraulic sphere removal and installation in hand. Please let me know your email address so that I can send it (together with some photos) over to you for your reading.
The followings are my approach:
(a) Loose wheel nuts, jack your car up and support it with stands, rather than on ramp. Remove wheels. Wear protective goggles and protective clothes.
NB: Some information suggests to put car on ramp, go under it and release the hydraulic suspension height control lever with engine running. But this will cause the rear to be lower. I skipped this step for not only to avoid the risk of injury, but also to prevent me from breaking the lever and connected pipes as they were so rusty and looked fragile.
(b) Drain hydraulic fluid.
Clip and connect a clear plastic tube securely to the drain plug (similar to brake drain plug) located near the height control lever. Prepare for spillage by placing loads of cardboard paper on the driveway/garage floor. Lead the tube into a container for catching drained fluid. Loose the plug and drain old fluid out with engine running (better to have an assistance to start and stop engine whilst you are monitoring the flow). Once you see some foam coming out, stop the engine and let it drip. Close the drain plug when you see there is no more dripping and the reservoir should then be empty.
(c) Start with one side, slack the nuts connected to old sphere.
Use penetration oil and flare-nut wrench (11mm and 17mm), rather than line wrench that could round off the nuts at the hydraulic pipes. I rounded mine off ending up purchase of new mountings from a dealer. I am sure you do not want to repeat my mistake. Prepare for spillage in this step.
(d) Connect new sphere in.
This sounds easy but care must be exercised to ensure the pipes and the sphere are well connected. The angle of connecting the sphere and pipes, as well as the application of right torque, become crucial. Unfortunately I could not remember the correct torque. Perhaps somebody in this forum can point that out.
(e) Once done, repeat the same process for the other side.
(f) Measure the capacity of the drained fluid which should be about 1.5L to 1.8L.
(g) Replace the hydraulic fluid filter (under the cap of the reservoir) and start pouring new fluid into the reservoir. Pour 1L in first, and tighten the cap up.
(h) With an assistant turning on the engine, monitor the fluid flowing process again by loosening the drain plug until you see new fluid begin coming out (watch the fluid colour). Tighten the drain plug and stop the engine.
(i) Put wheels back on, lower car to floor and tighten wheel nuts.
(j) Top the reservoir with new fluid up to the maximum level. Turn engine on and let the hydraulic system run for a few minutes. Stop engine and top the reservoir up to the maximum level again if you see the fluid level drop. In total, I poured in 1.5L at this stage - at normal loading condition. Check for any spillage. Check and measure the height of the rear suspension (from wheel arch to ground) which should be the same.
(k) Load your car with heavy objects (I used a set of spare wheels plus). Start the engine for a few more minutes. Under this loading condition, with self-levelling suspension running properly, the height of the rear suspension should be as same as that under the normal loading condition. If it is, the job is basically done.
(l) Do a test drive under normal loading condition and check the level of hydraulic fluid level again.
(m) Check for any leakage and the level of hydraulic fluid frequently. Eventually I filled it up a couple of times. Totally I used about 1.8L.
Hope you find the above useful. Any question please ask.
Hope also any expert points out any mistakes I have made or advise for any room of improvement.
Regards
Sean Ng
NigelSpicer
Member
- Joined
- Sep 26, 2021
- Messages
- 23
- Reaction score
- 6
- Your Mercedes
- e300TD/1999/3L
I have a 1999 e300td estate W210.225 and am about to attempt (bit scared in truth) to replace the rear lower control arms which I think may lead to having to replace the SLS hydraulic rams. The reason I say this is because the lower two bolt fitting of the ram to the control arm is heavily corroded on both sides and the clip around the boot has gone- they work fine and no leaks. I've talked to Sachs and rather bizarrely they didn't want to discuss any technical detail of these parts because Mercedes own the design. After some pushing they say there is no replacement part for this lower corroded section- so if I have to replace them then it looks like new ones. Mercedes have quoted £420 +vat/unit so that is out. I could get a Sachs unit (102420) online for about £250/unit which is still pretty horrendous but better- wish they were normal struts!
My question to the forum is even though this thread has been very helpful to me in understanding the task ahead I'm still a bit worried about if I do disconnect the ram's hydraulic line will I end up with a problem of getting air out the system once a new one is fitted? ie is there a procedure for refitting the line and making sure it is bled right through or will it somehow self bleed itself and the SLS will sort itself out. I fear doing something silly like wrecking the PAS pump because of air in the system or the SLS leaves the car at different levels on each side. Could anyone offer me some advice. (Also if anyone wants to throw in any do's and dont's regarding the whole process of replacing the control arm- I intend to replace the sway bar link and the axle bush- then that would be most welcome.
Thank you
